Featured

Havasu Falls: Land of the Teal Blue Water

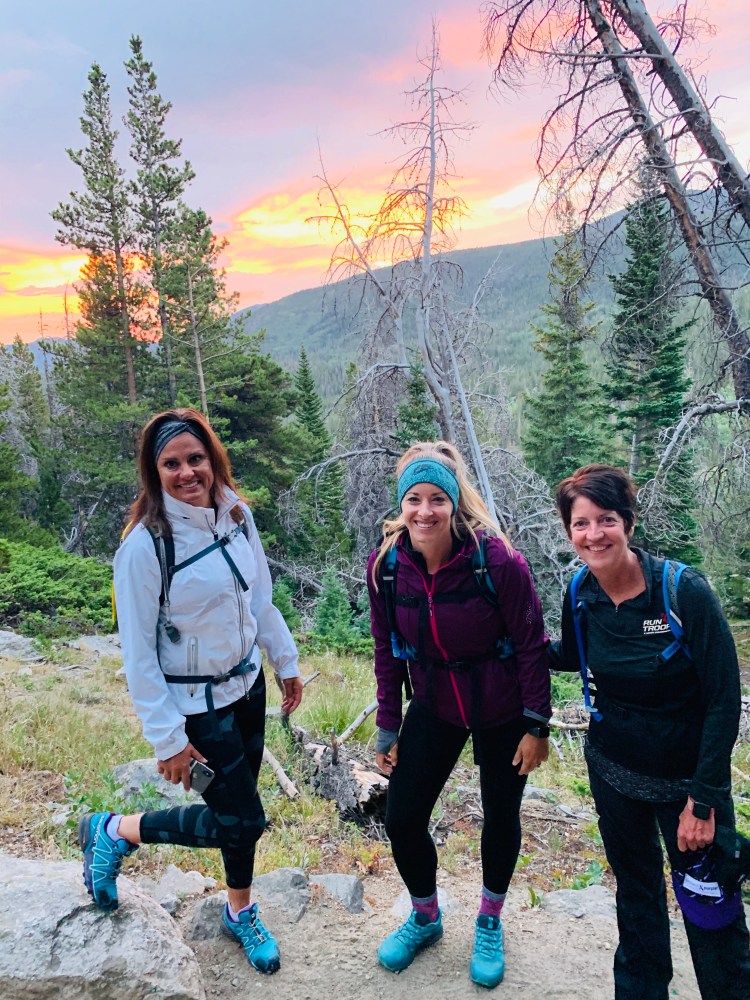
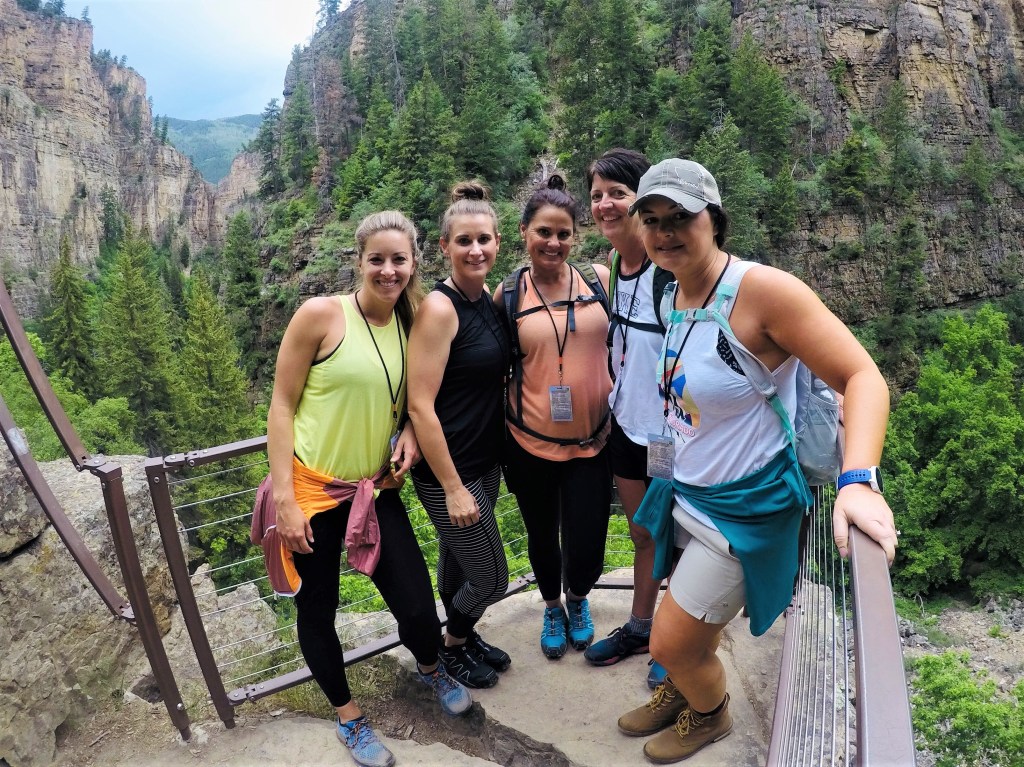
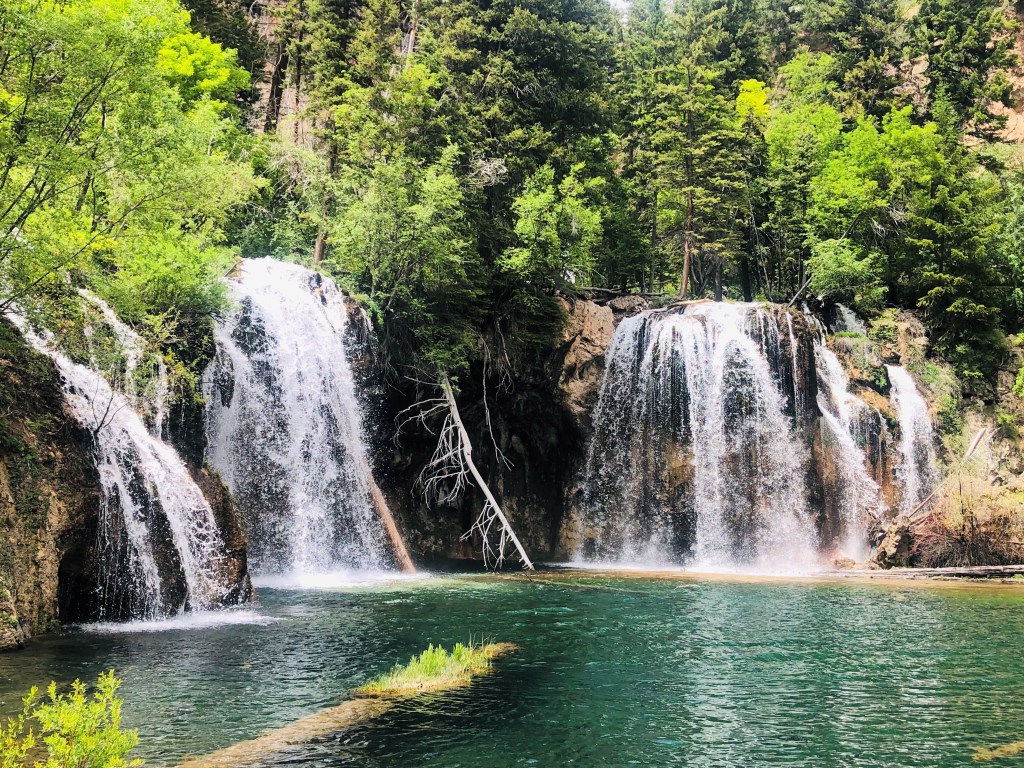
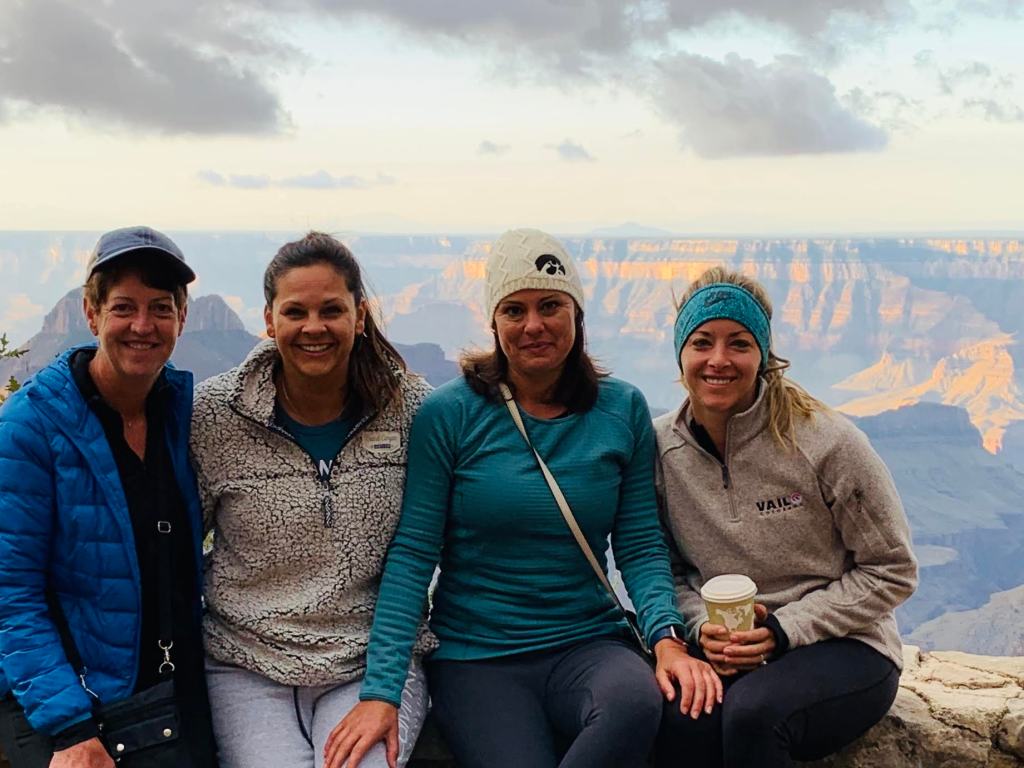
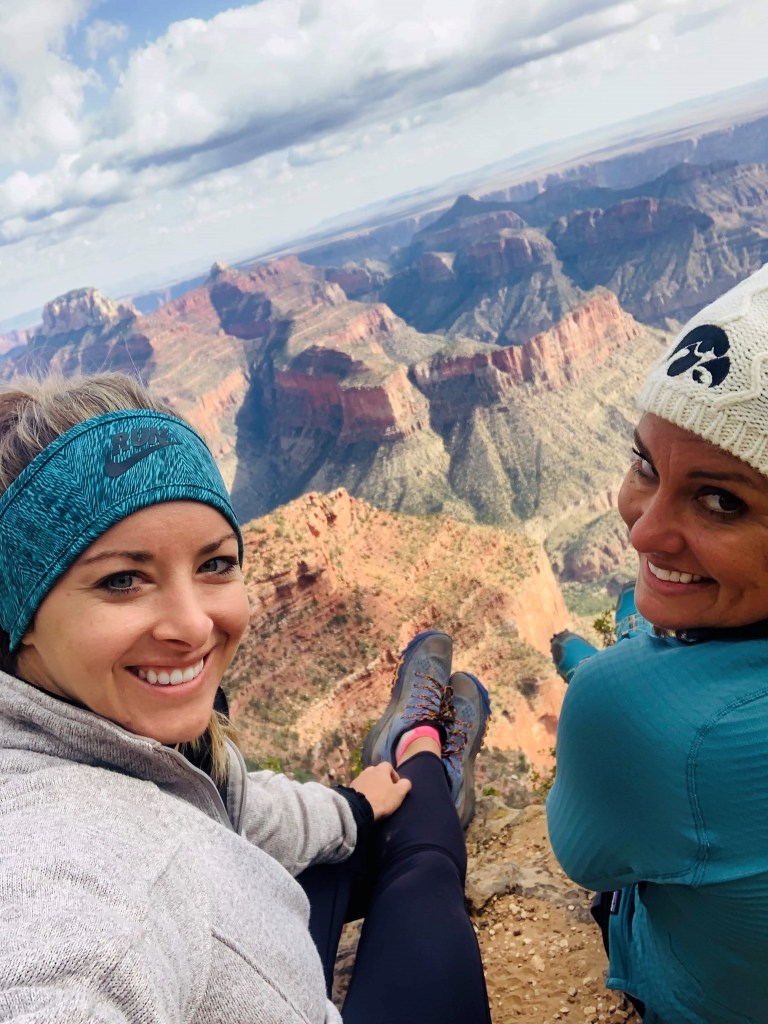
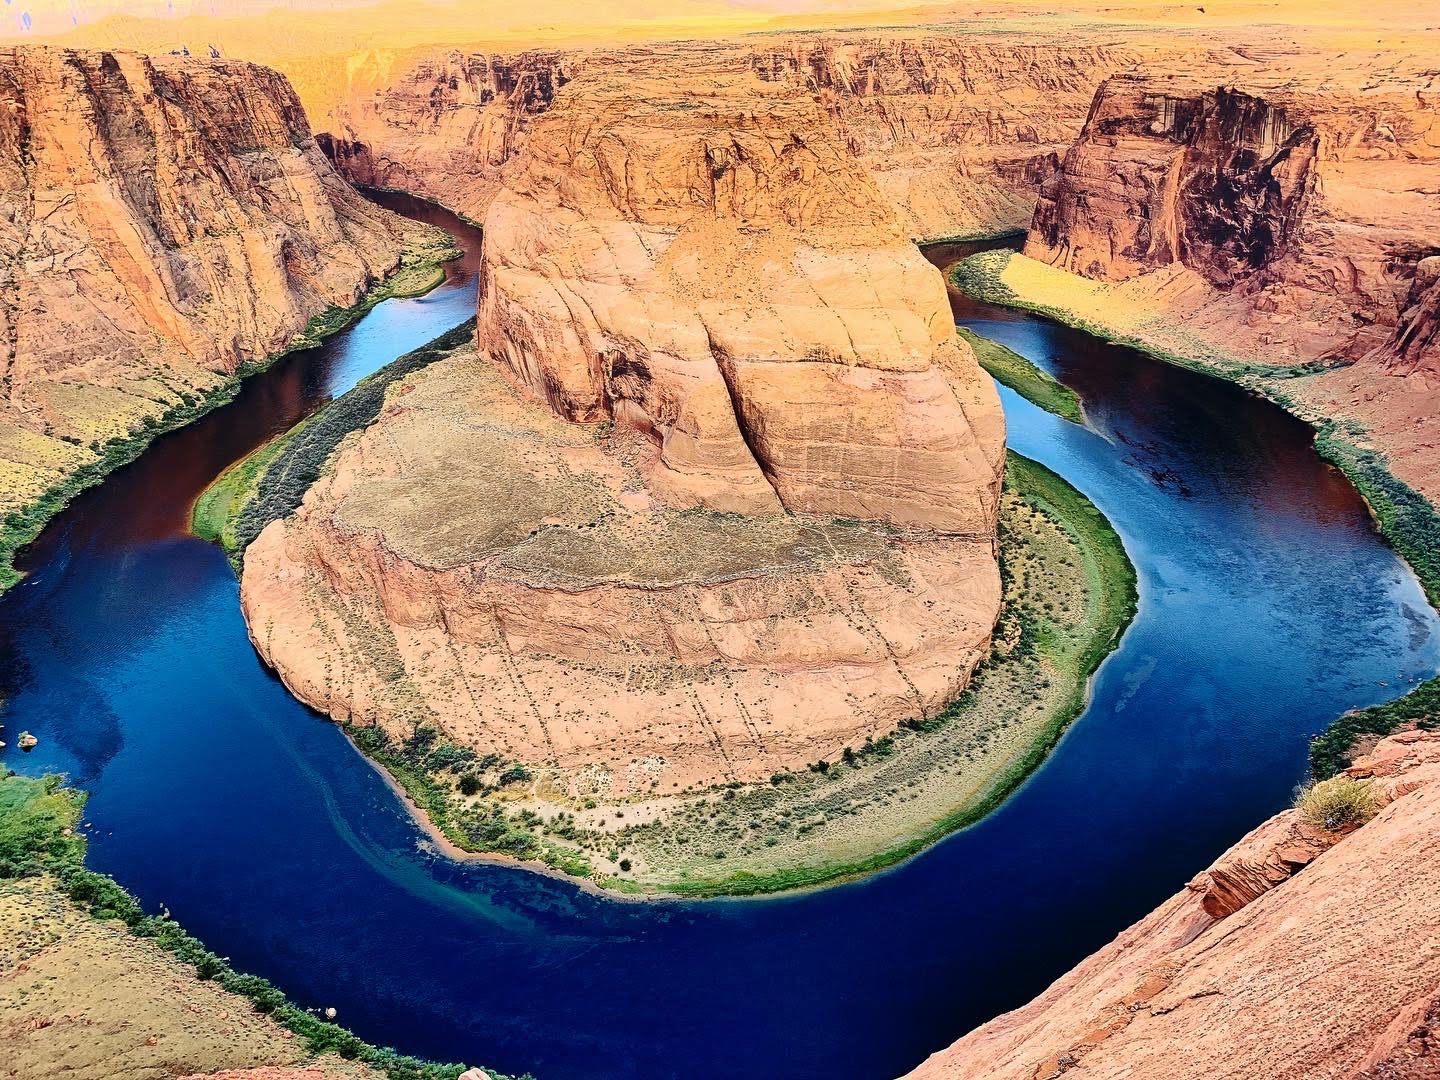
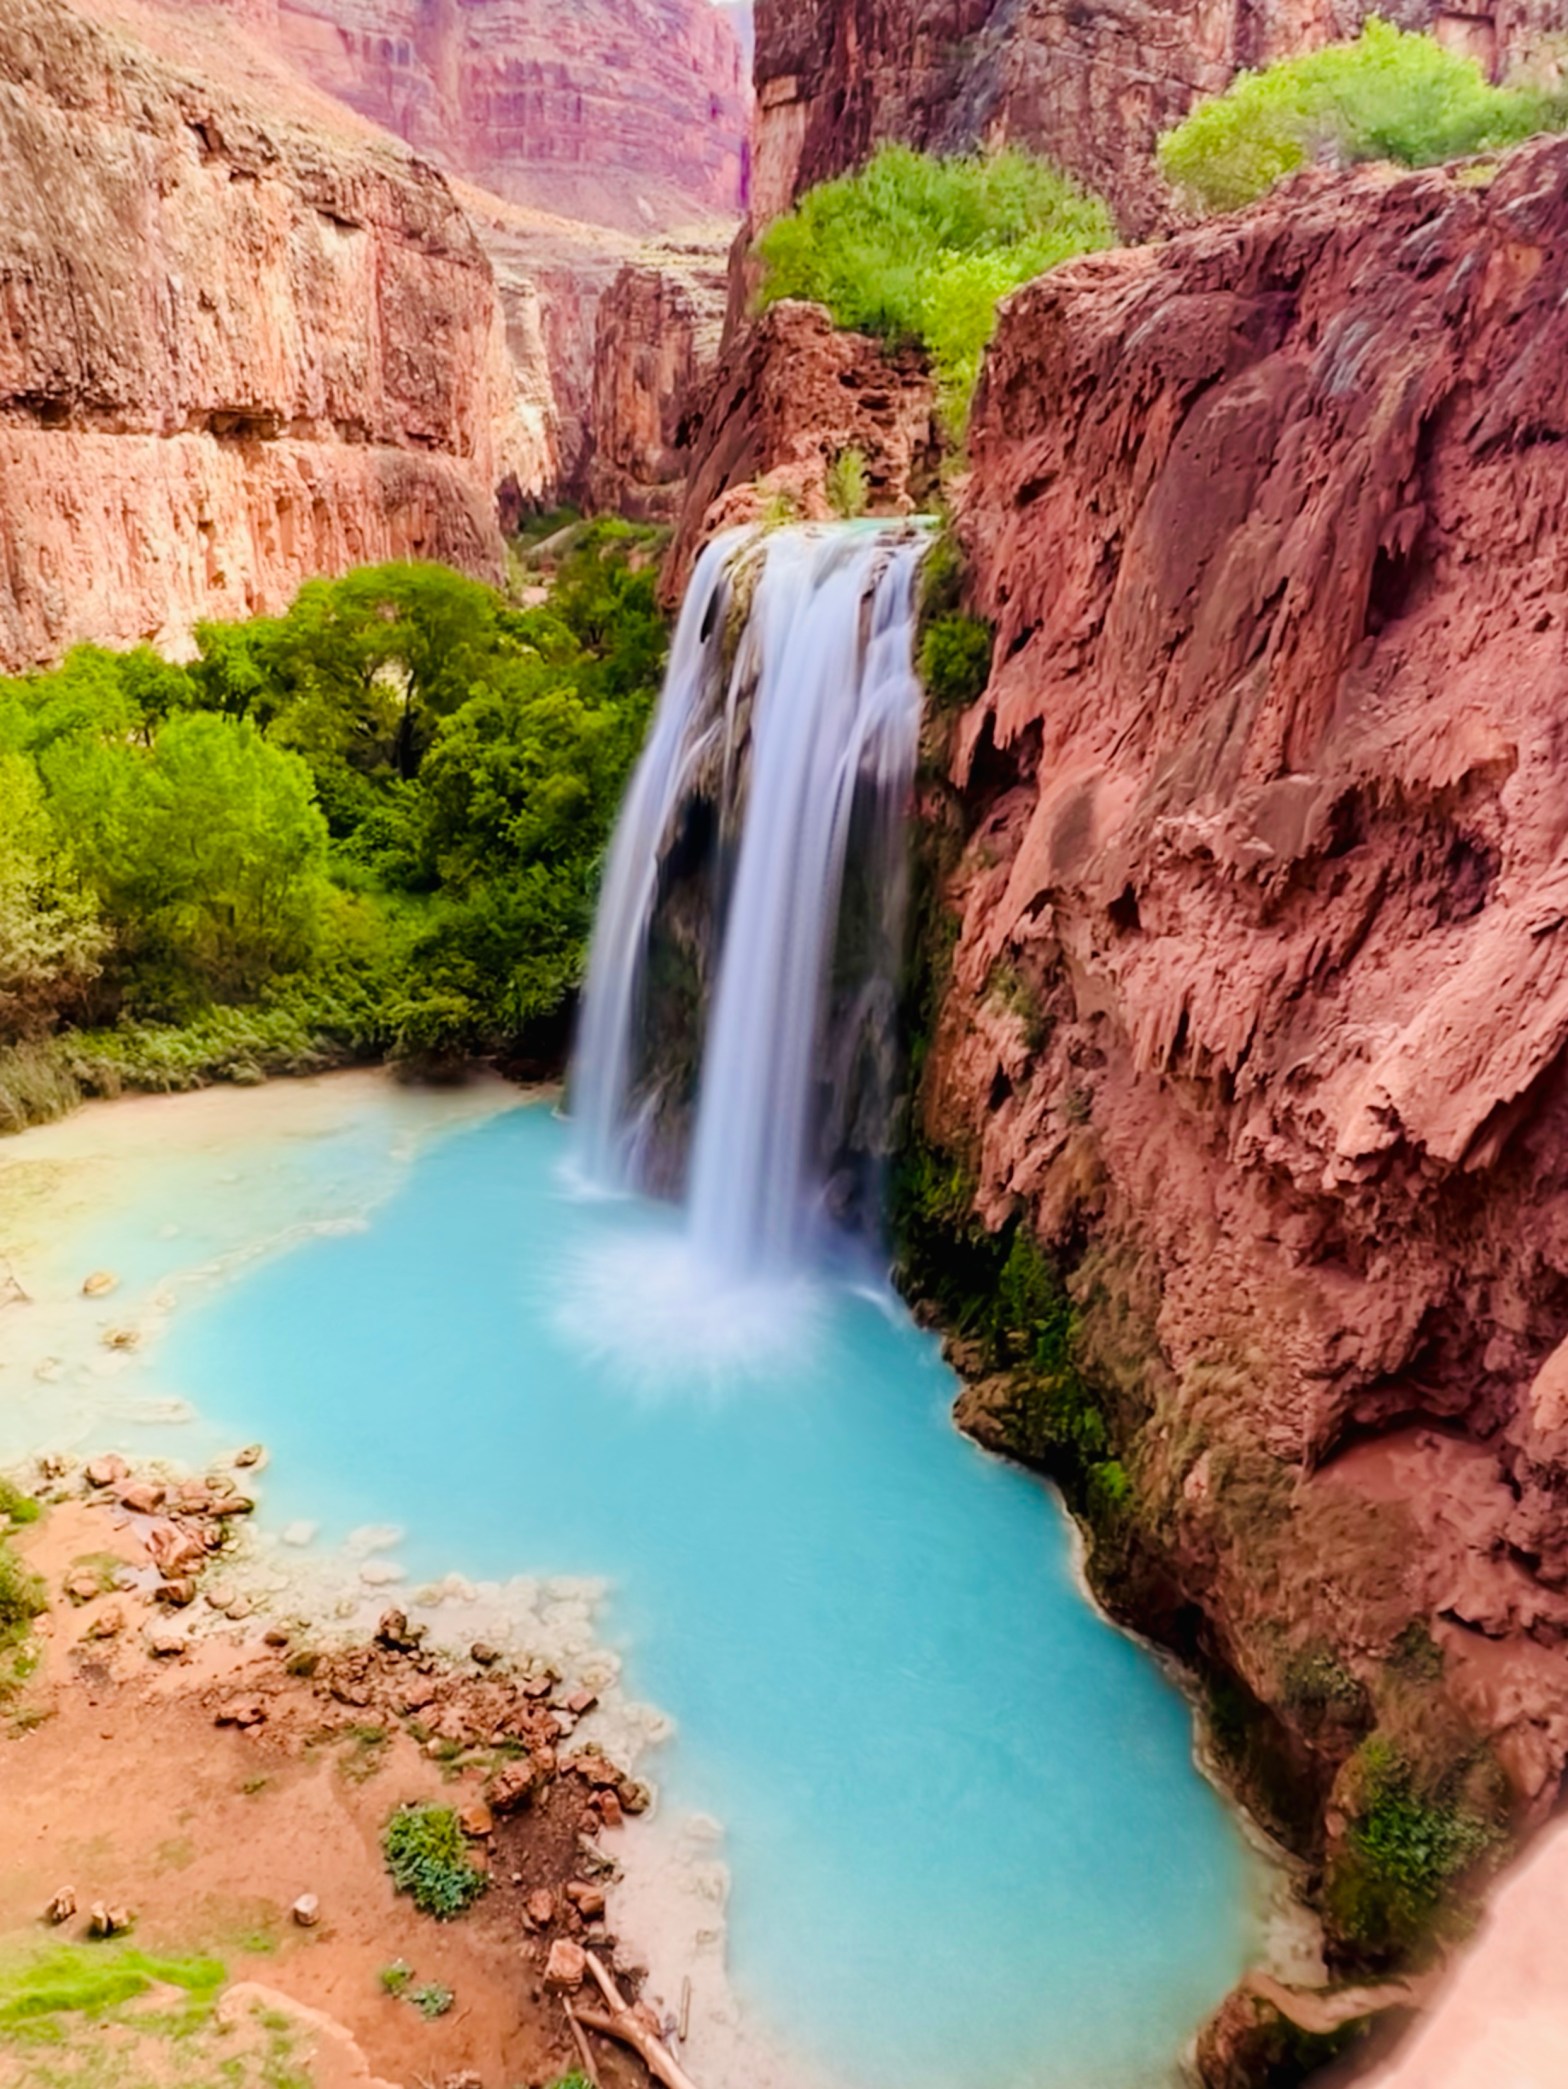
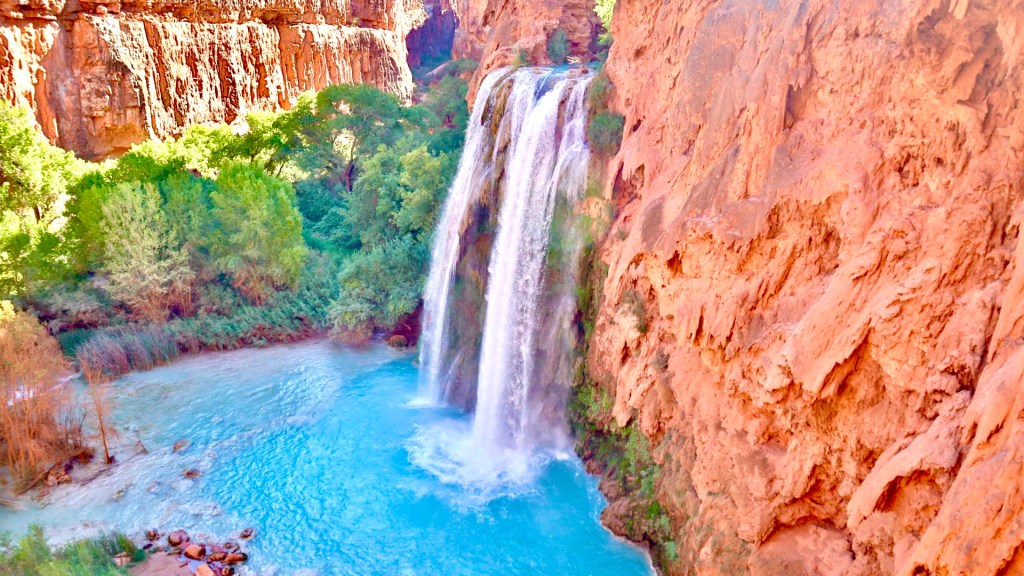
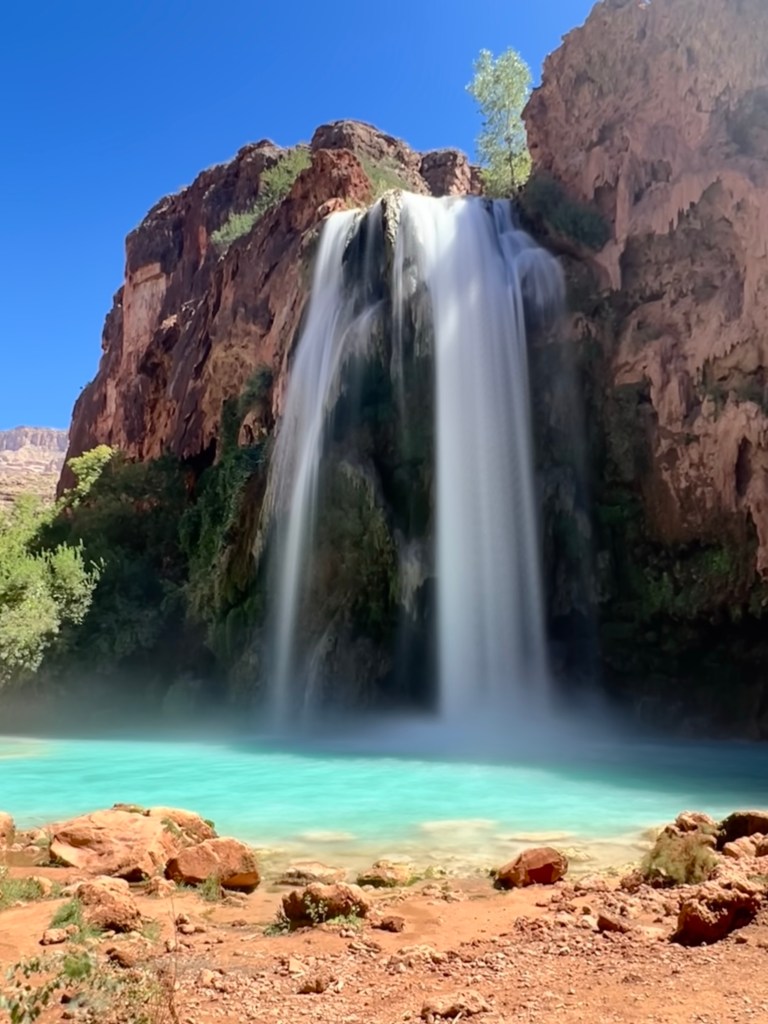
Deep within the heart of the Grand Canyon, Havasu Falls is a true natural wonder. With its crystal-clear blue waters, lush green surroundings, and awe-inspiring waterfalls, it’s no wonder that this oasis is a bucket-list destination for nature lovers and adventure seekers. Recently, I had the incredible opportunity to visit Havasu Falls in early September 2023, with two friends and the experience left an imprint on my soul.

In this post, I’ll take you through our journey, sharing tips and insights for planning your own adventure to this mesmerizing paradise. While this post shares the high level picture, other posts will break down packing lists, training tips, and other important tips if you want to experience Havasu some day!

Before we delve into the canyon experience, let me set the stage of what this experience meant to me! Nearly 8 years prior to visiting Havasu, I first saw a photo of the blue green waters and sent a text to my friend group with the photo and said “some day I will see this in person”. It was then that I started the process of trying to obtain permits! On February 1 every year, permit bookings open for the entire year. You used to have to call ALL day and succumb to never ending busy signals unless you were one of the lucky few to get through.

In recent years they moved to an online booking where on February 1, at 9 AM Arizona time they opened for permits and sold out for the year within an hour. In 2020, I logged into the reservation site minutes before it opened and had to refresh my page over and over and over again for almost 40 minutes, getting denied repeatedly for permits, with diminishing hope every time I refreshed, until FINALLY, the page loaded with November permits! I quickly added three to my cart and checked out, only to realize a month later this trip wouldn’t be happening November 2020. Havasupai is on reservation land and the tribe/land was closed to visitors until 2023 which is when we finally got to enjoy this masterpiece and it was worth the wait! Since 2020, we luckily were able to move our dates via buying canceled ones and selling our originals to get September dates. Now, let’s dig into the day-to-day play-by-play!

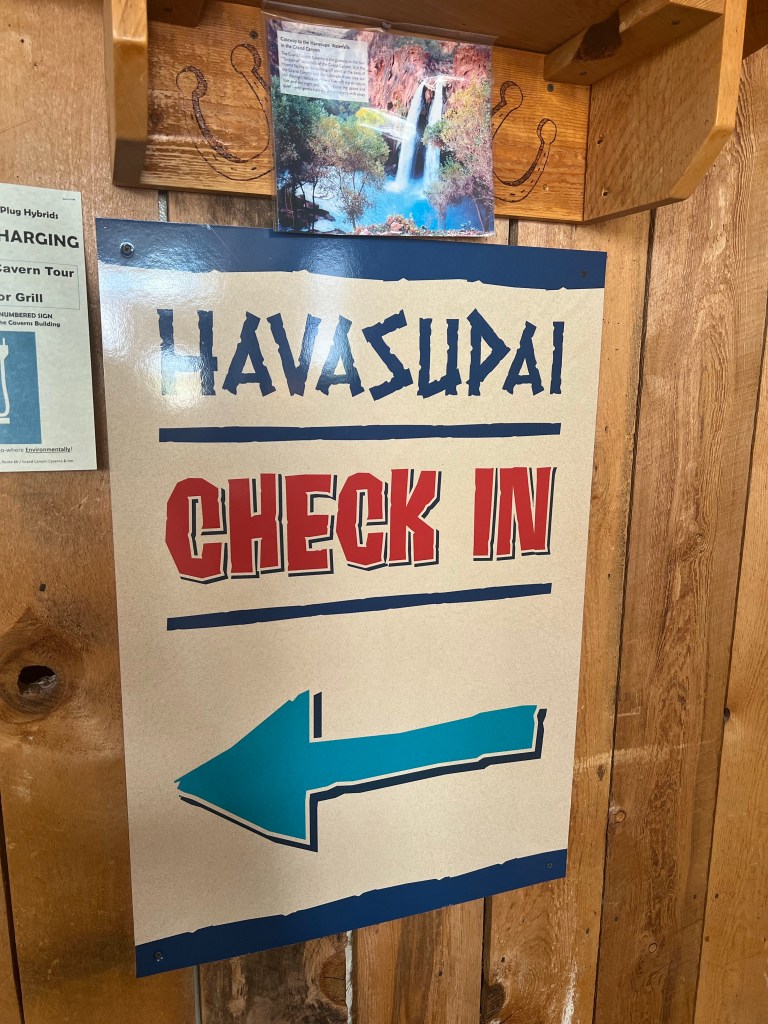
Day 0: Checking in for the permits to hike

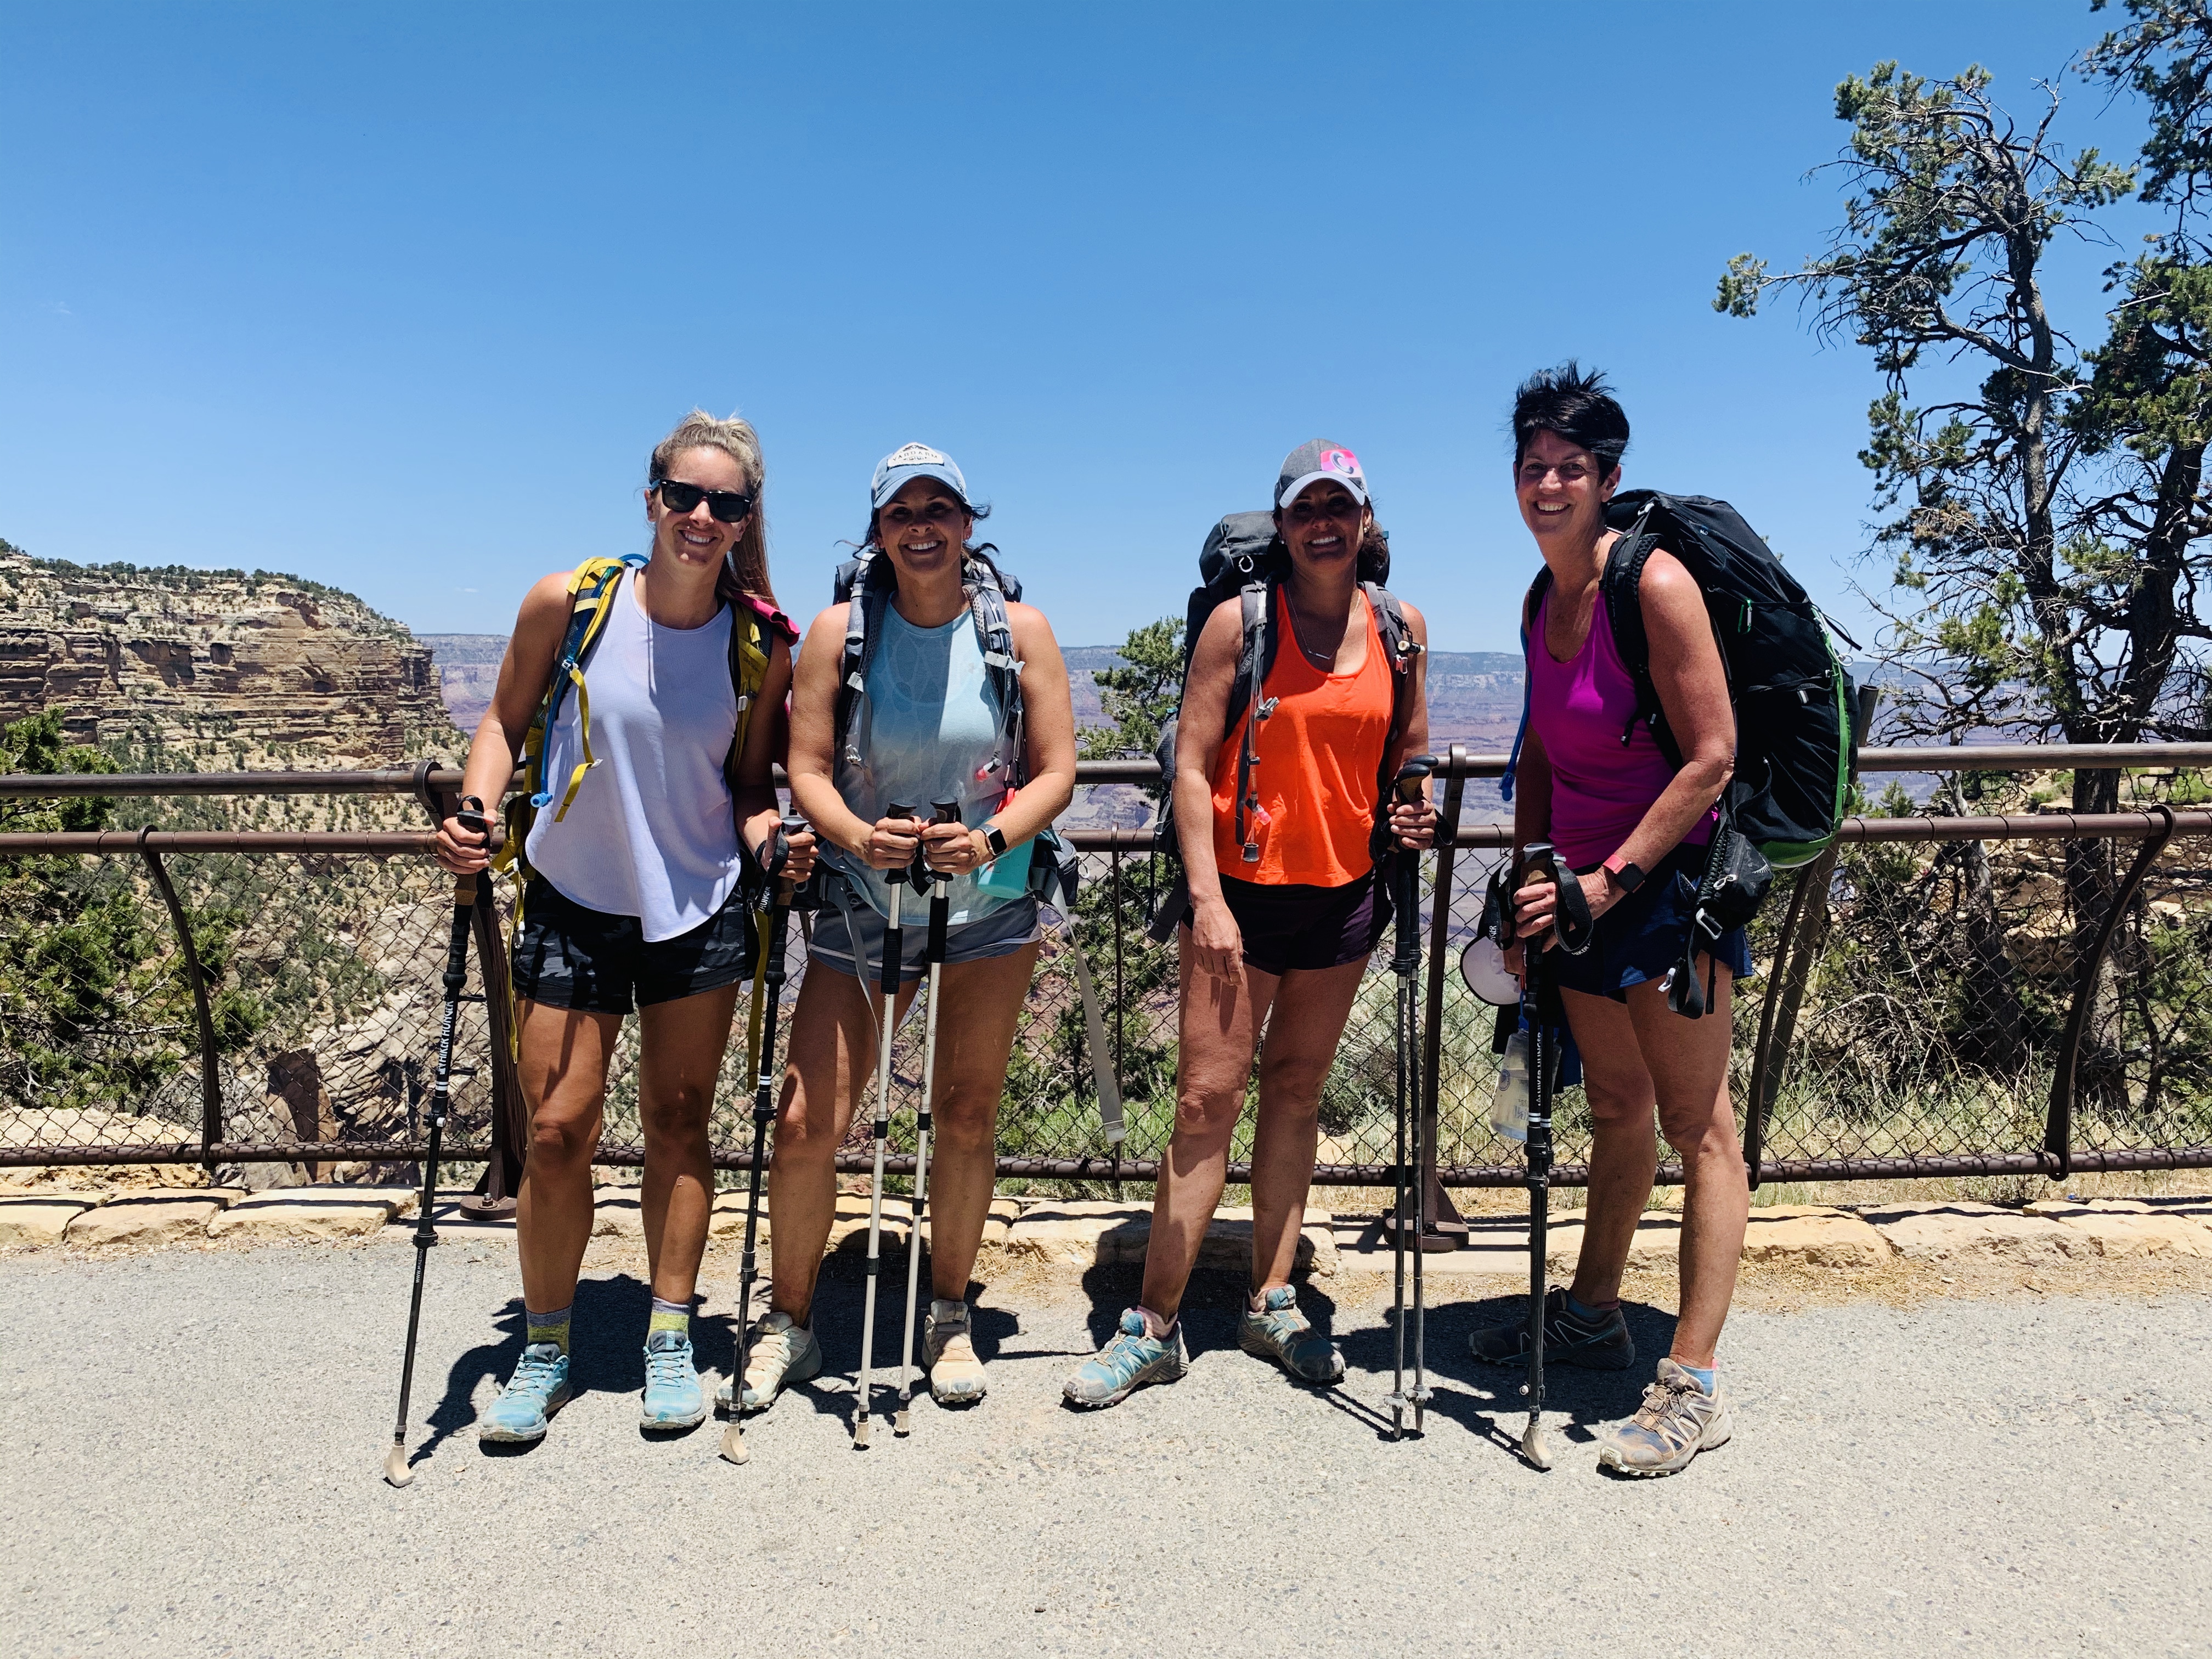
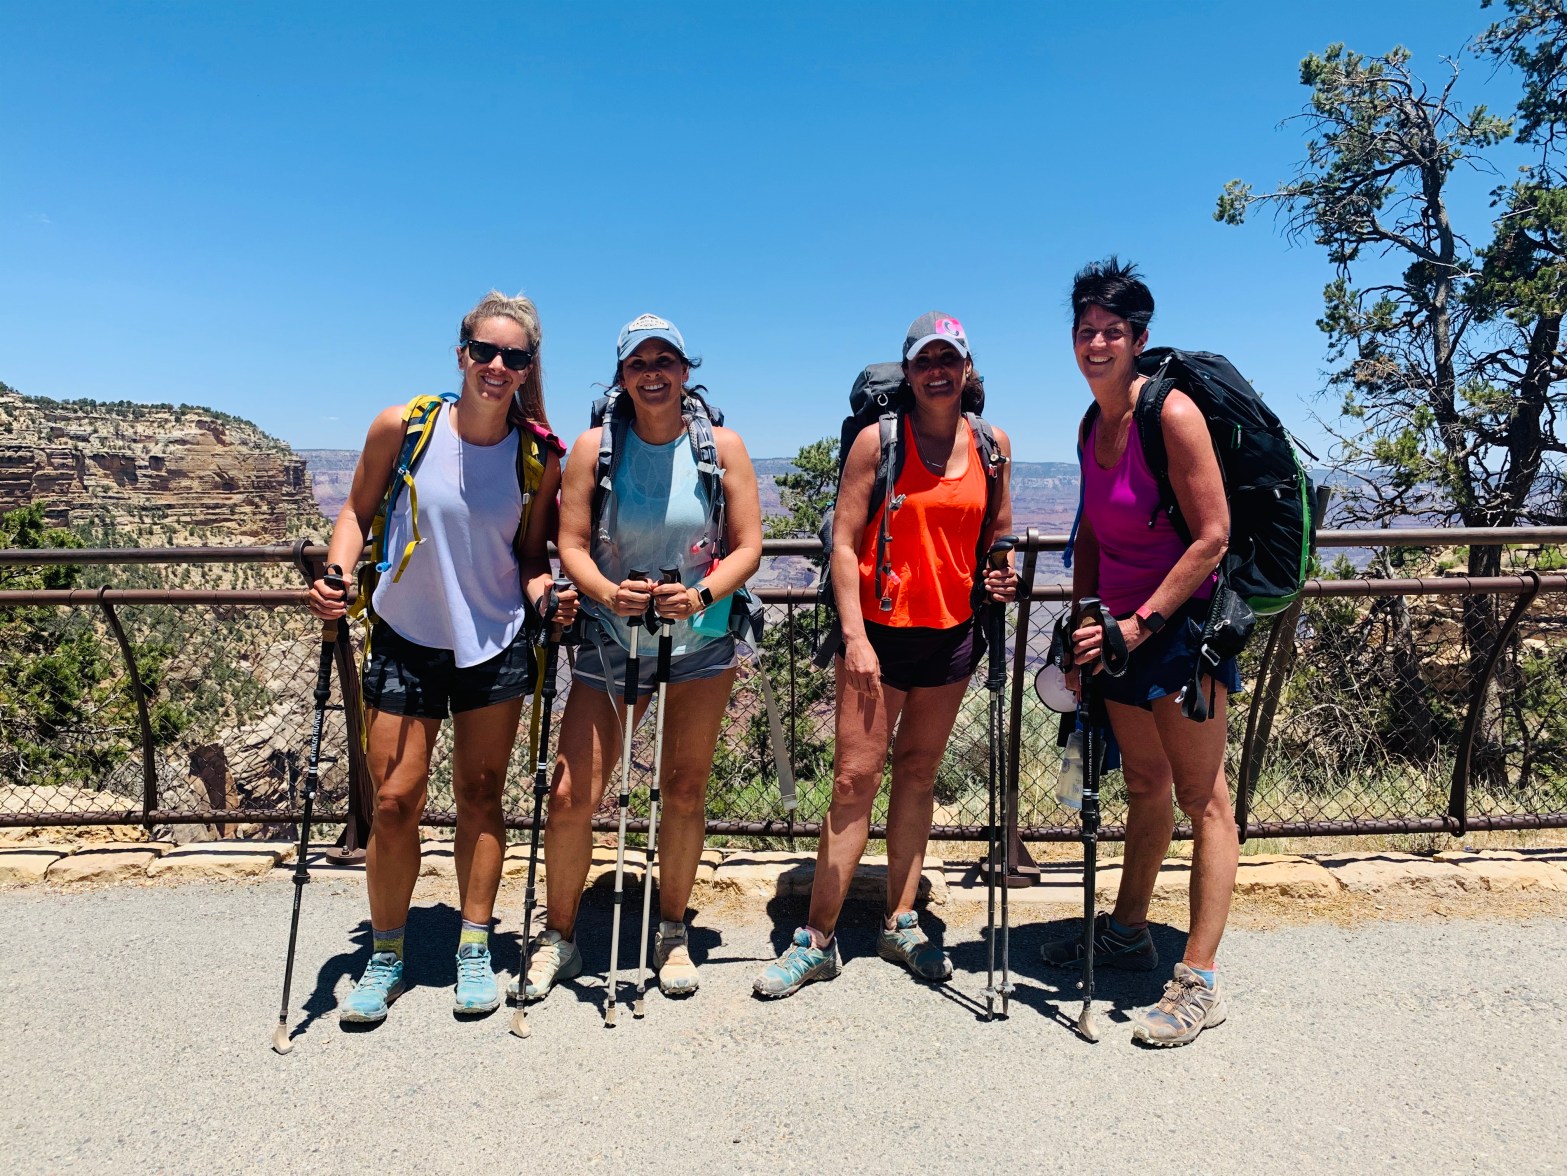
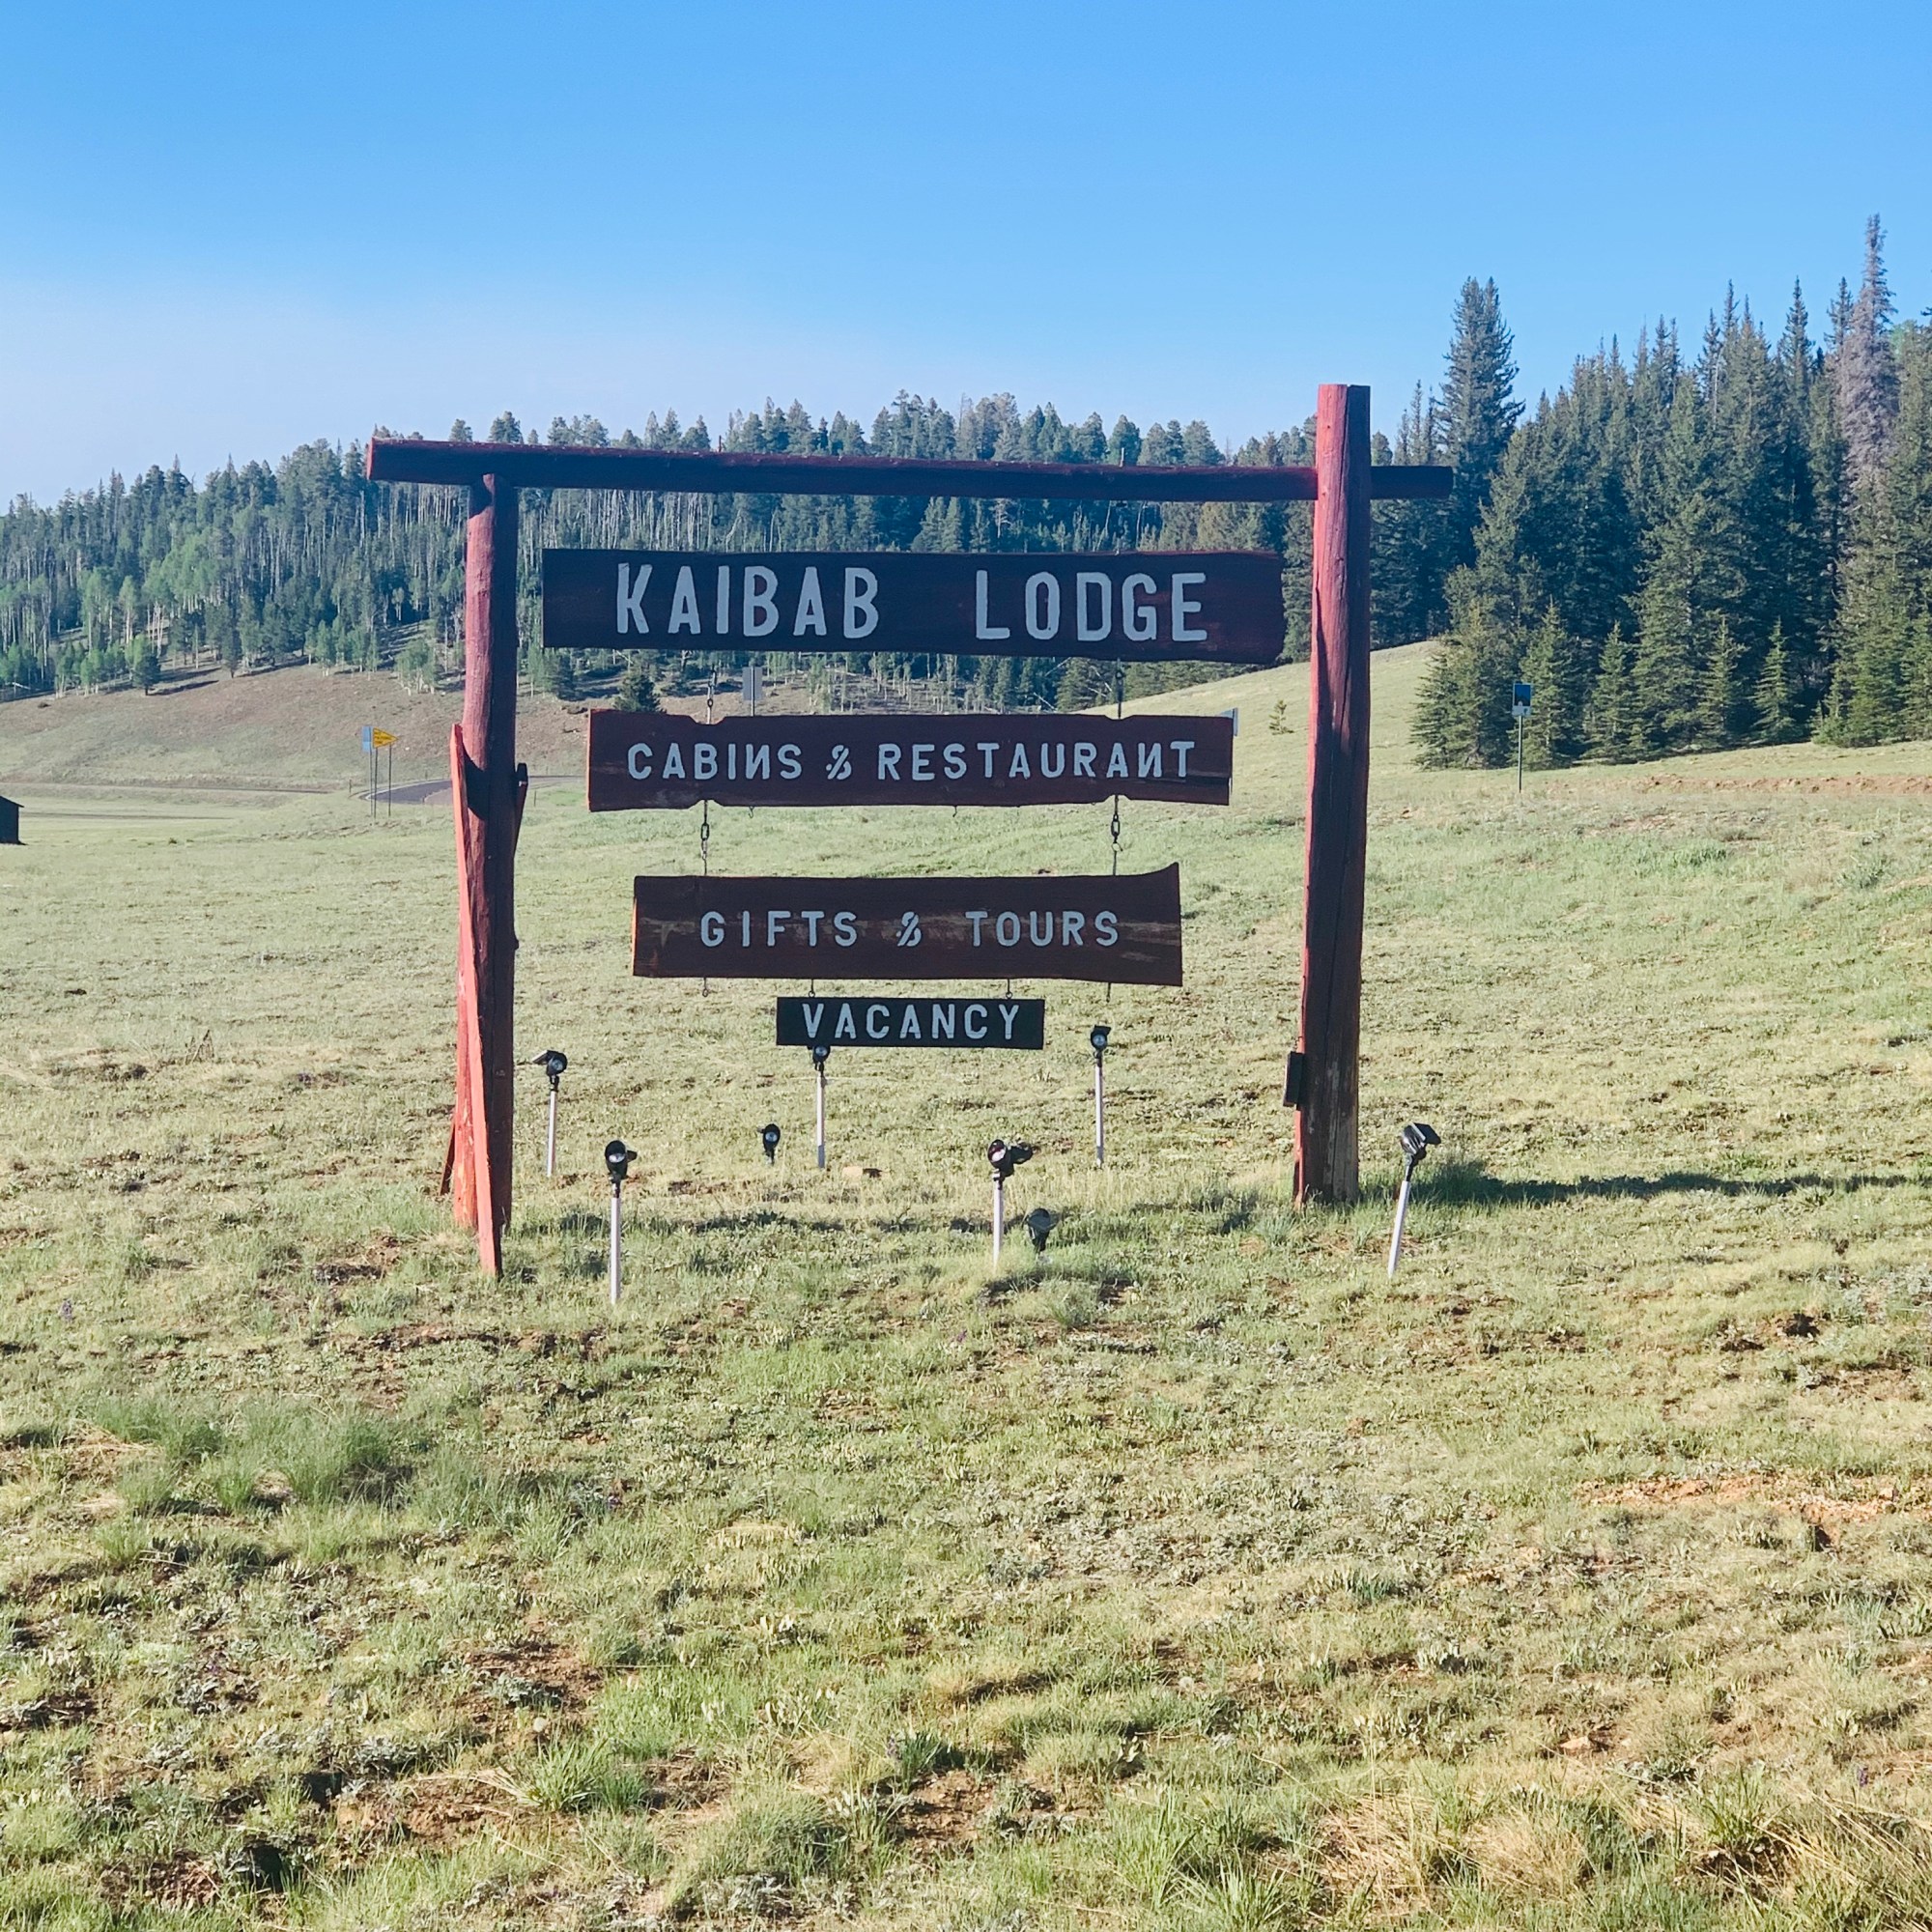
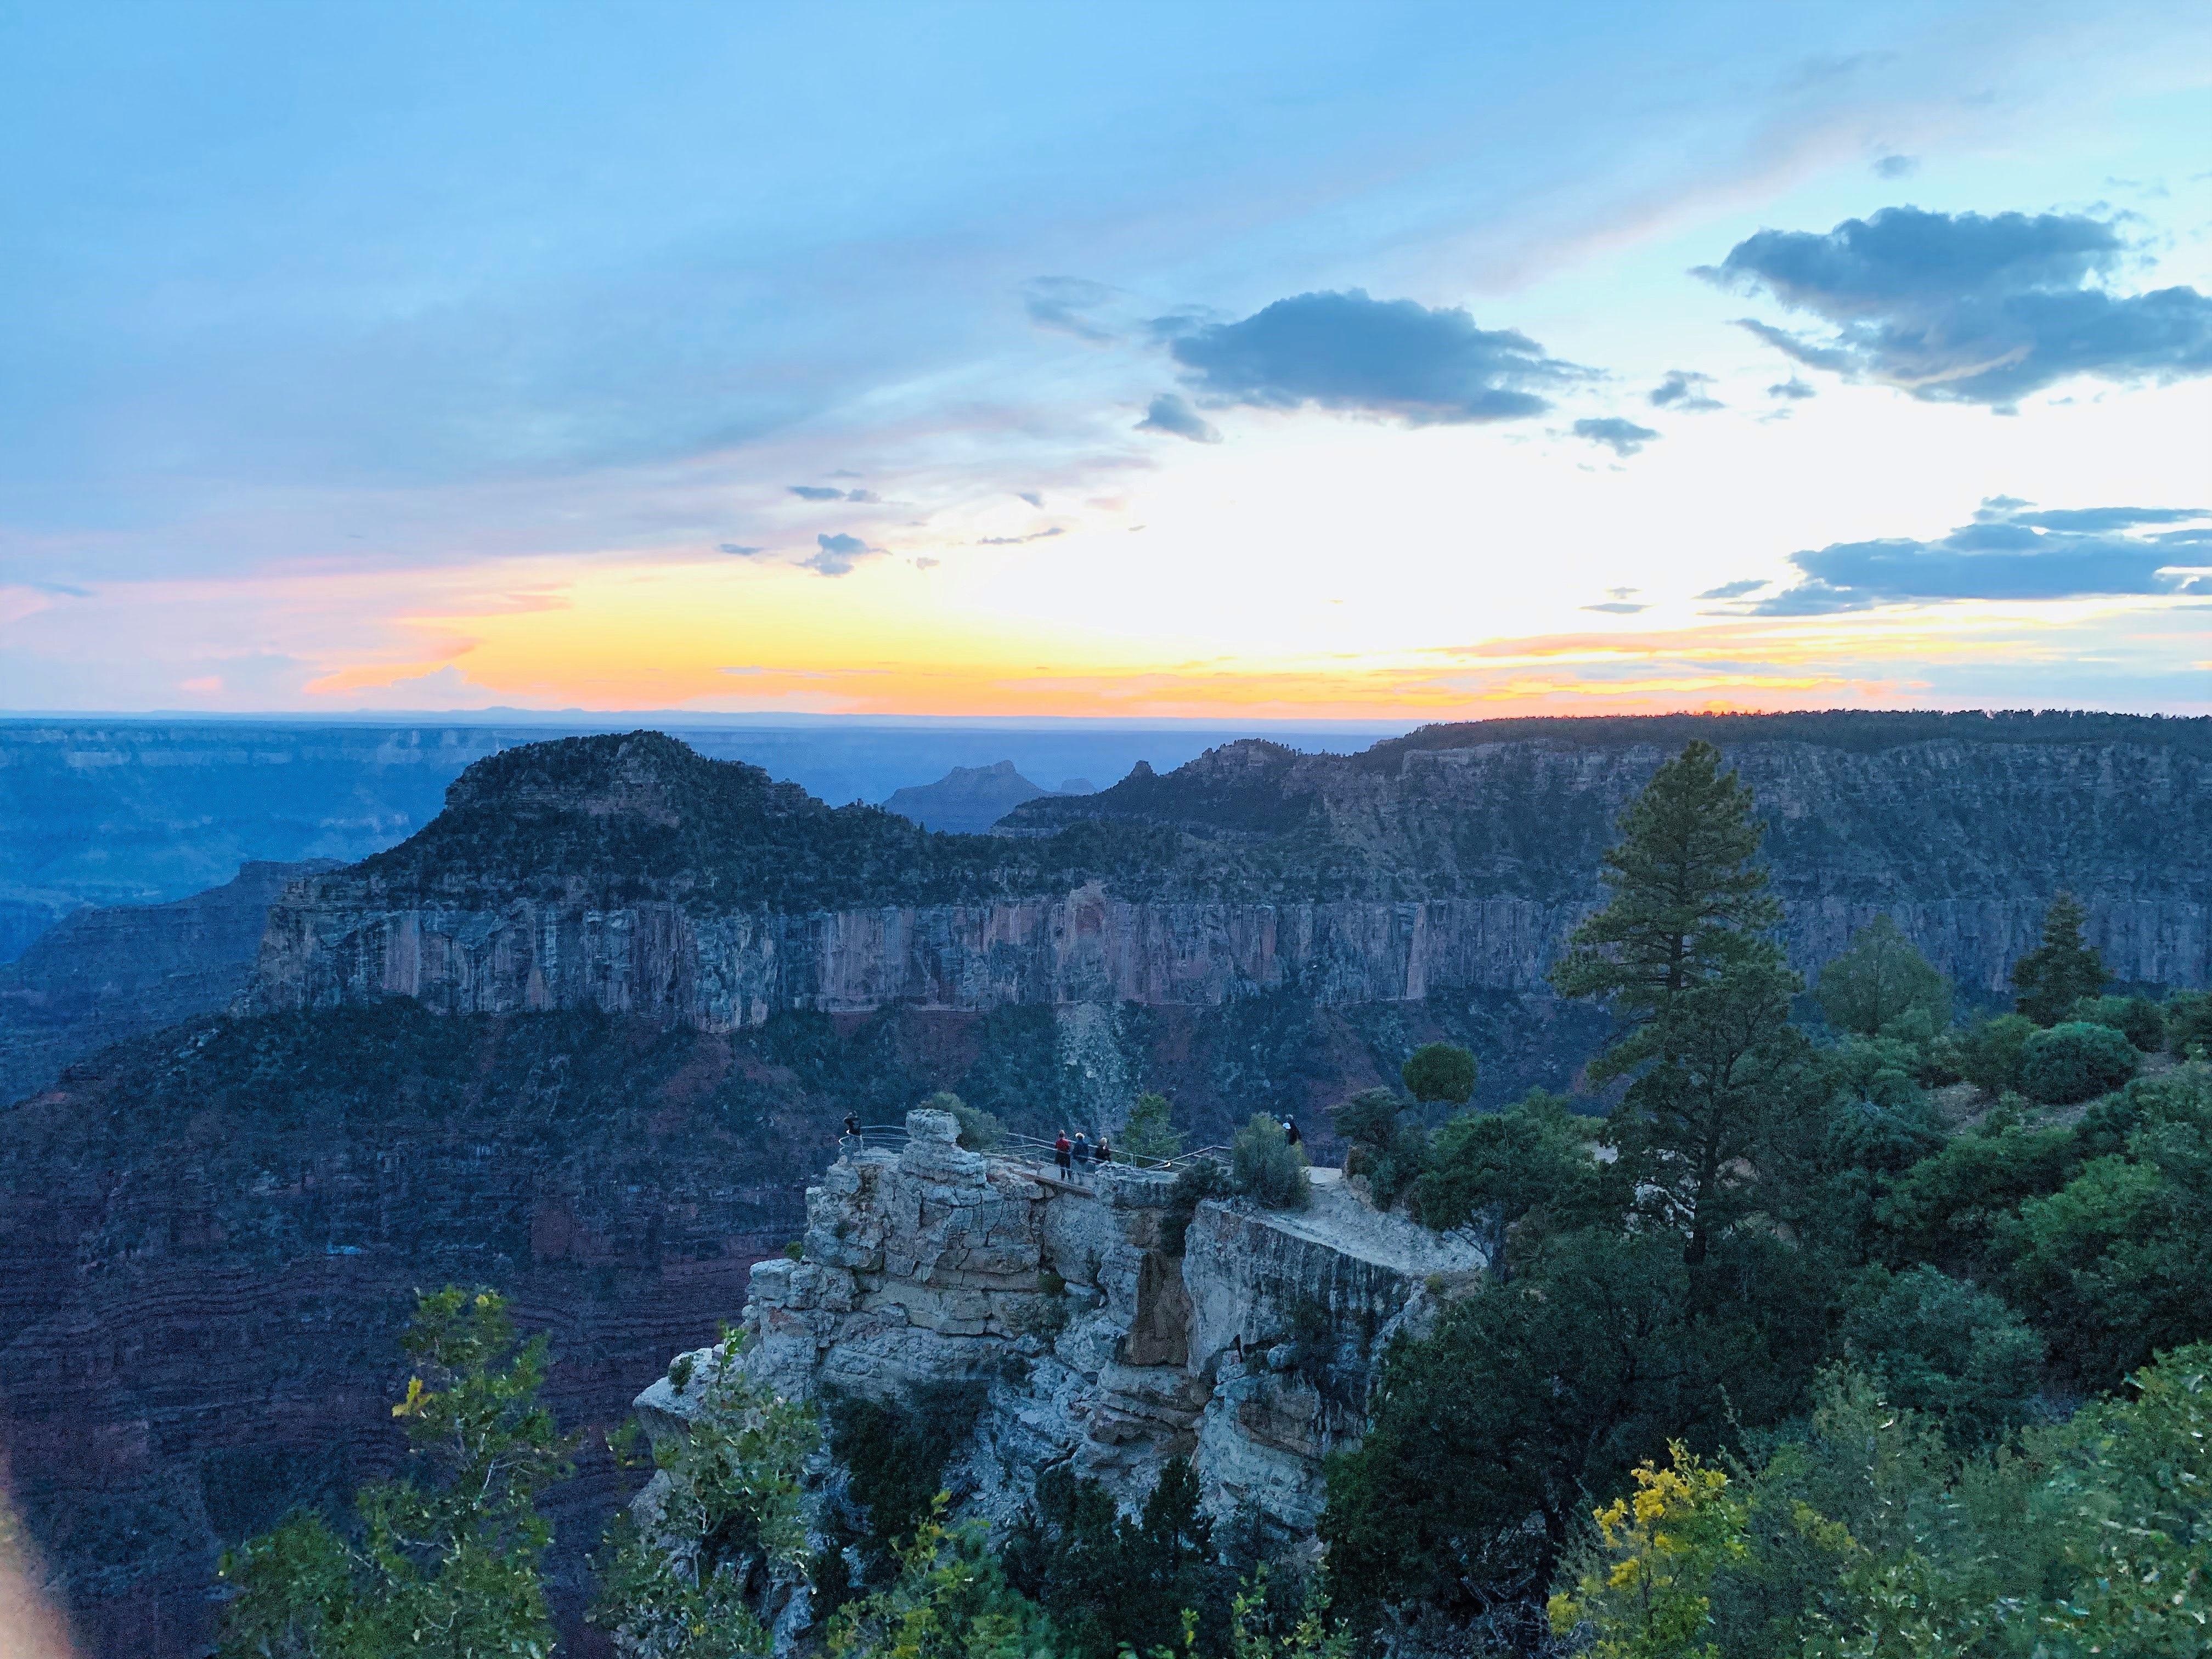
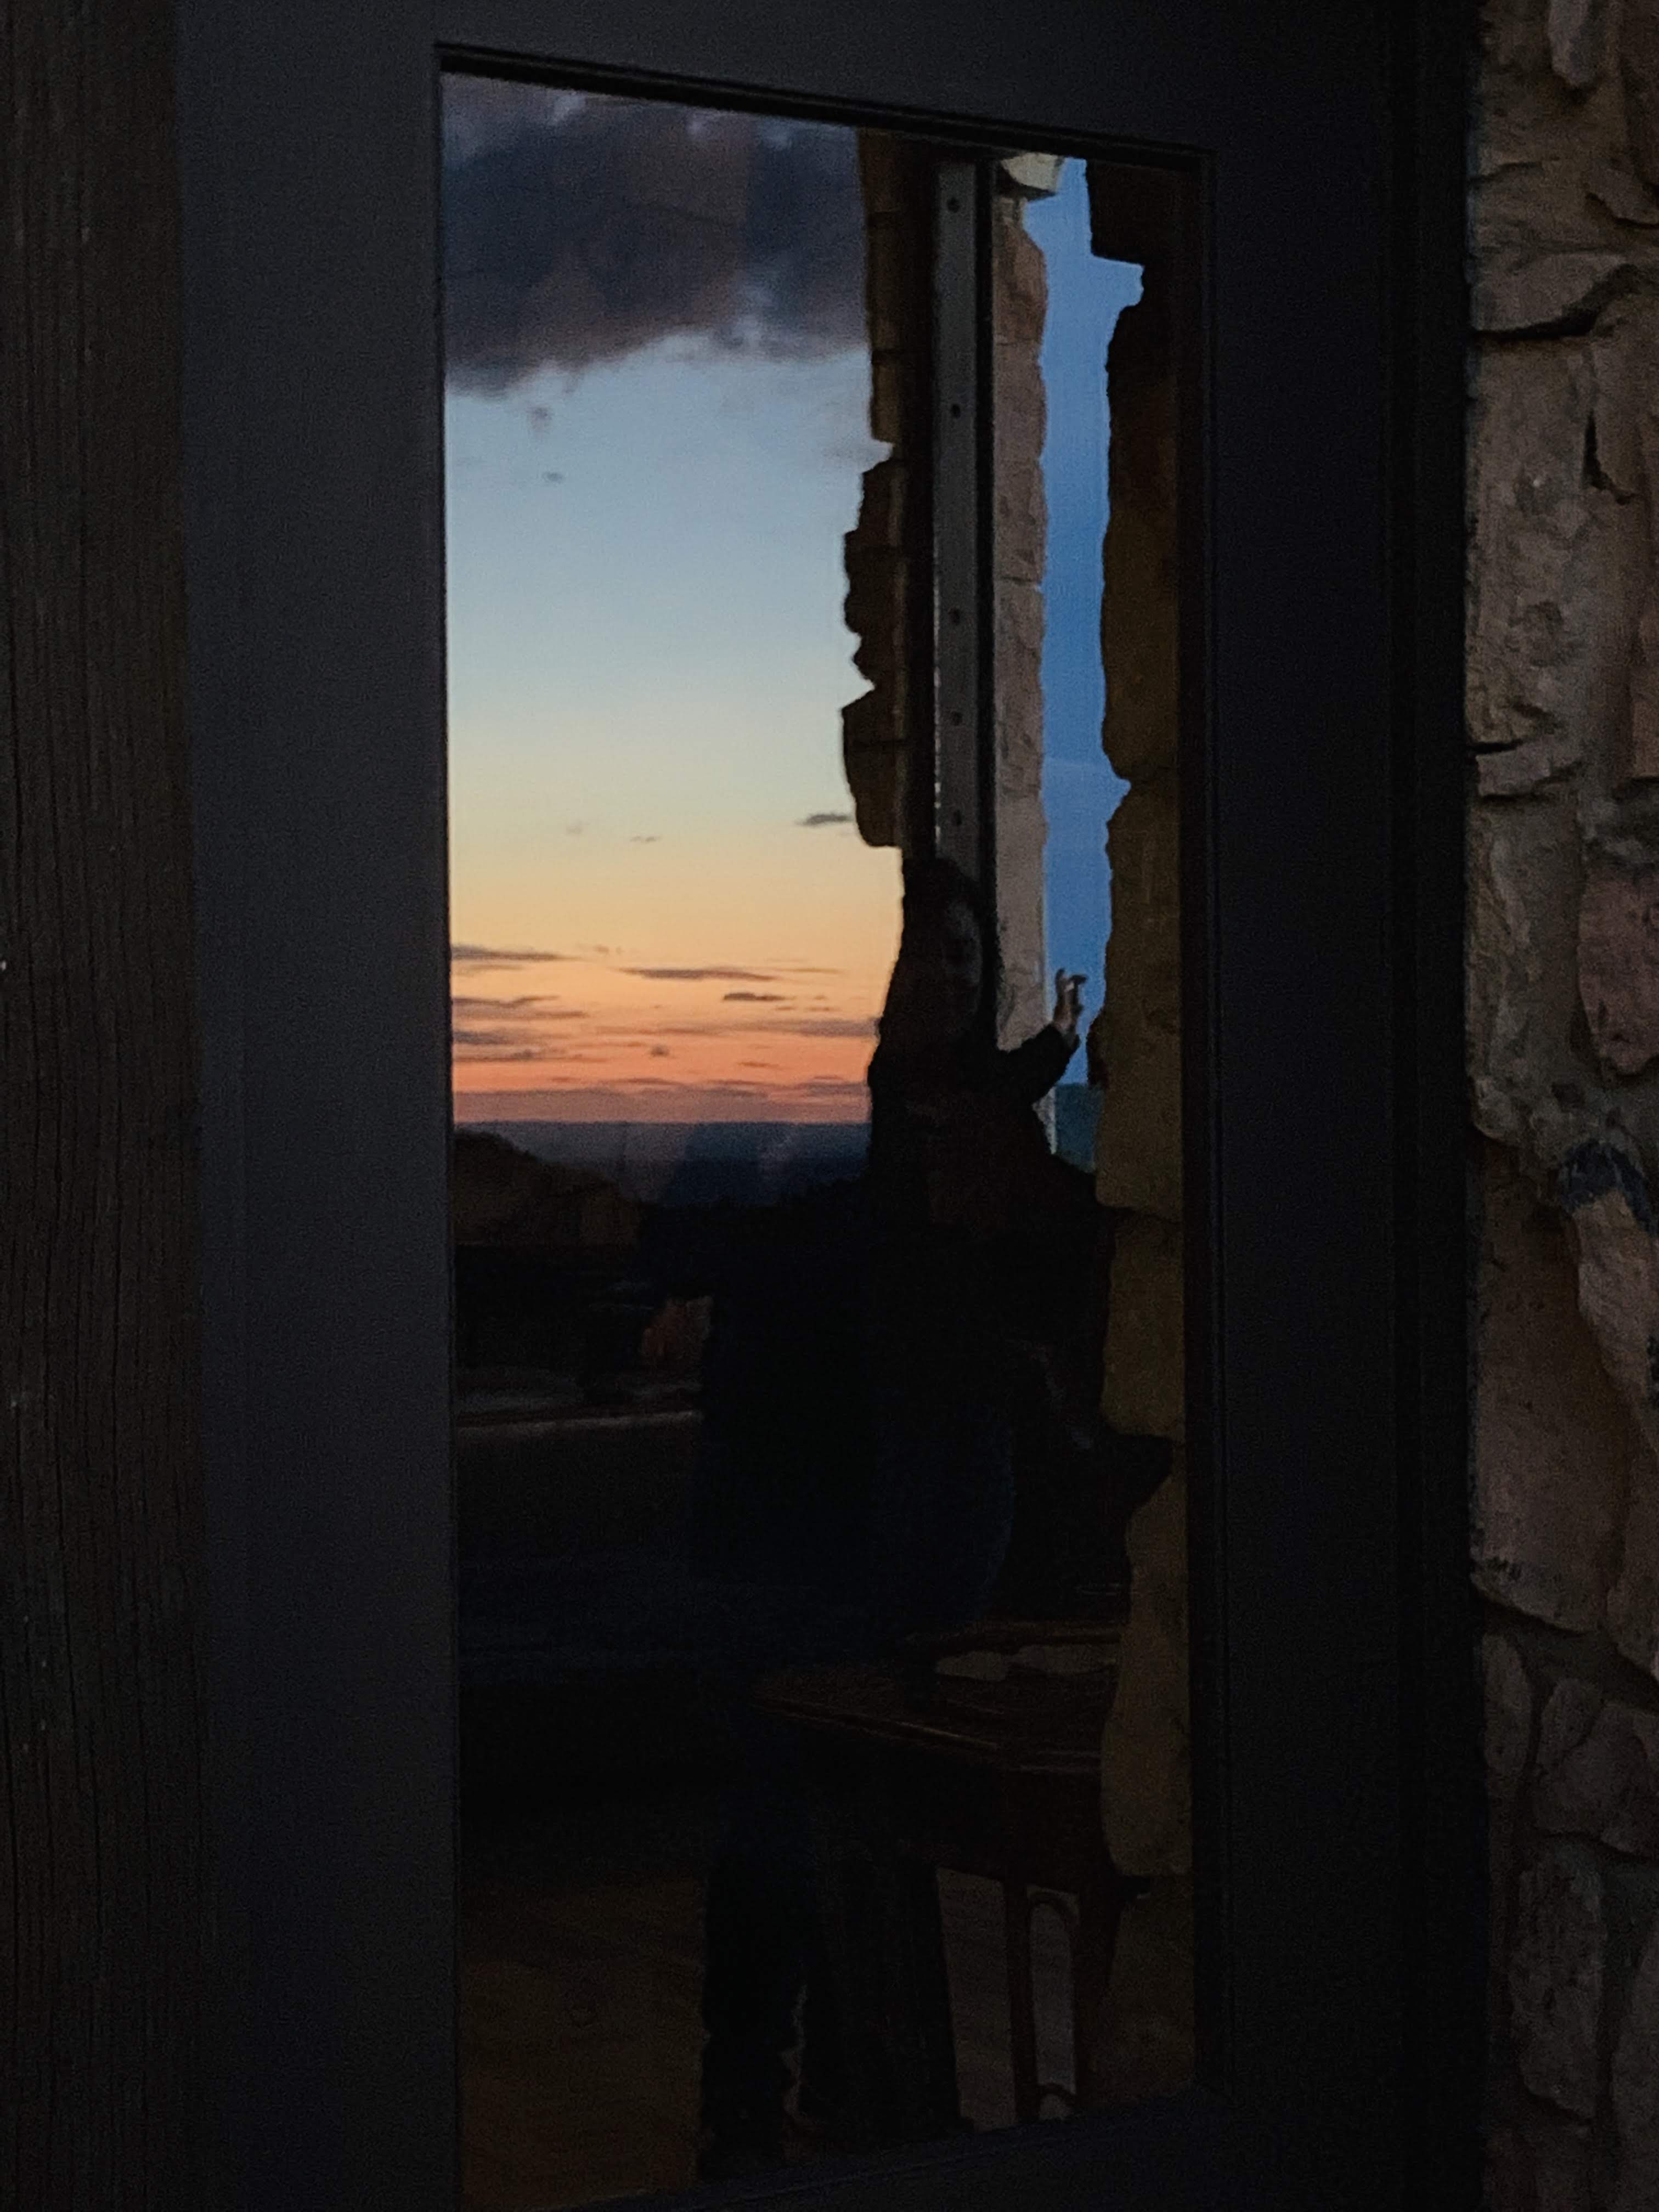
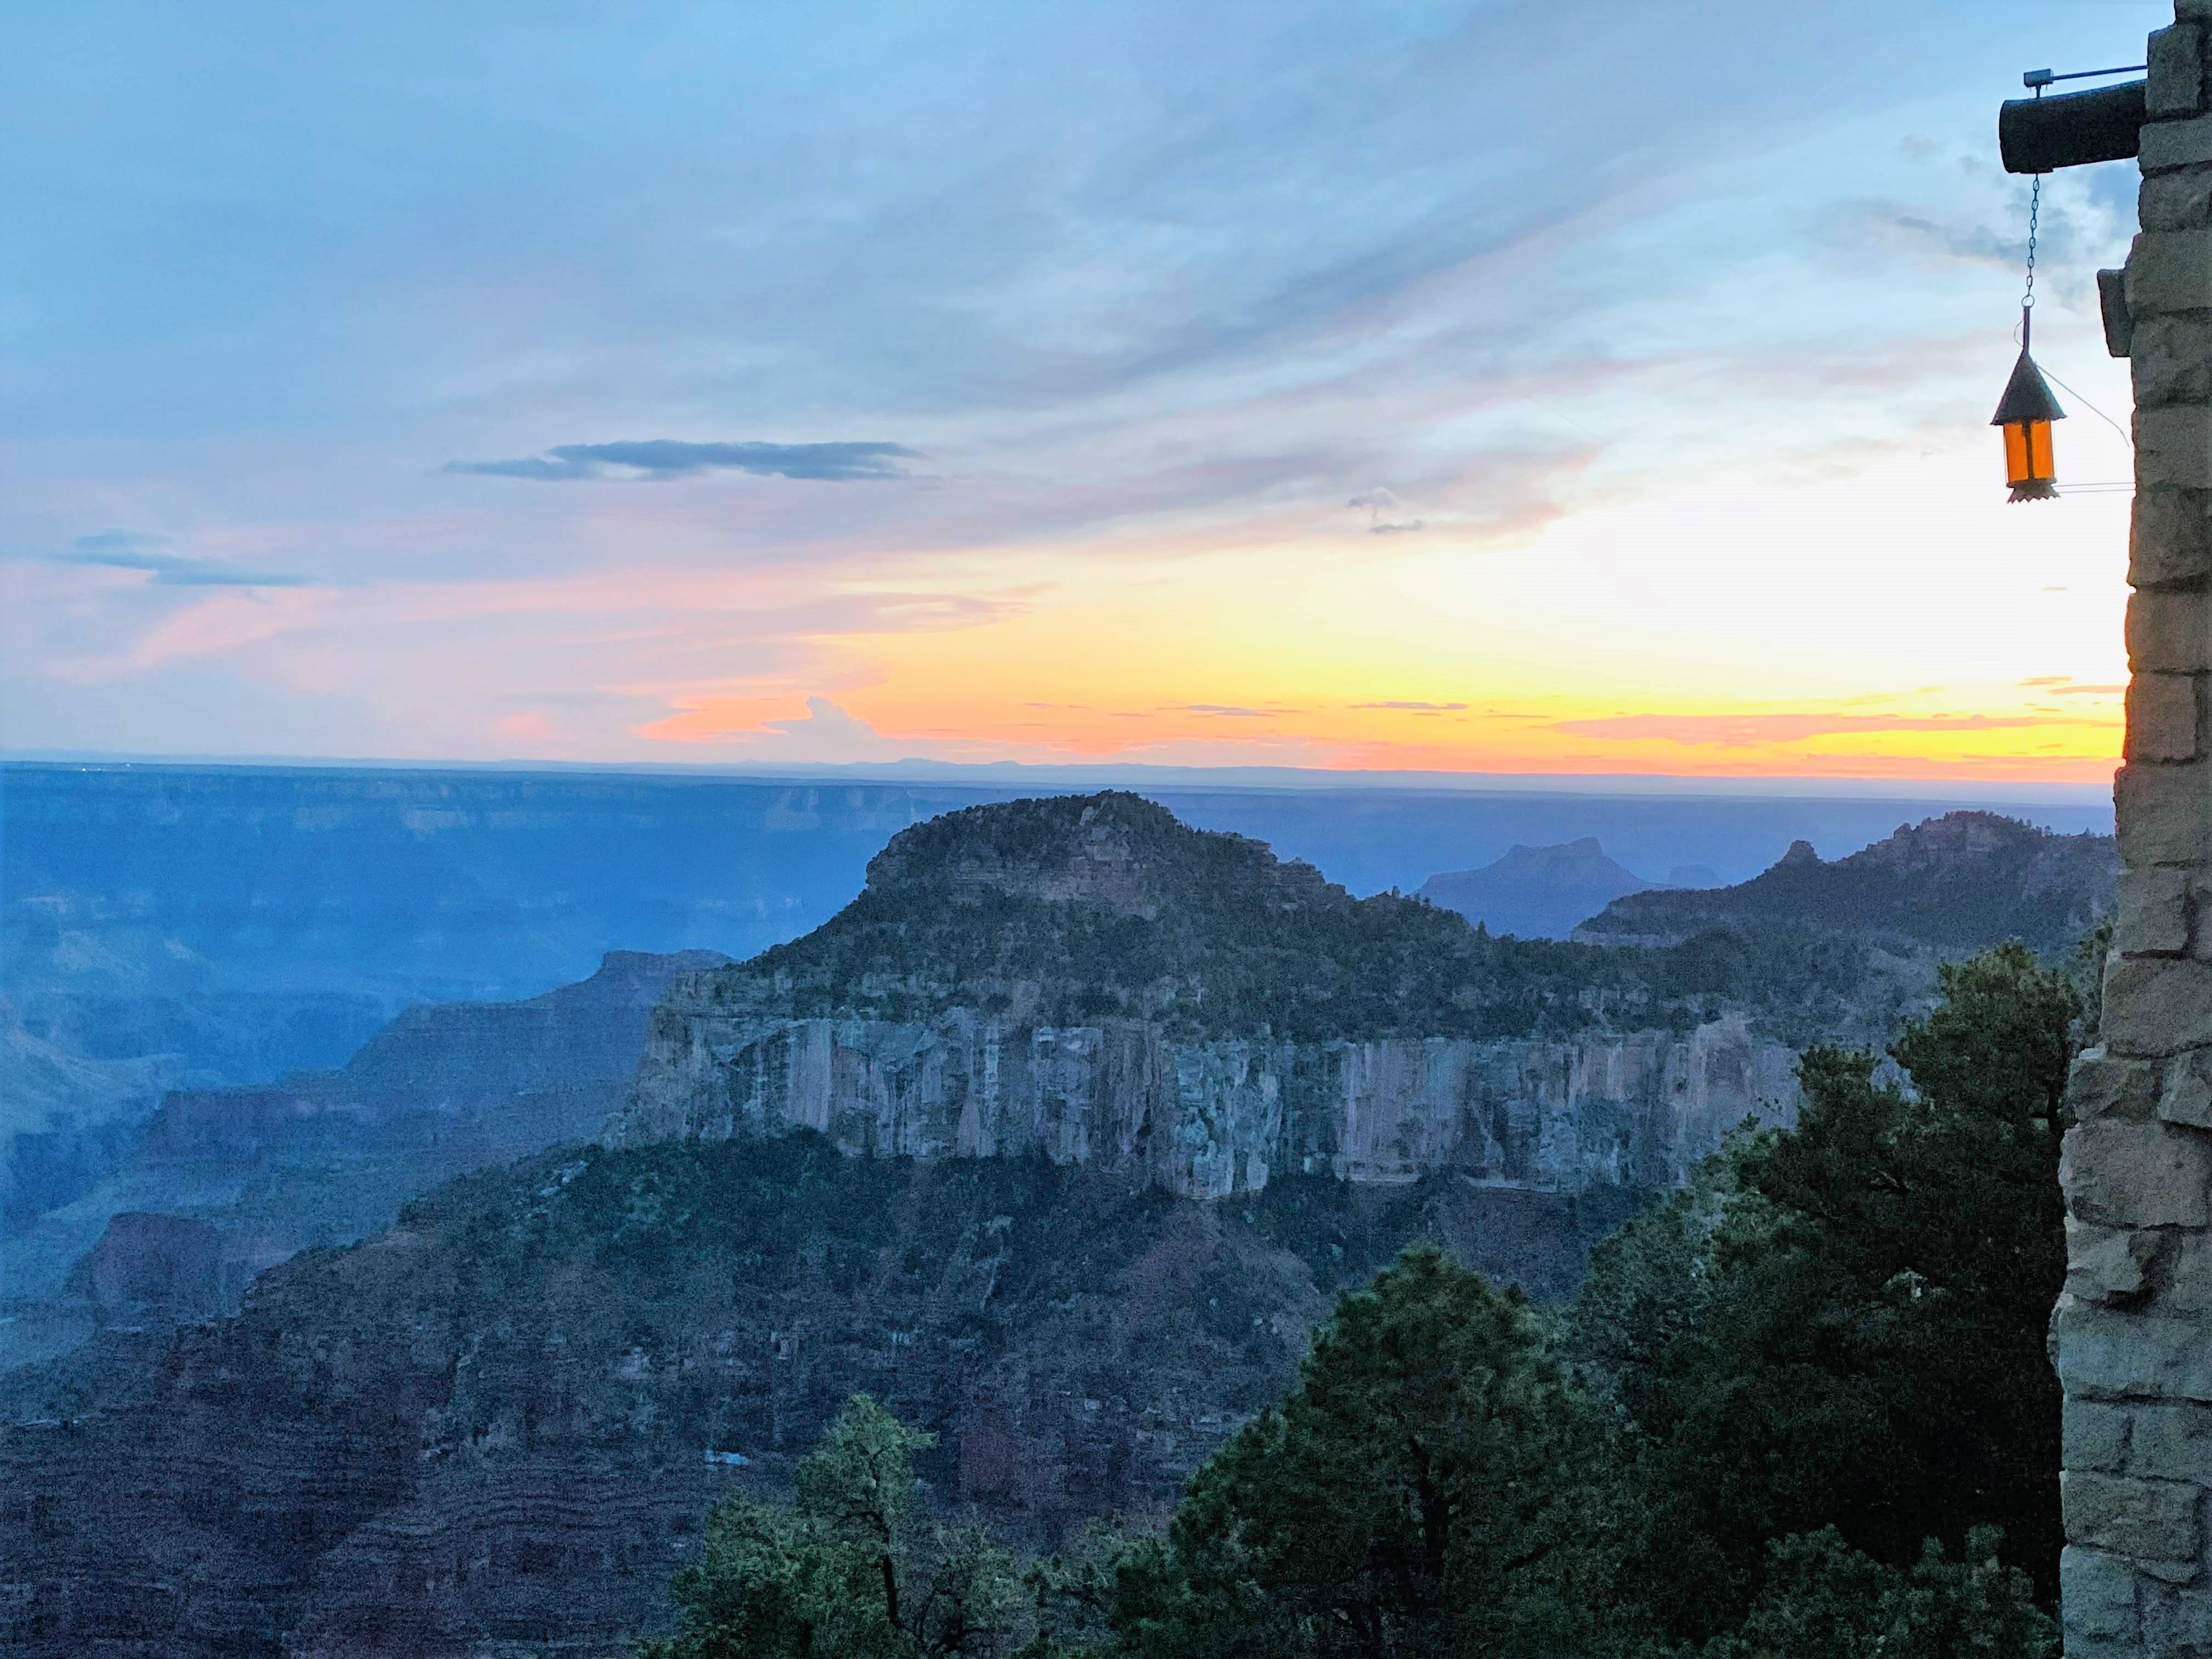
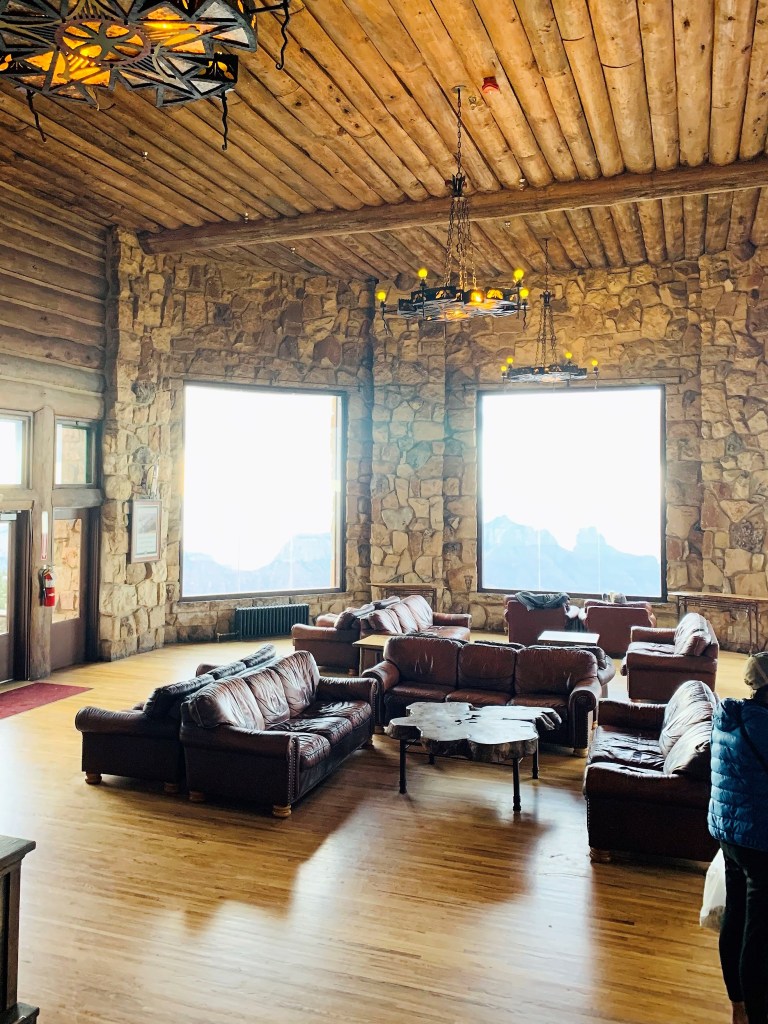
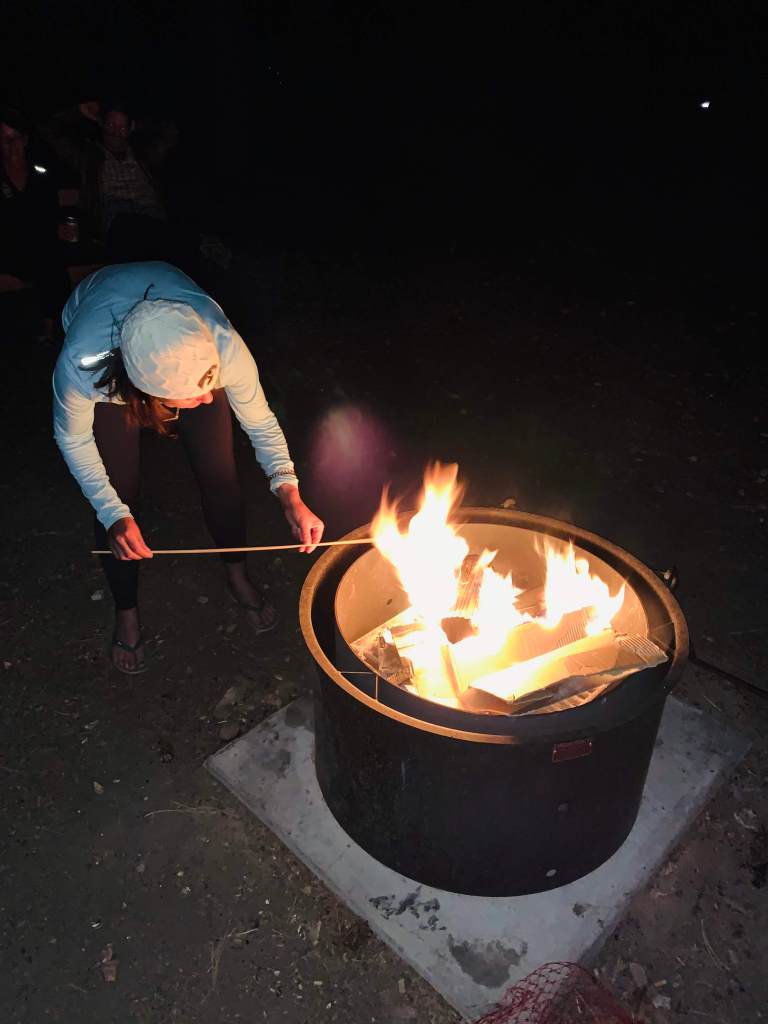
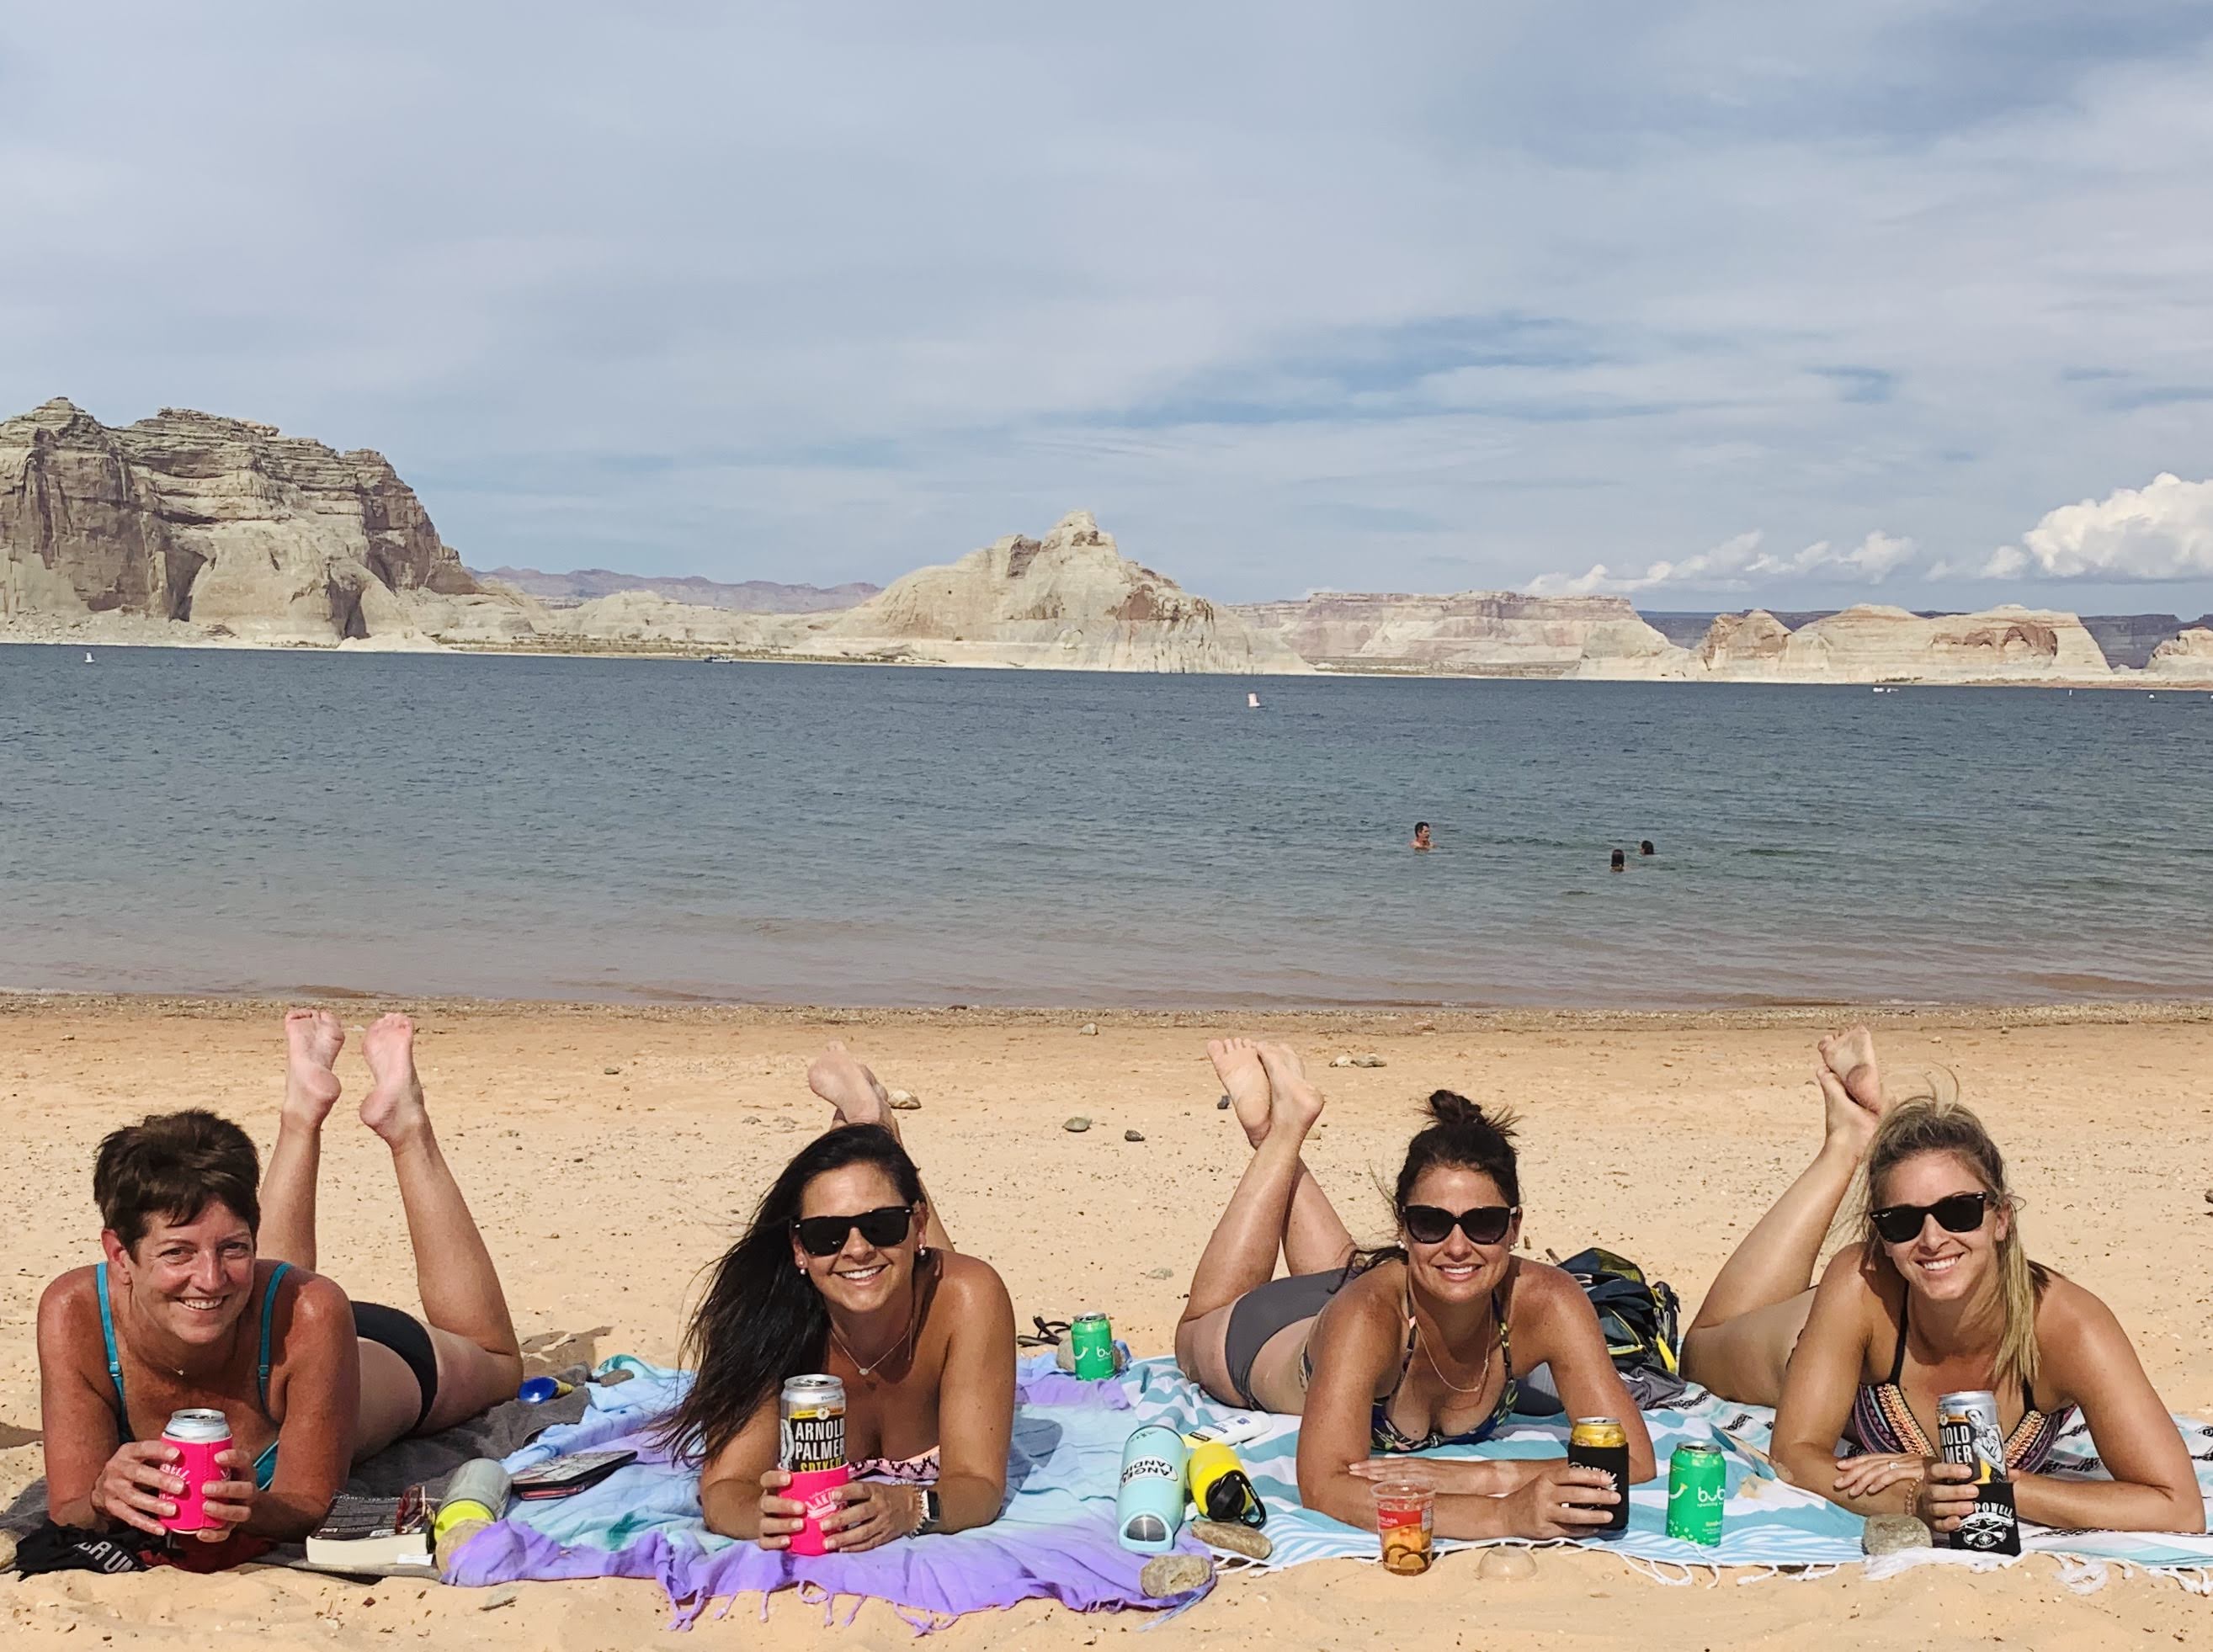
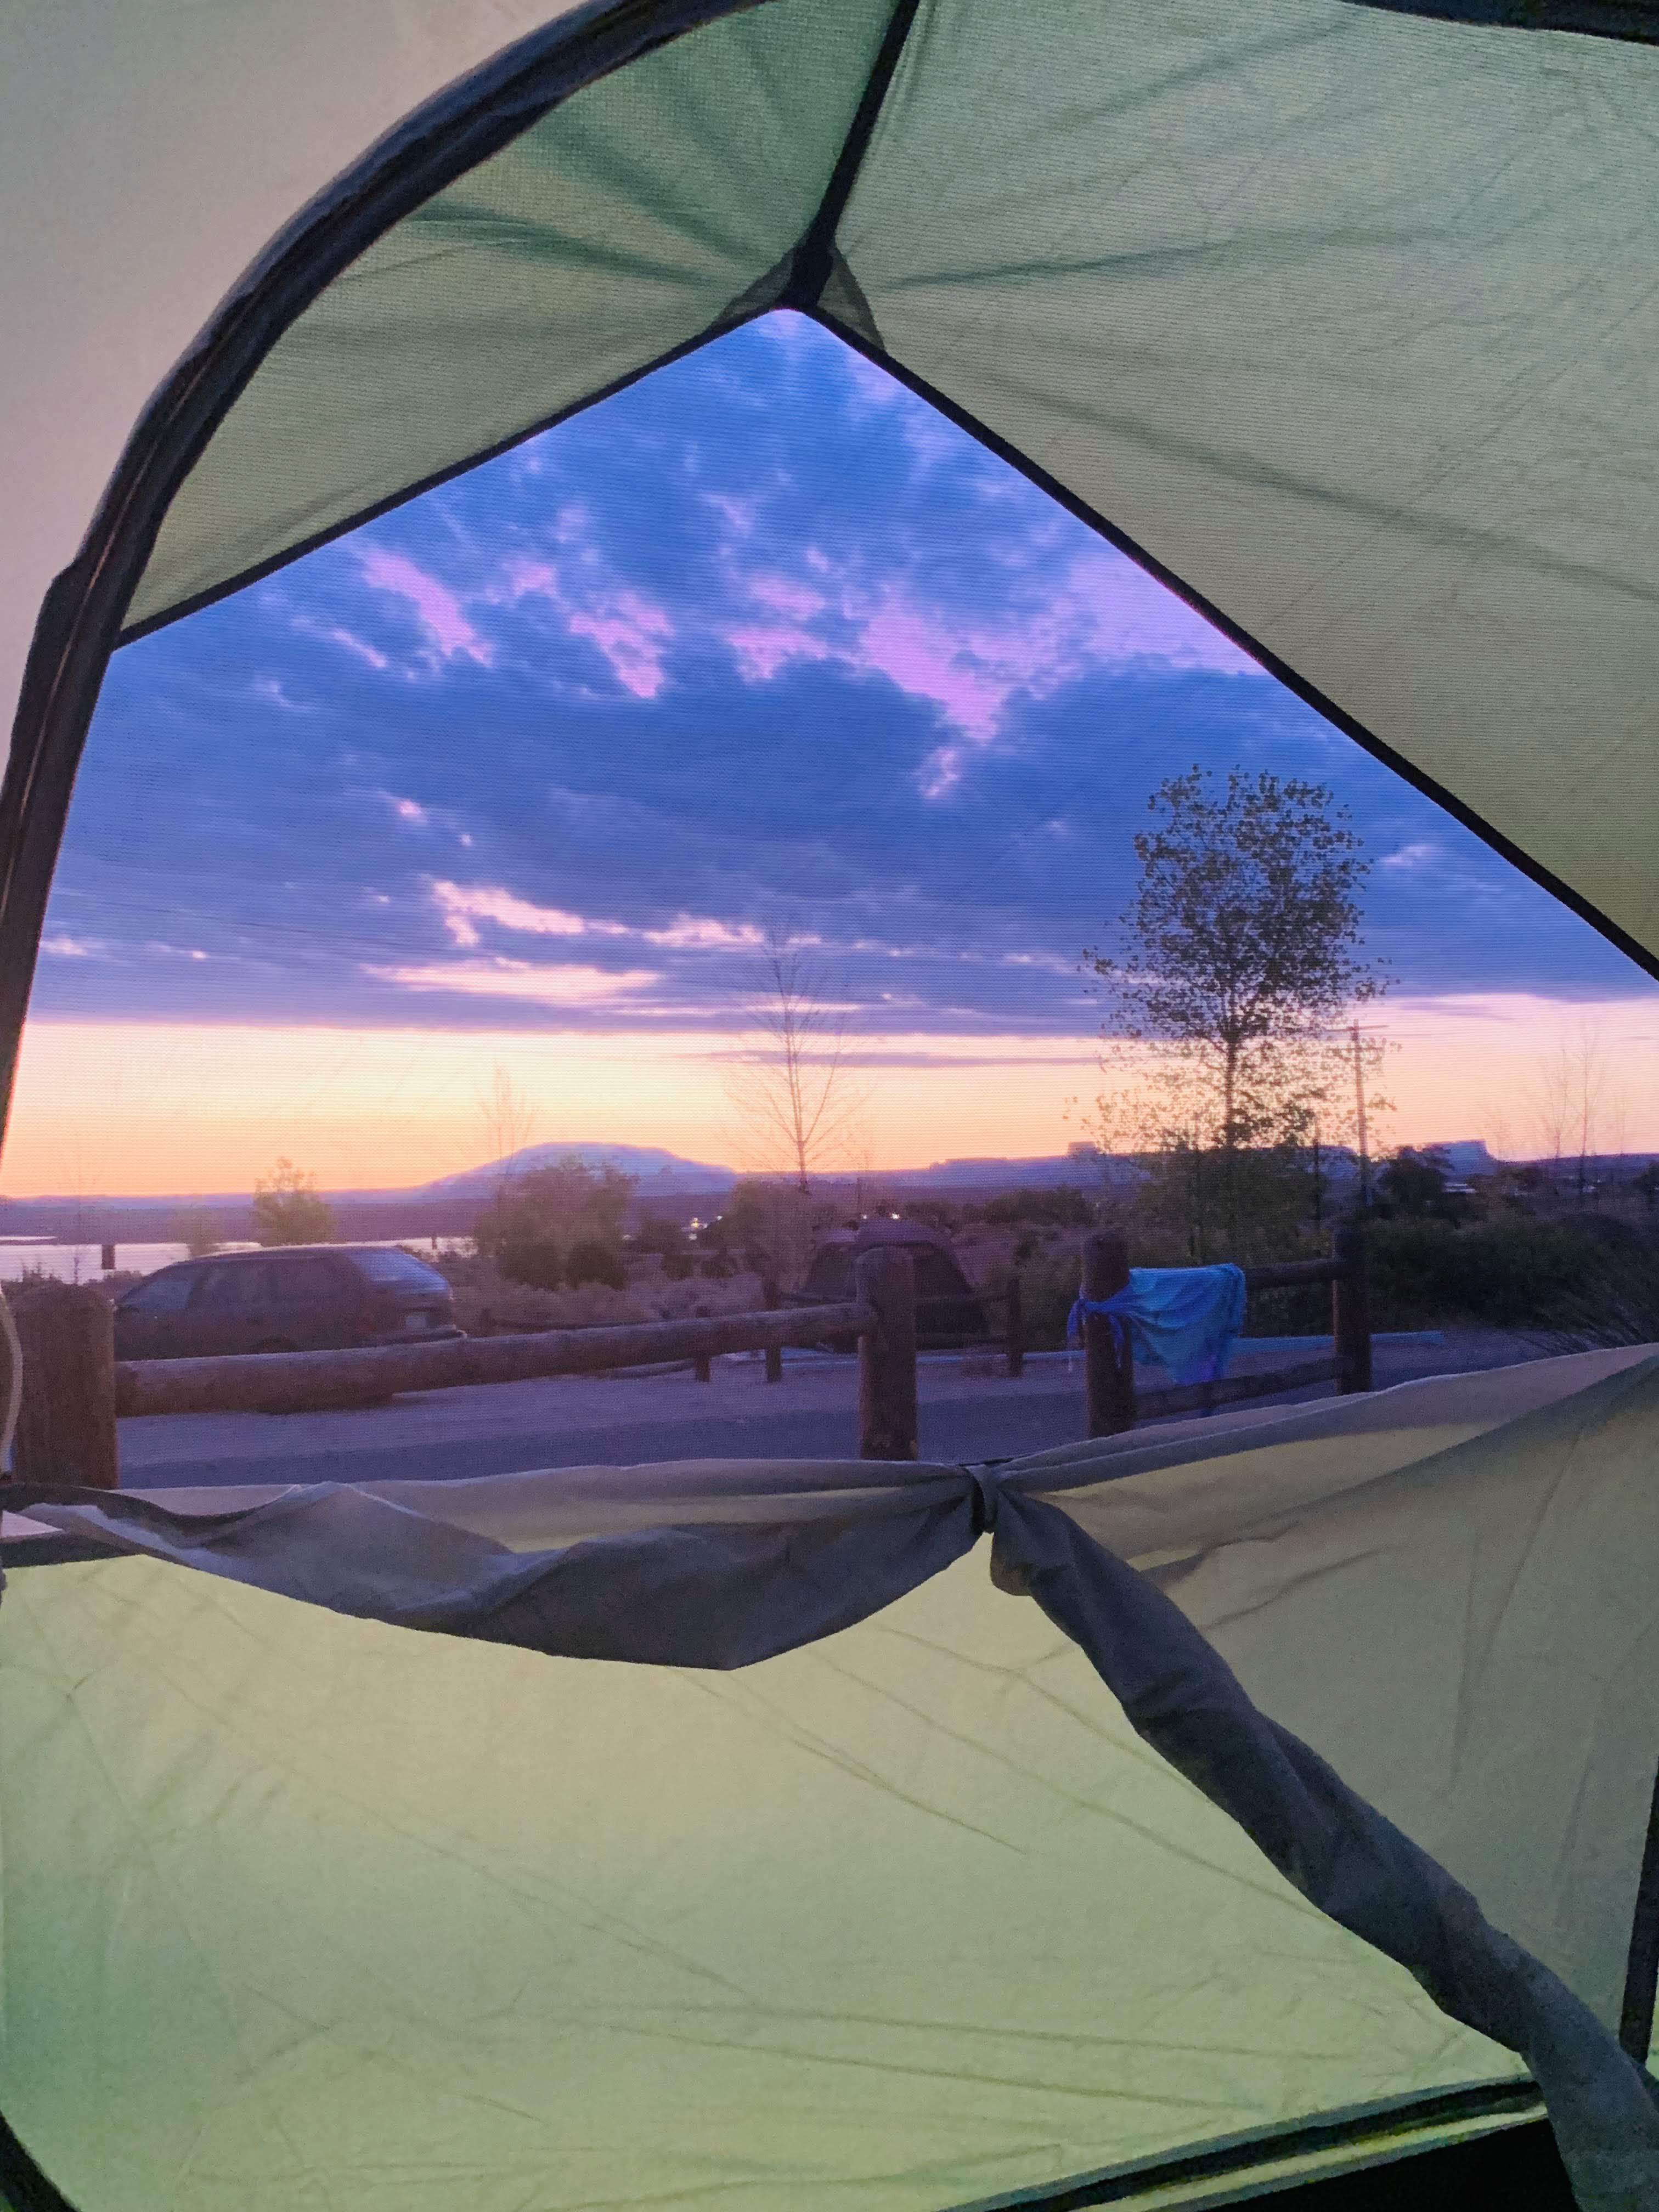
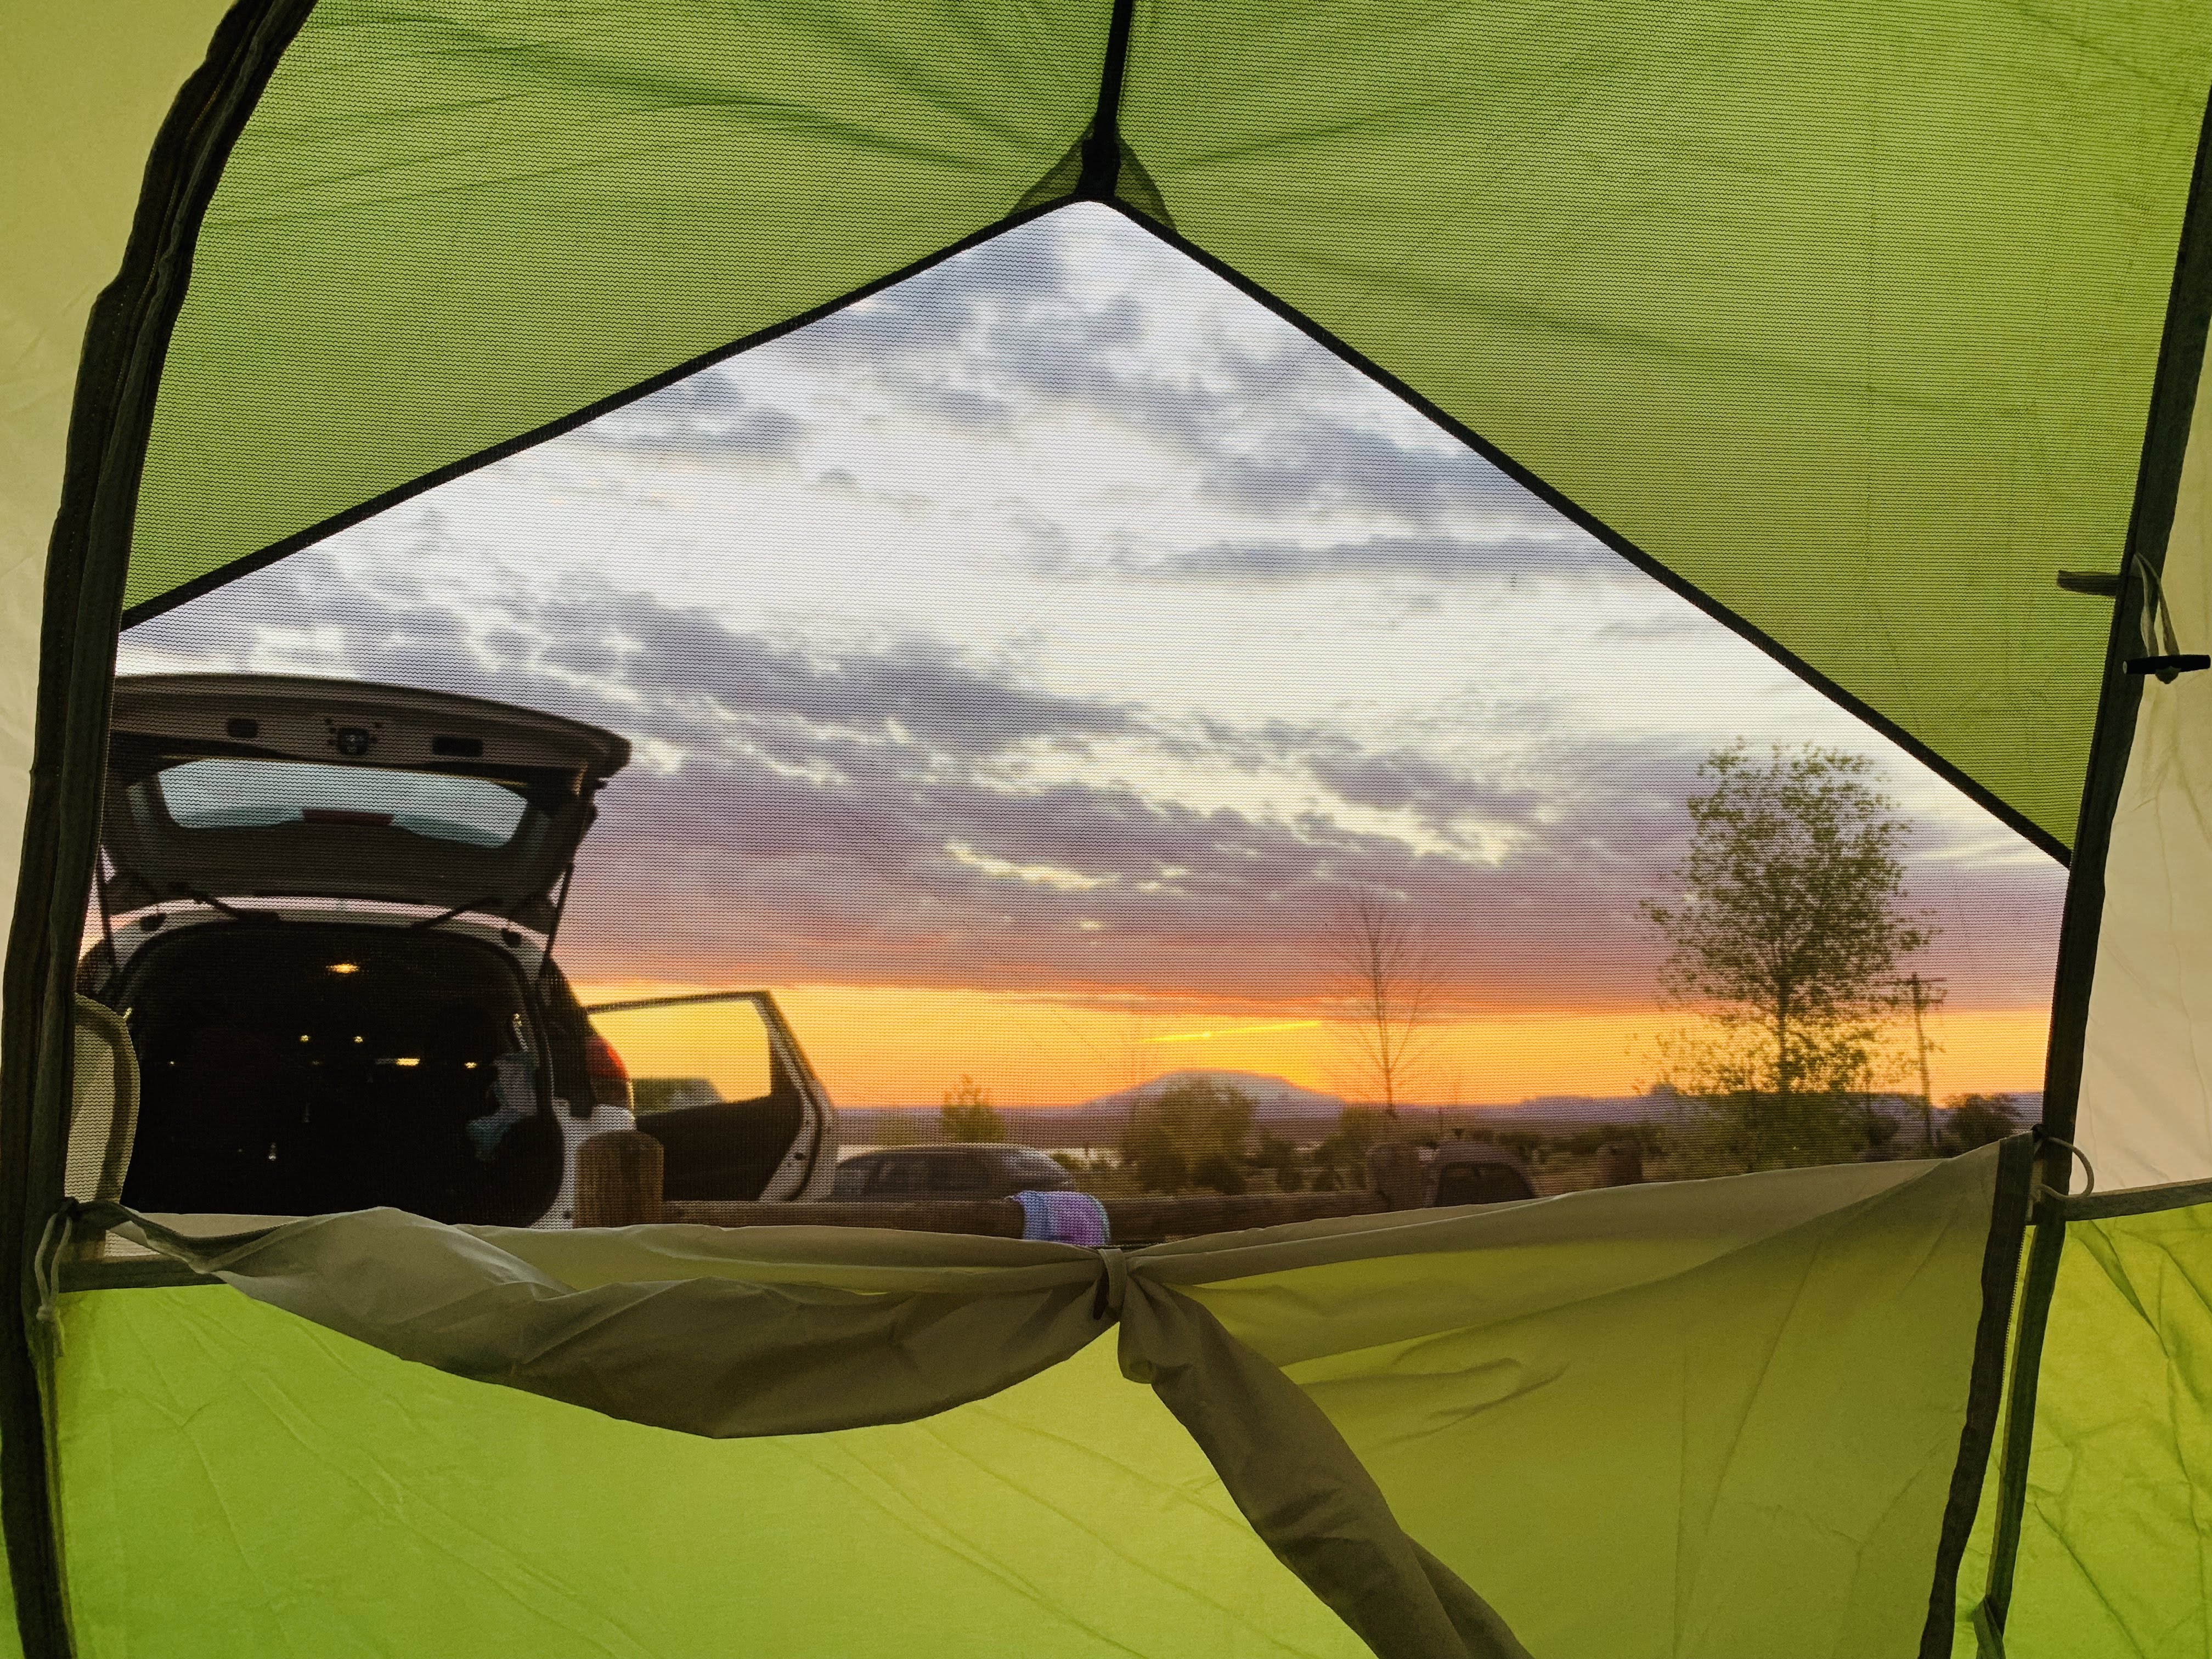
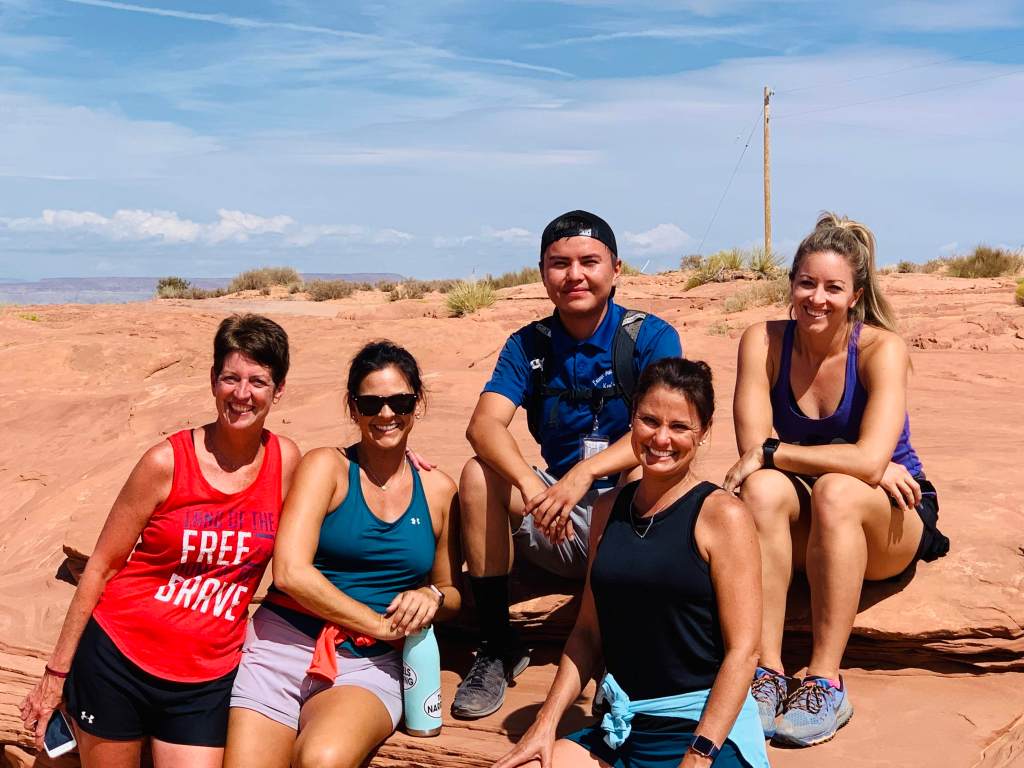
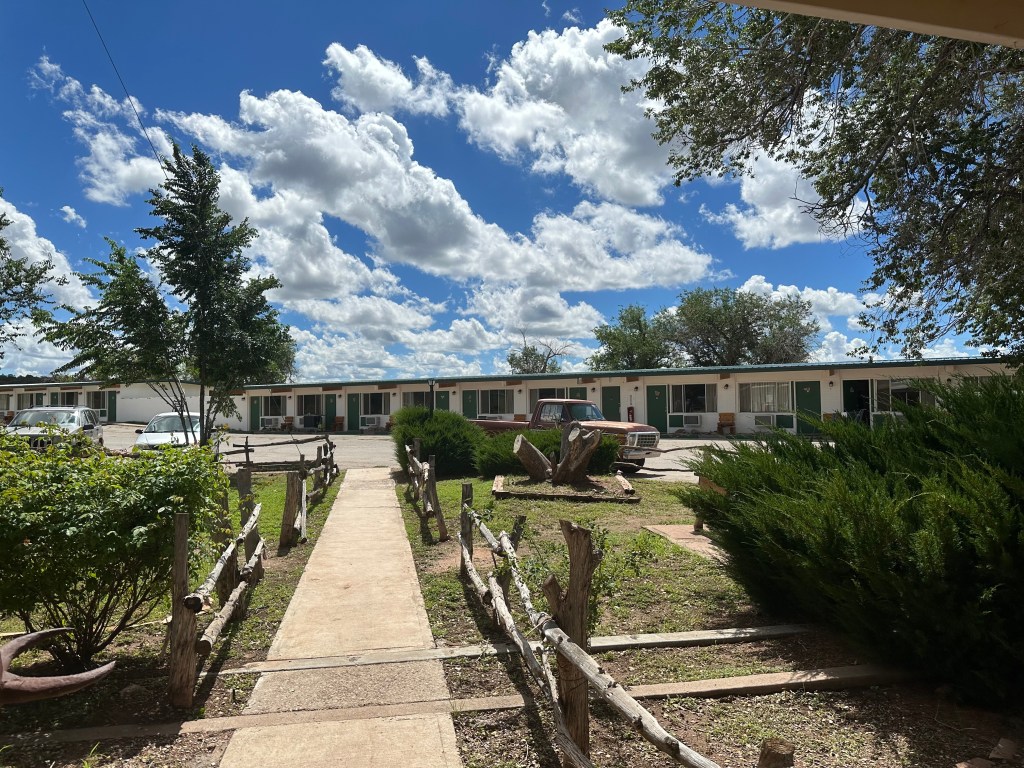
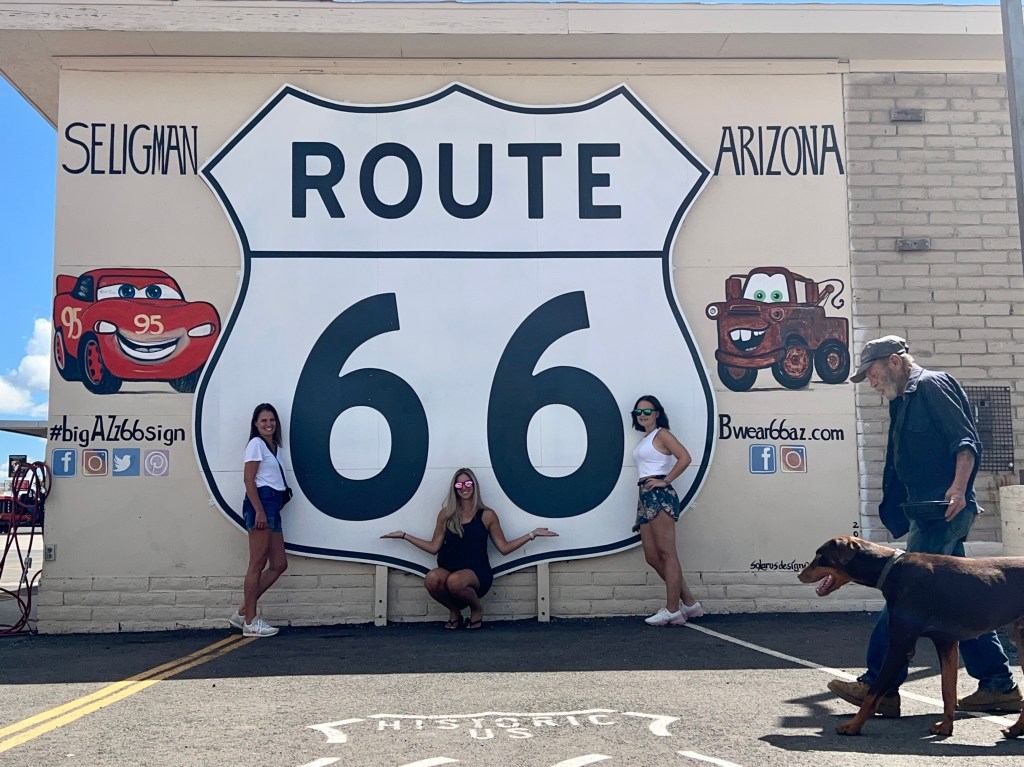
Myself and two girlfriends flew into Phoenix two days prior to the start of our hike . We picked up our rental car and grabbed some lingering groceries (see packing list post). The day before the hike, we traveled the 3.5 hours to Peach Springs, Arizona to pick up our permits and check into the Grand Caverns Inn for the night of Route 66. On the way, we toured a bit of Route 66, having fun in Seligman and venturing over to Kingman since we had time to kill to enjoy a final meal “up top”.

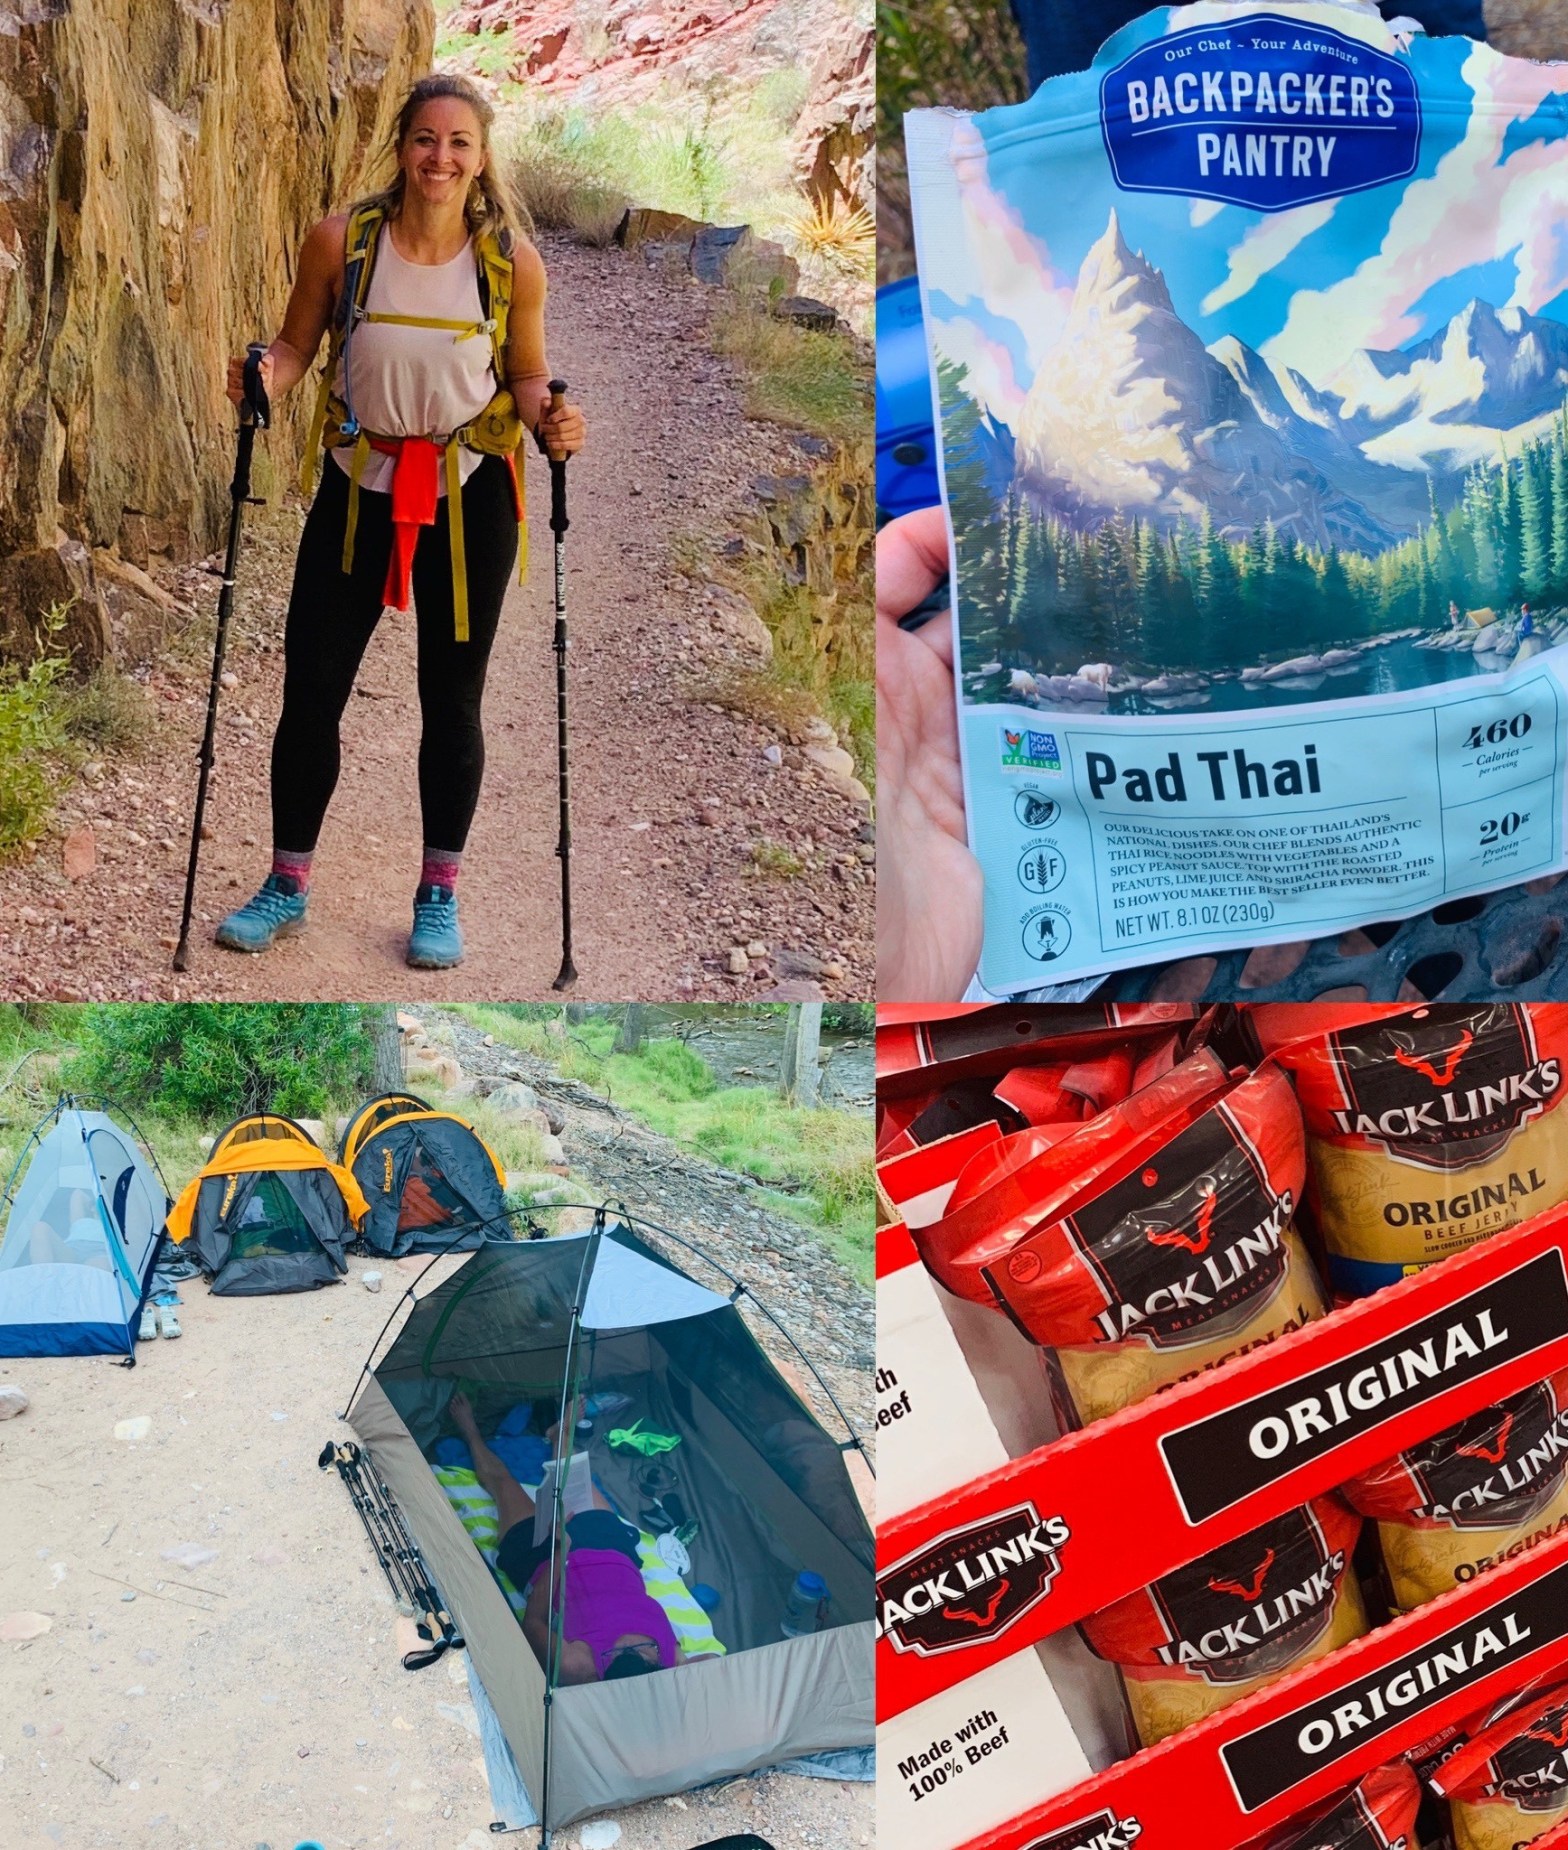
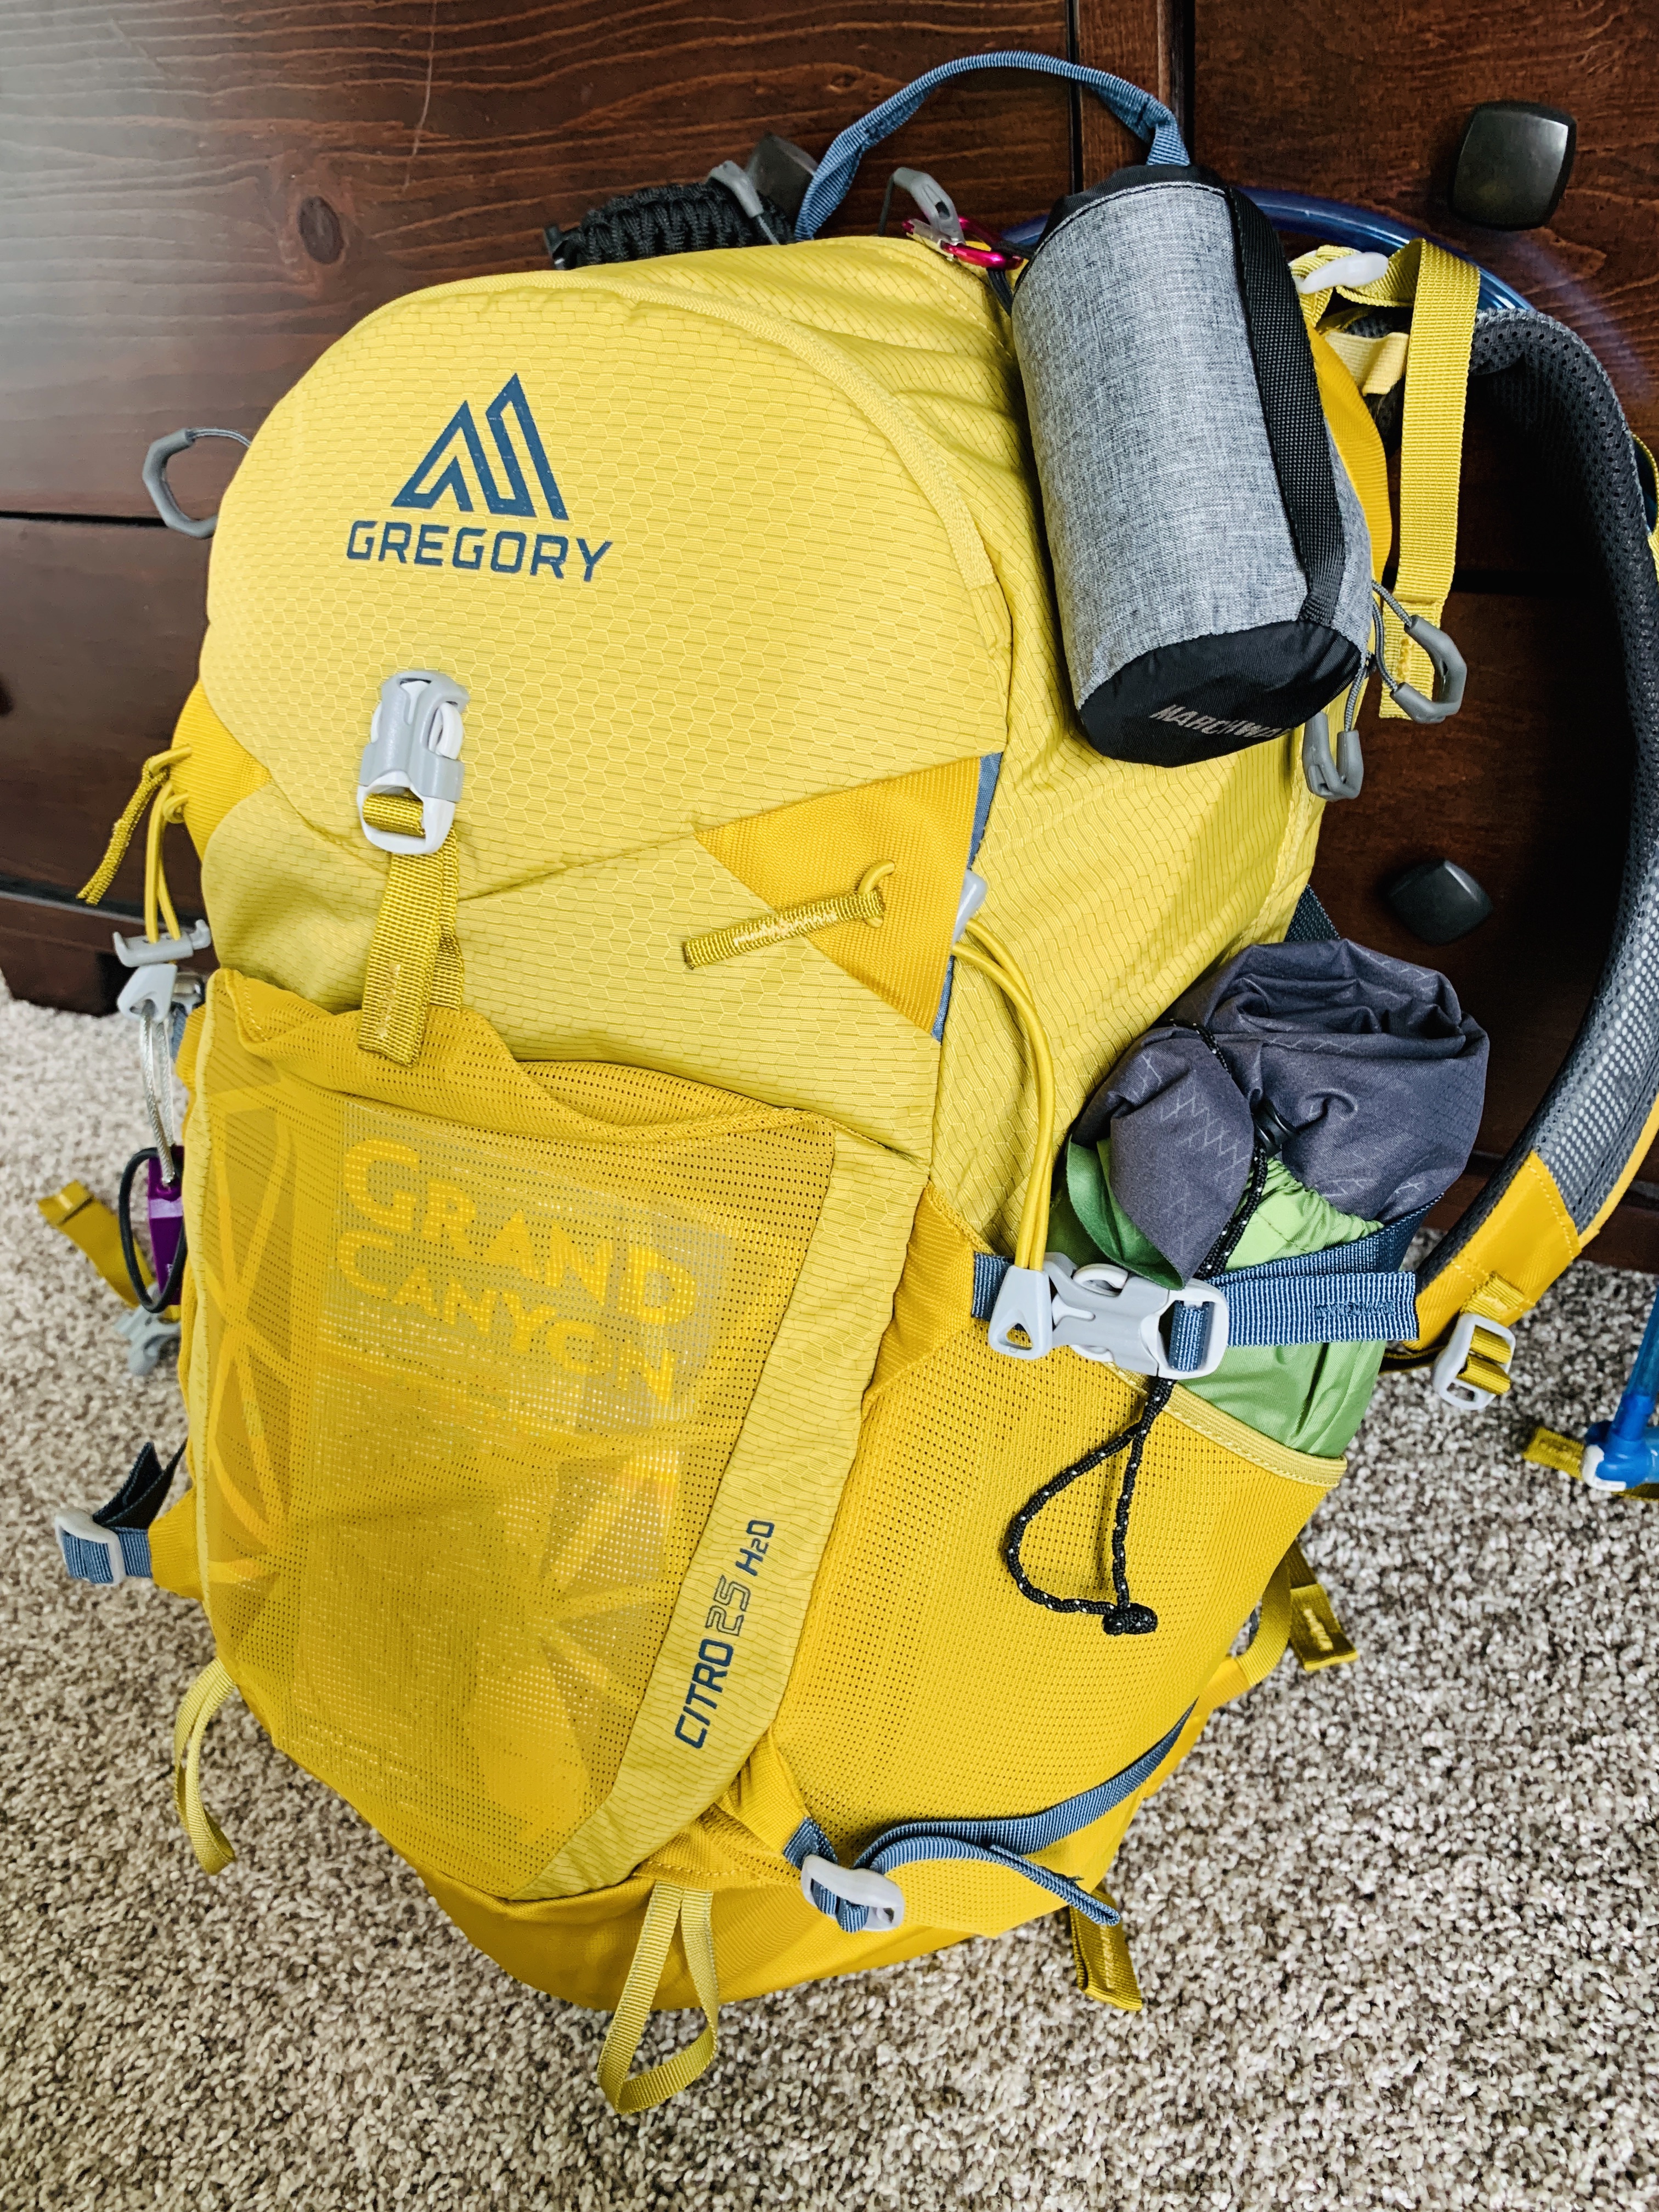
We later got our gear all organized and packed which was also when we second guessed every ounce of items for the 10 mile hike into the canyon! We ended with our bags between 31-34 pounds remembering the weight would deplete as we ate and drank. We laid down to rest around 7 pm knowing we would be waking at 3 am to continue on with the next leg of our adventure!

Day 1: Hike into Supai Village and campground


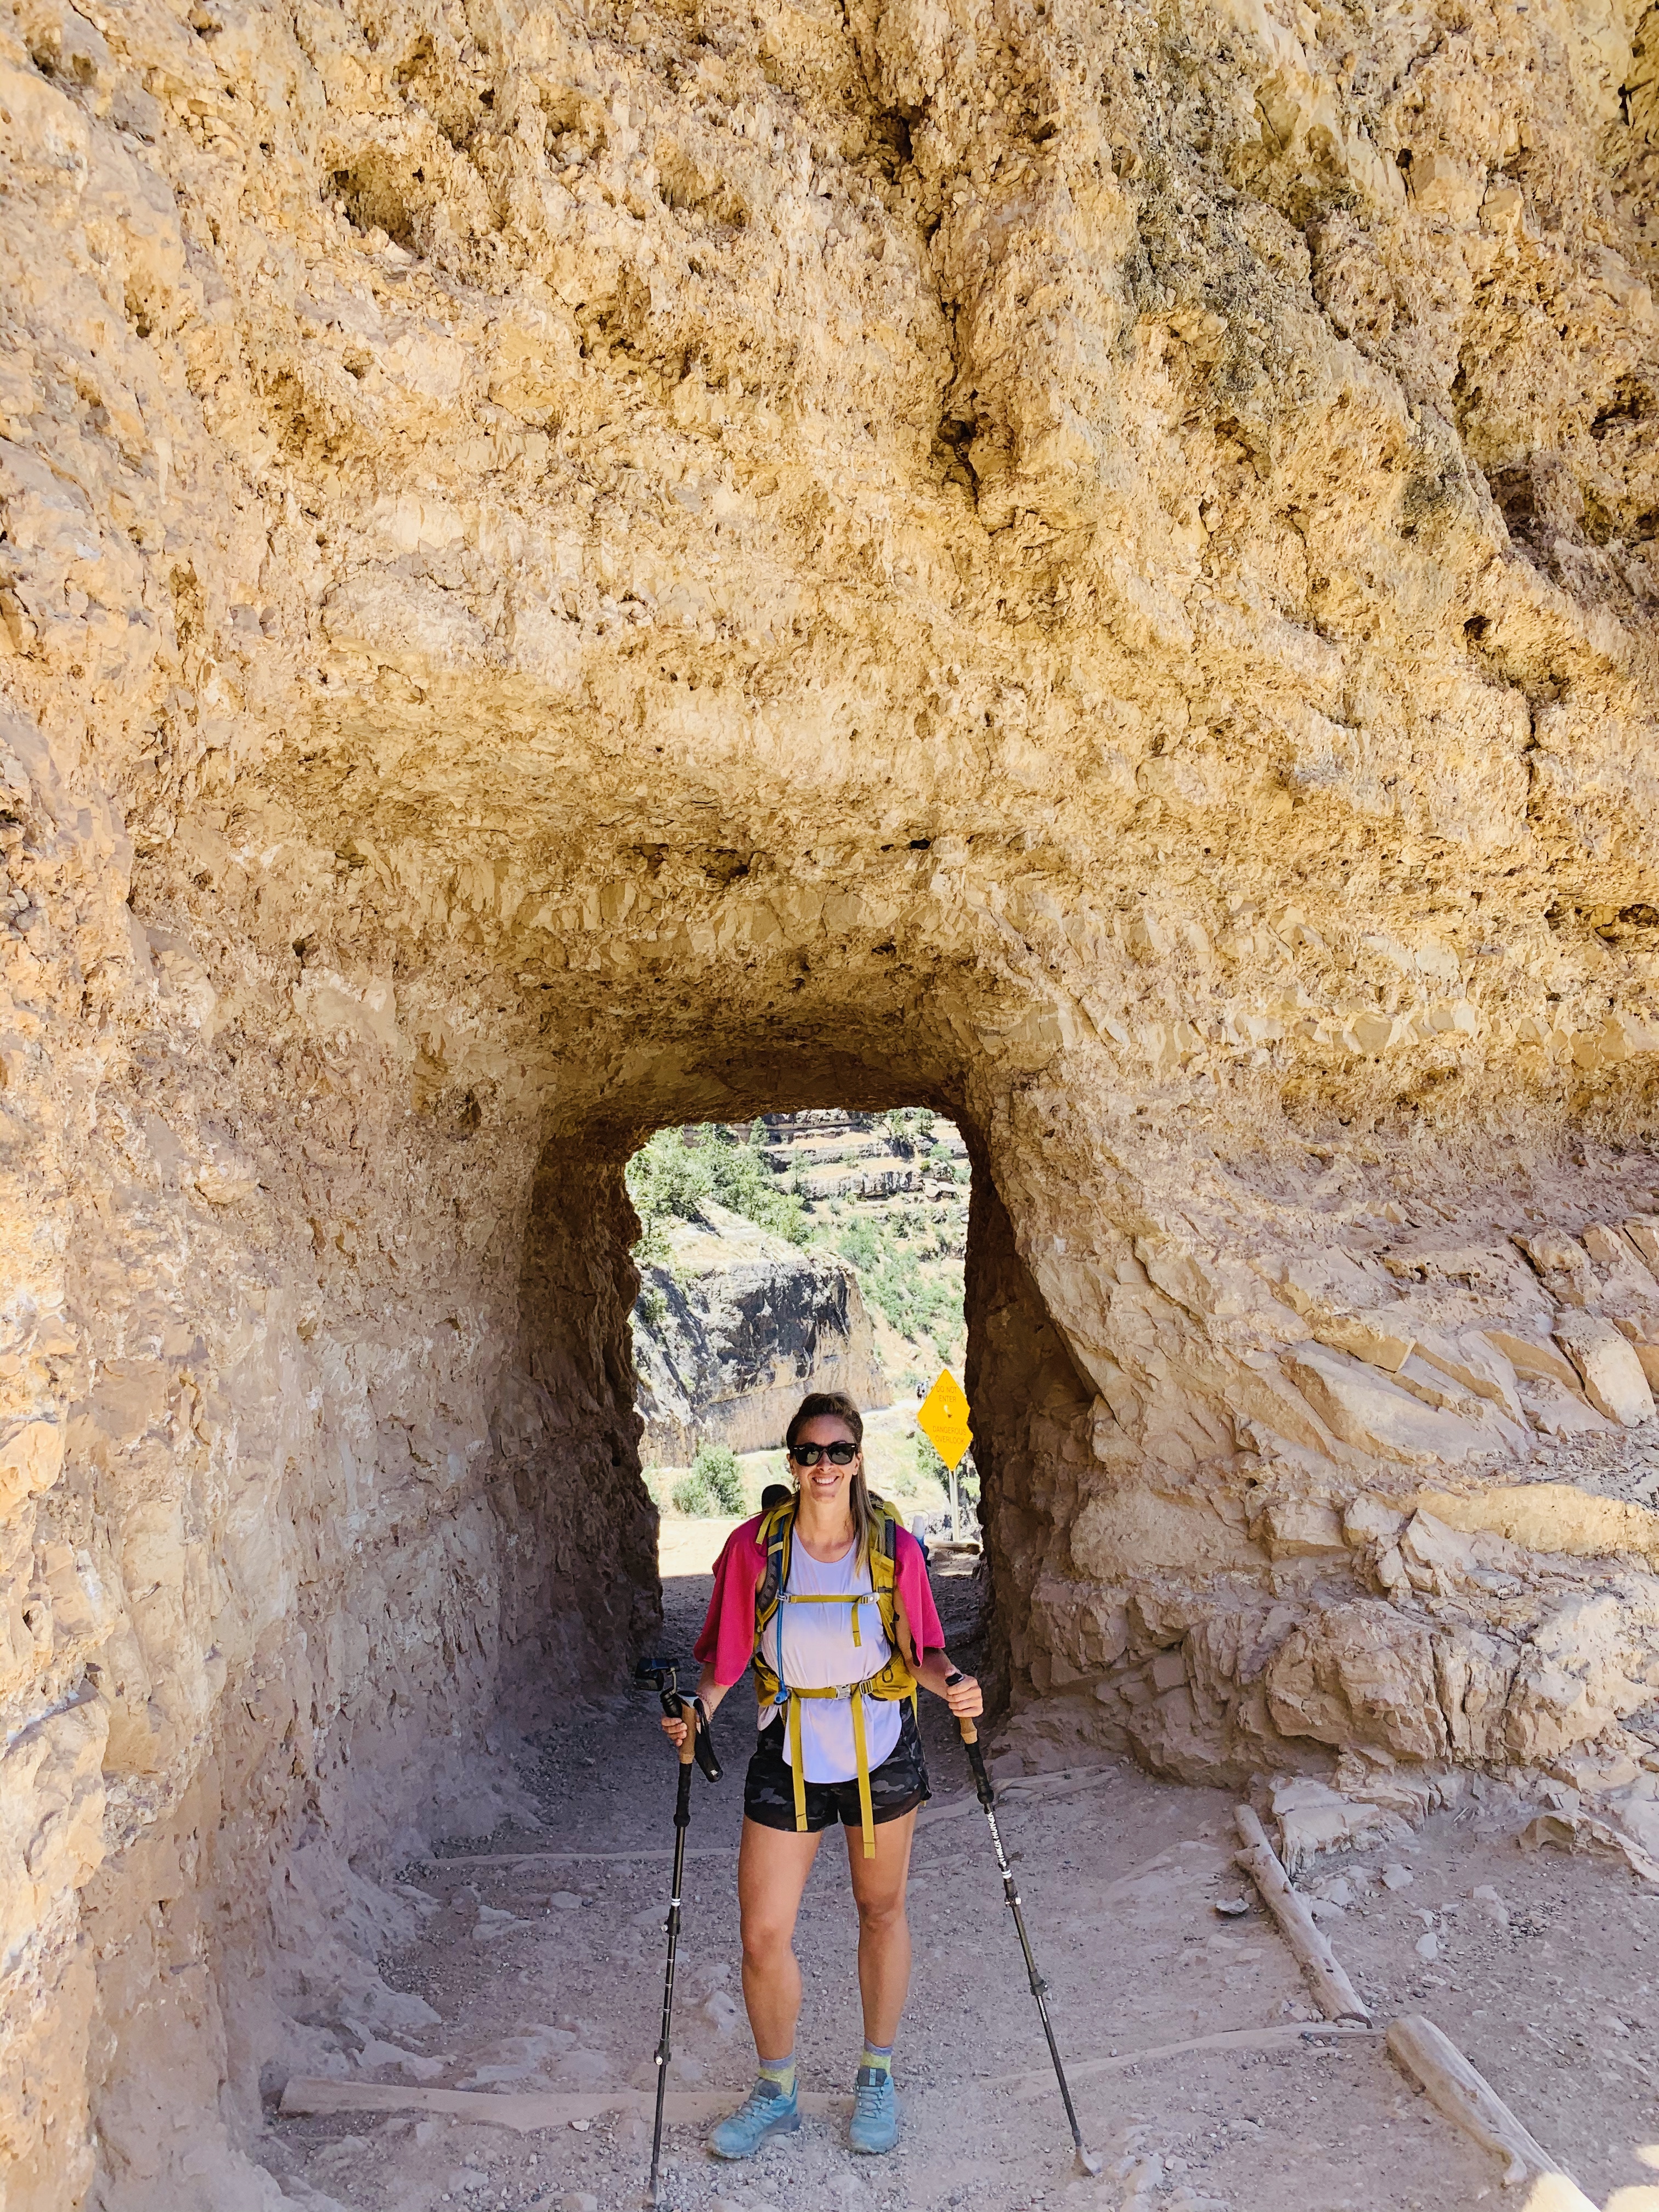
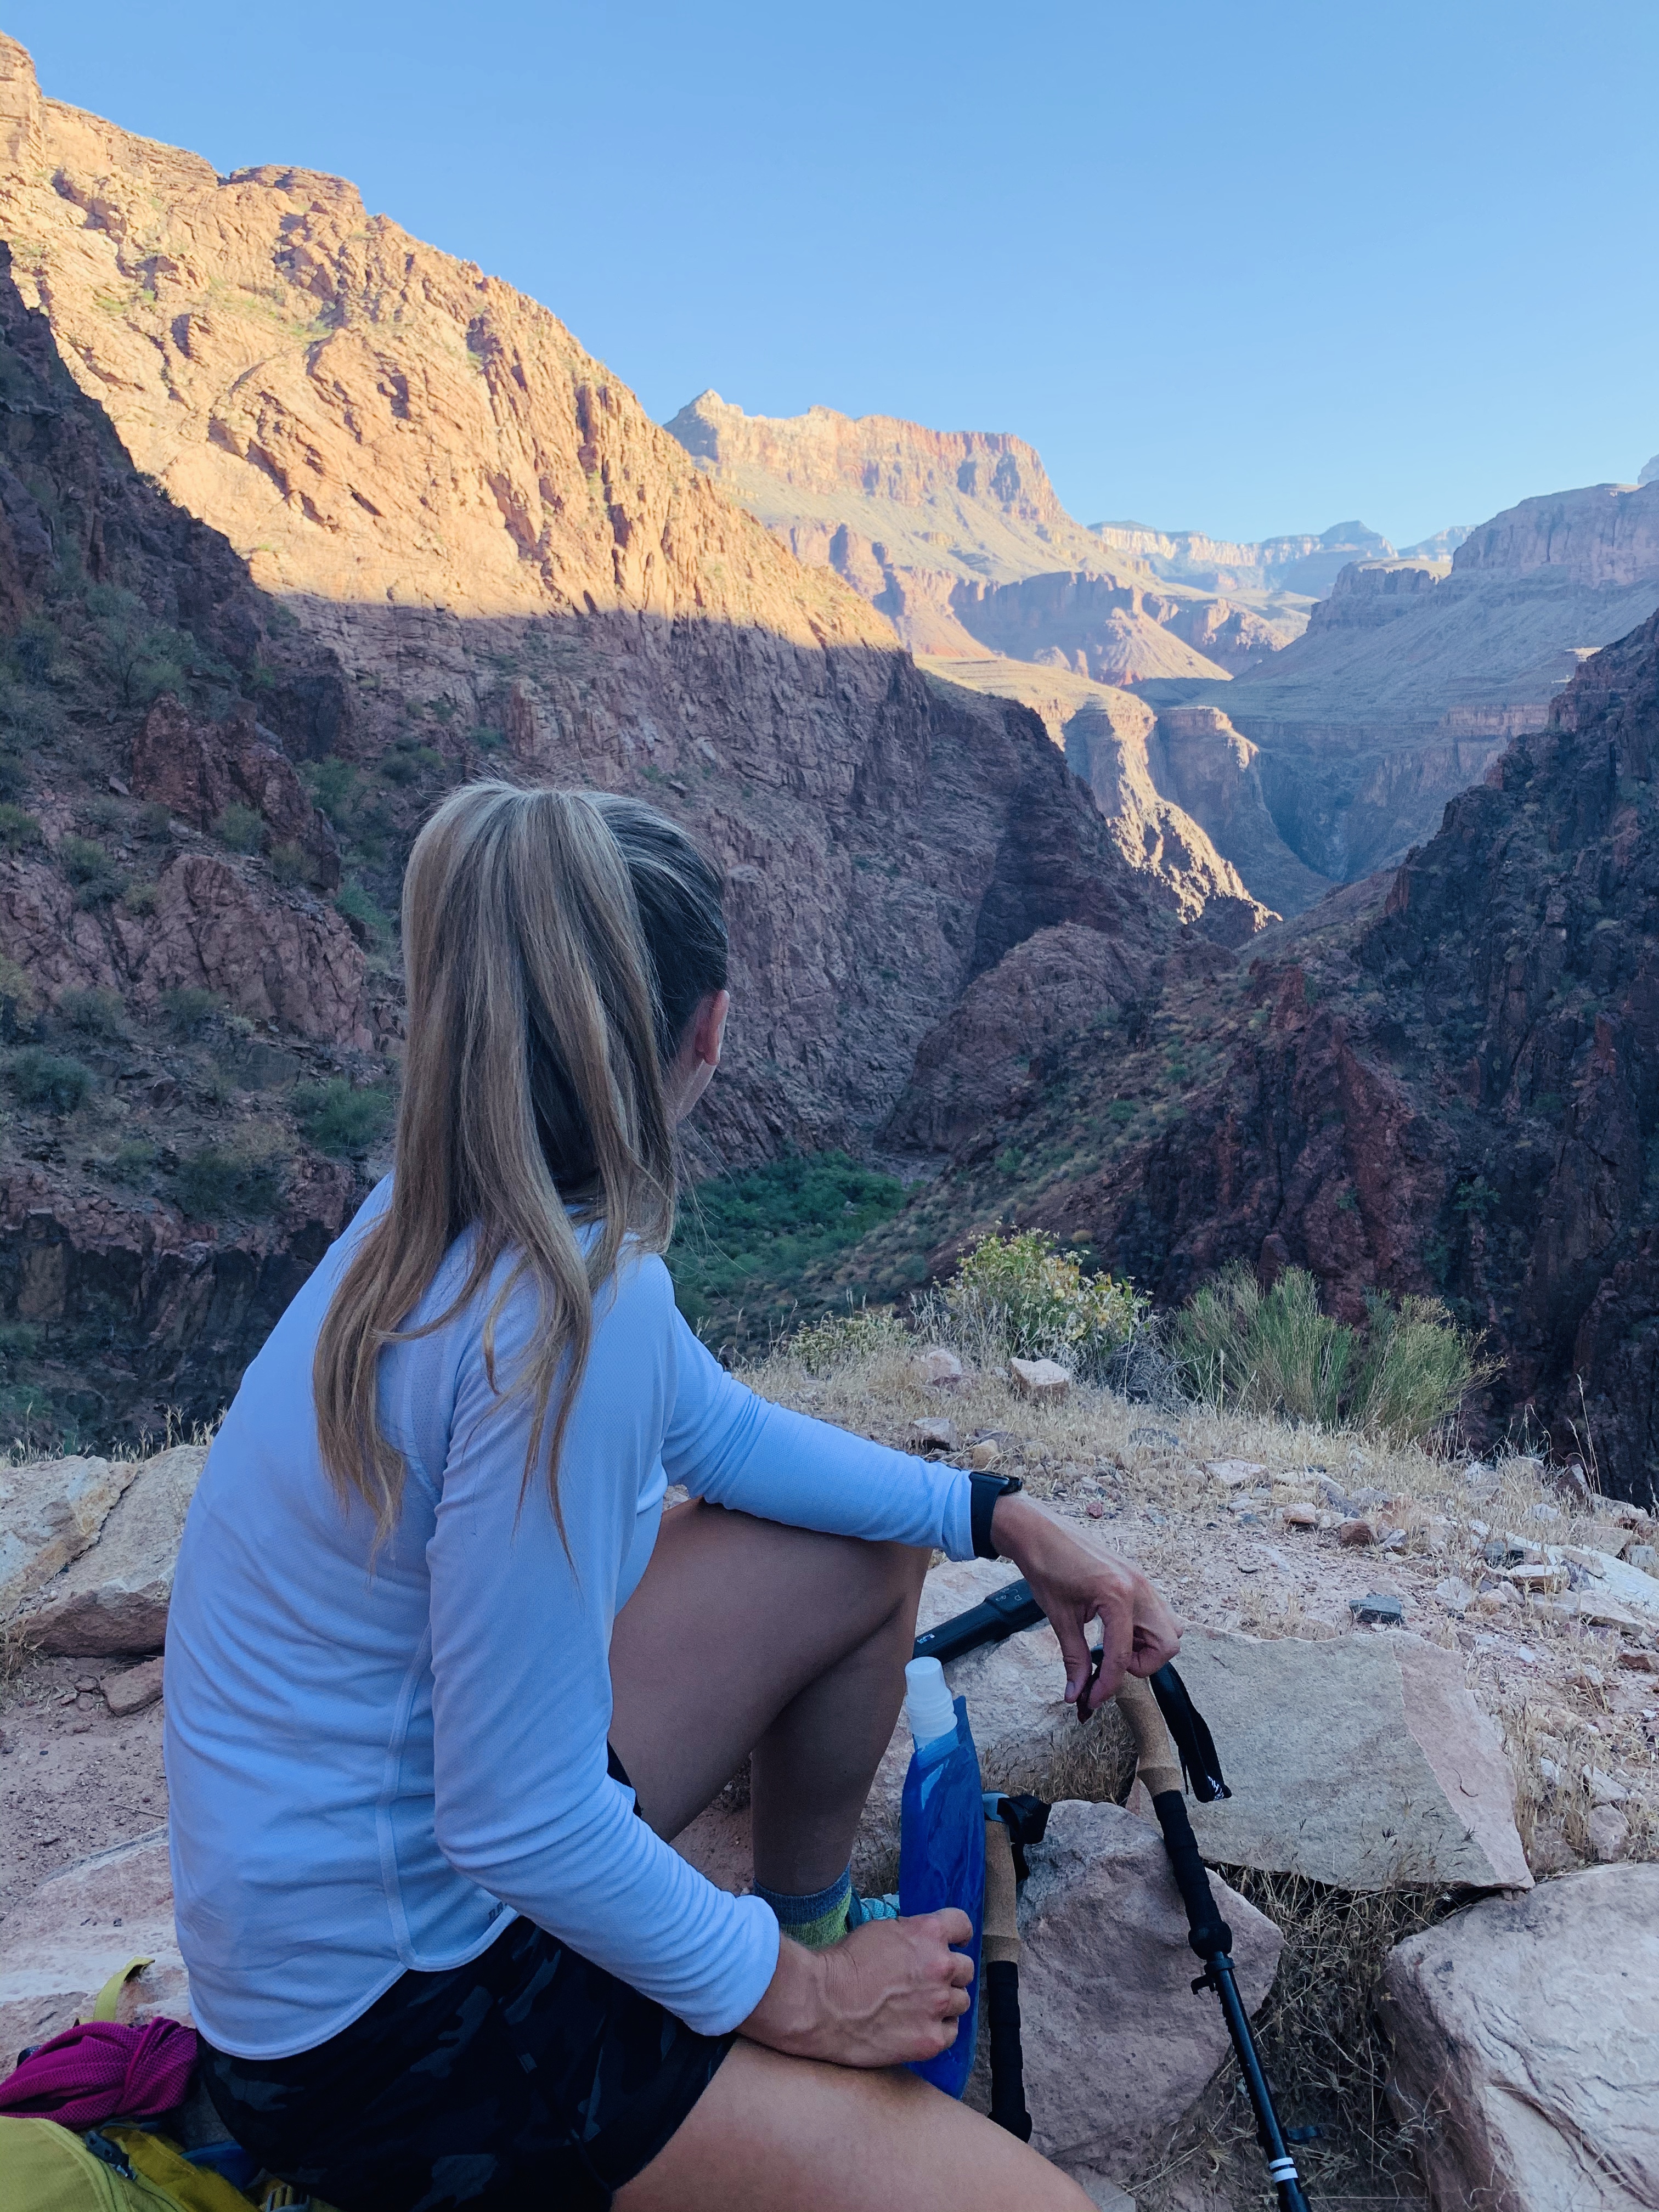
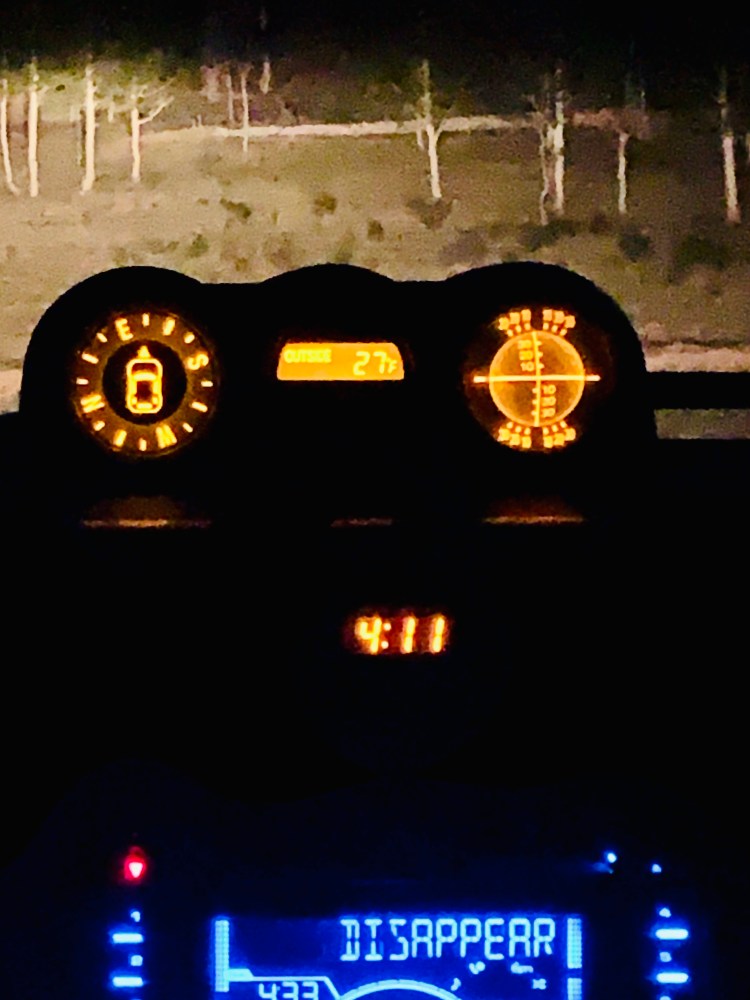
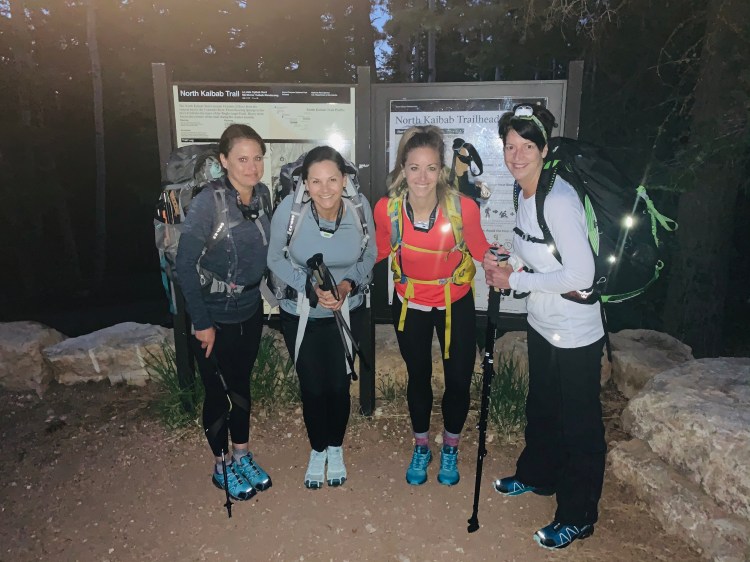
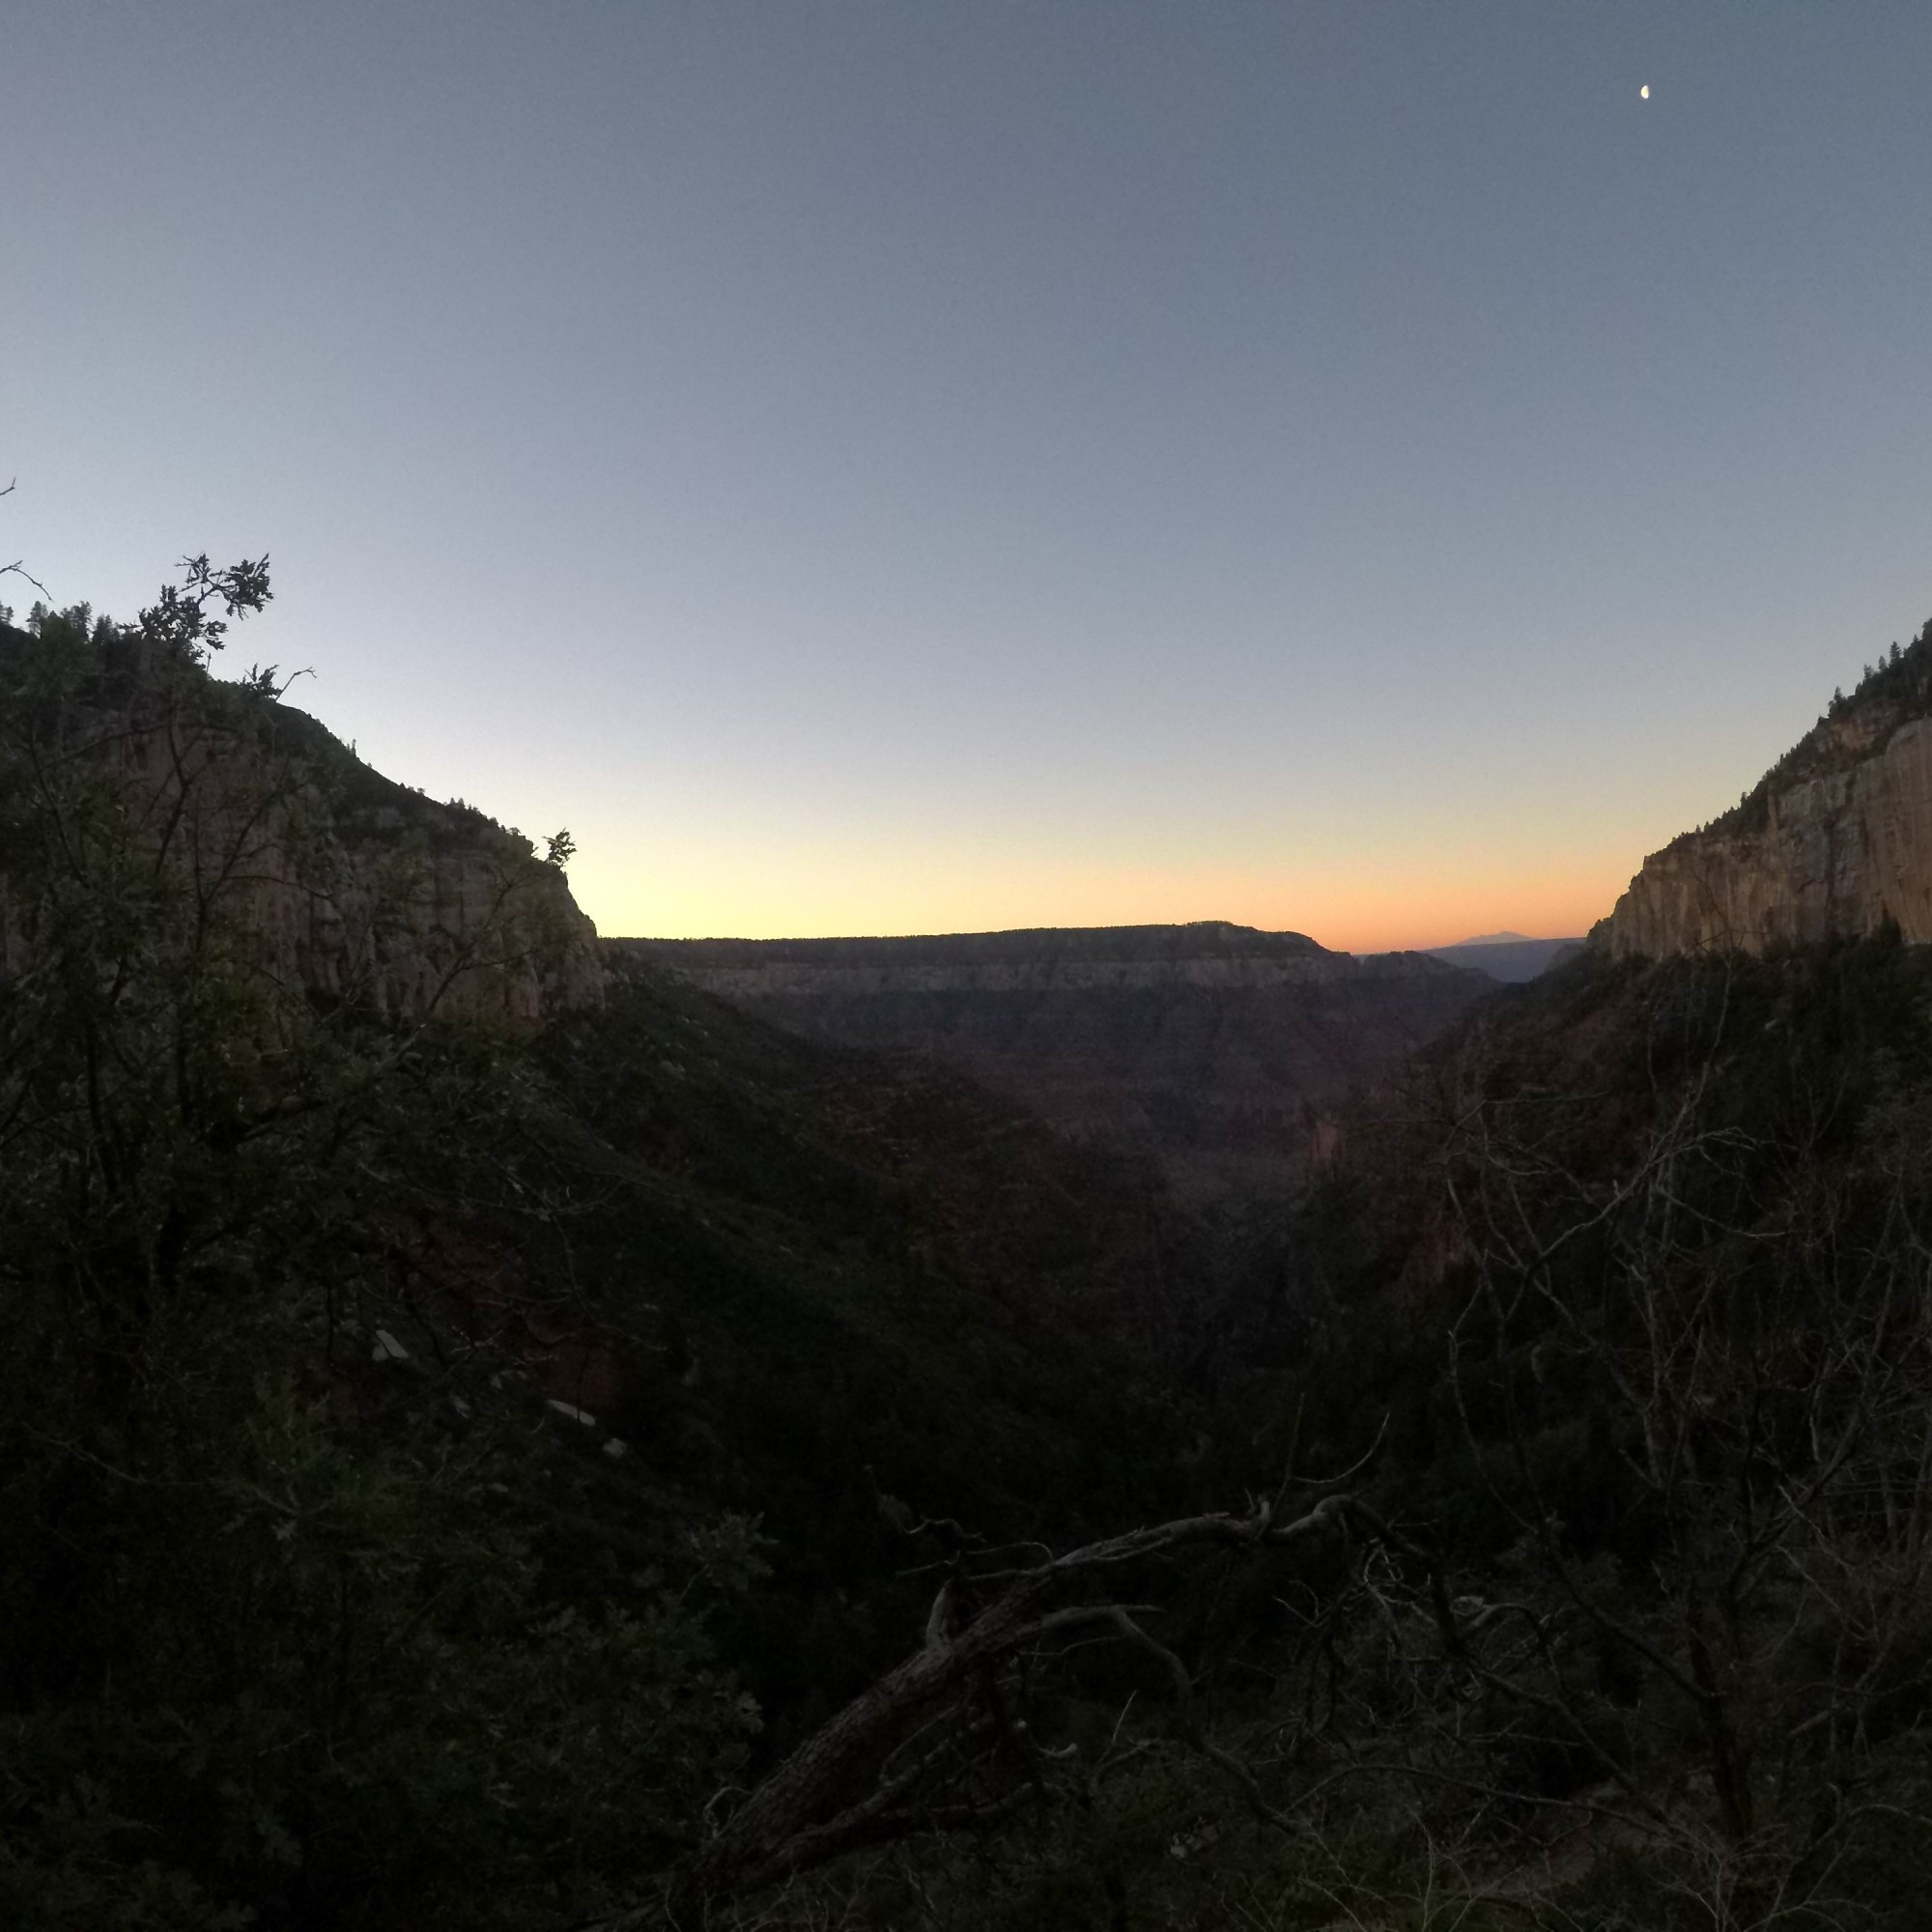
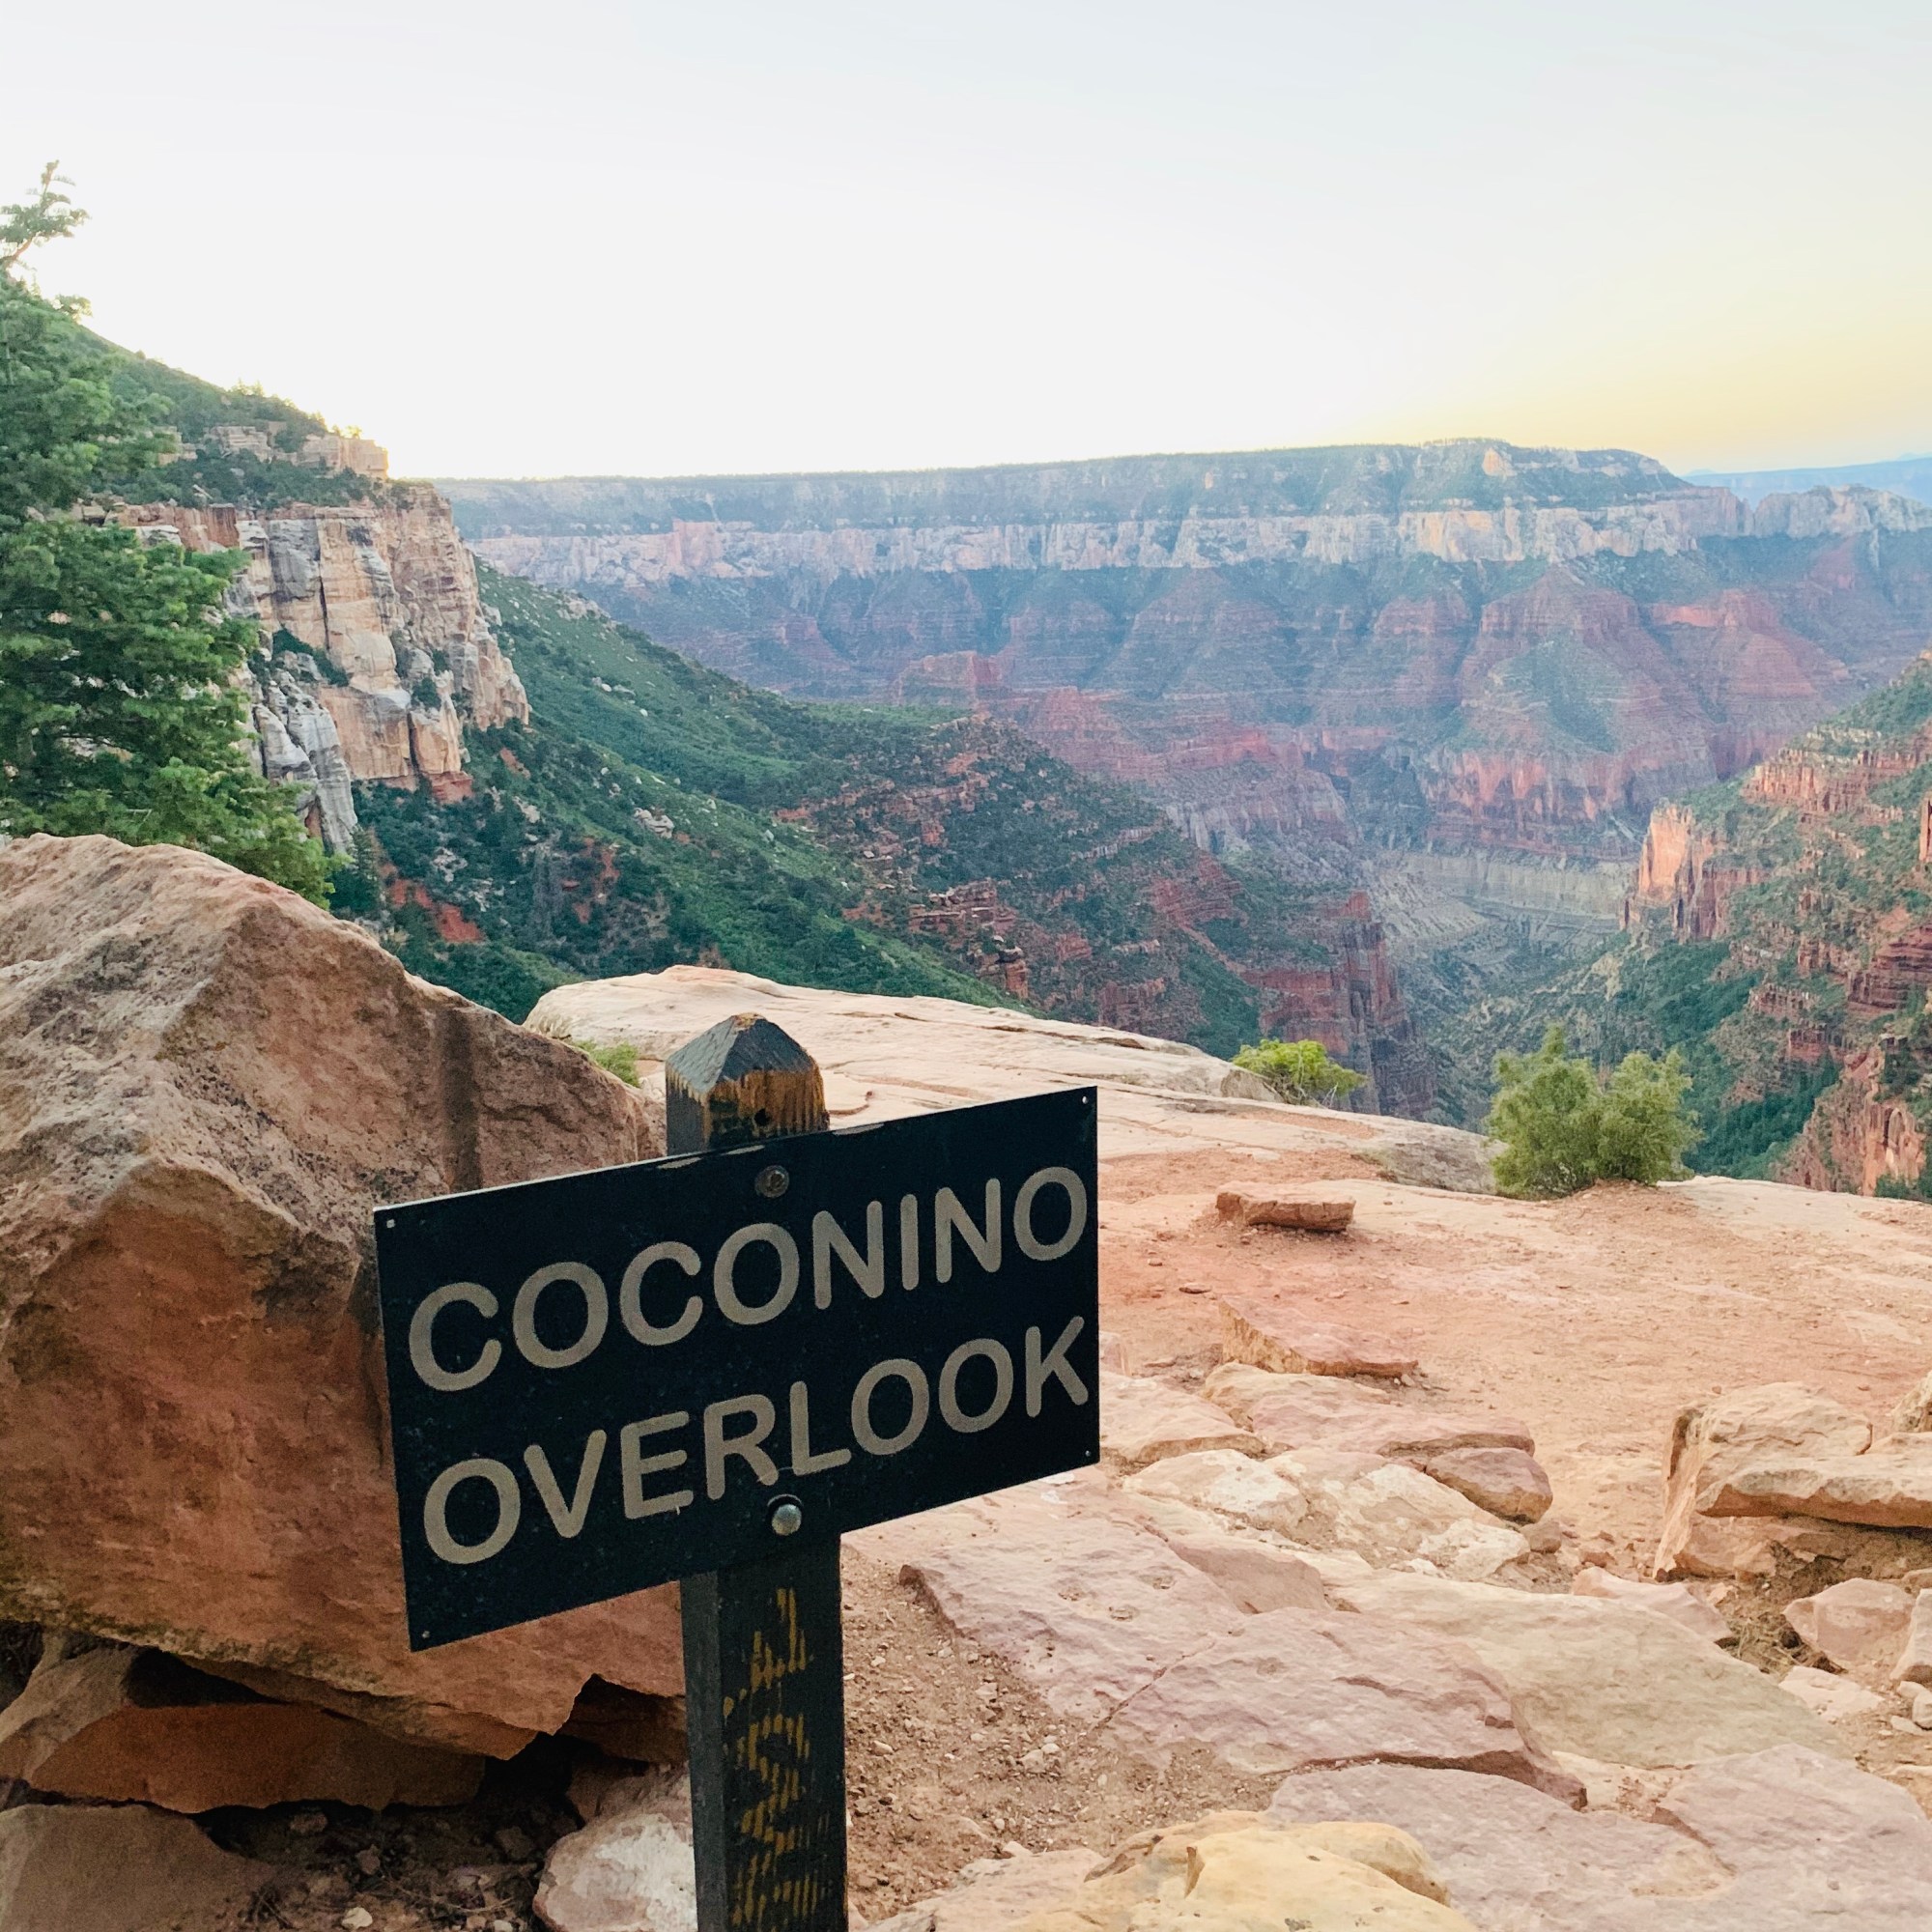
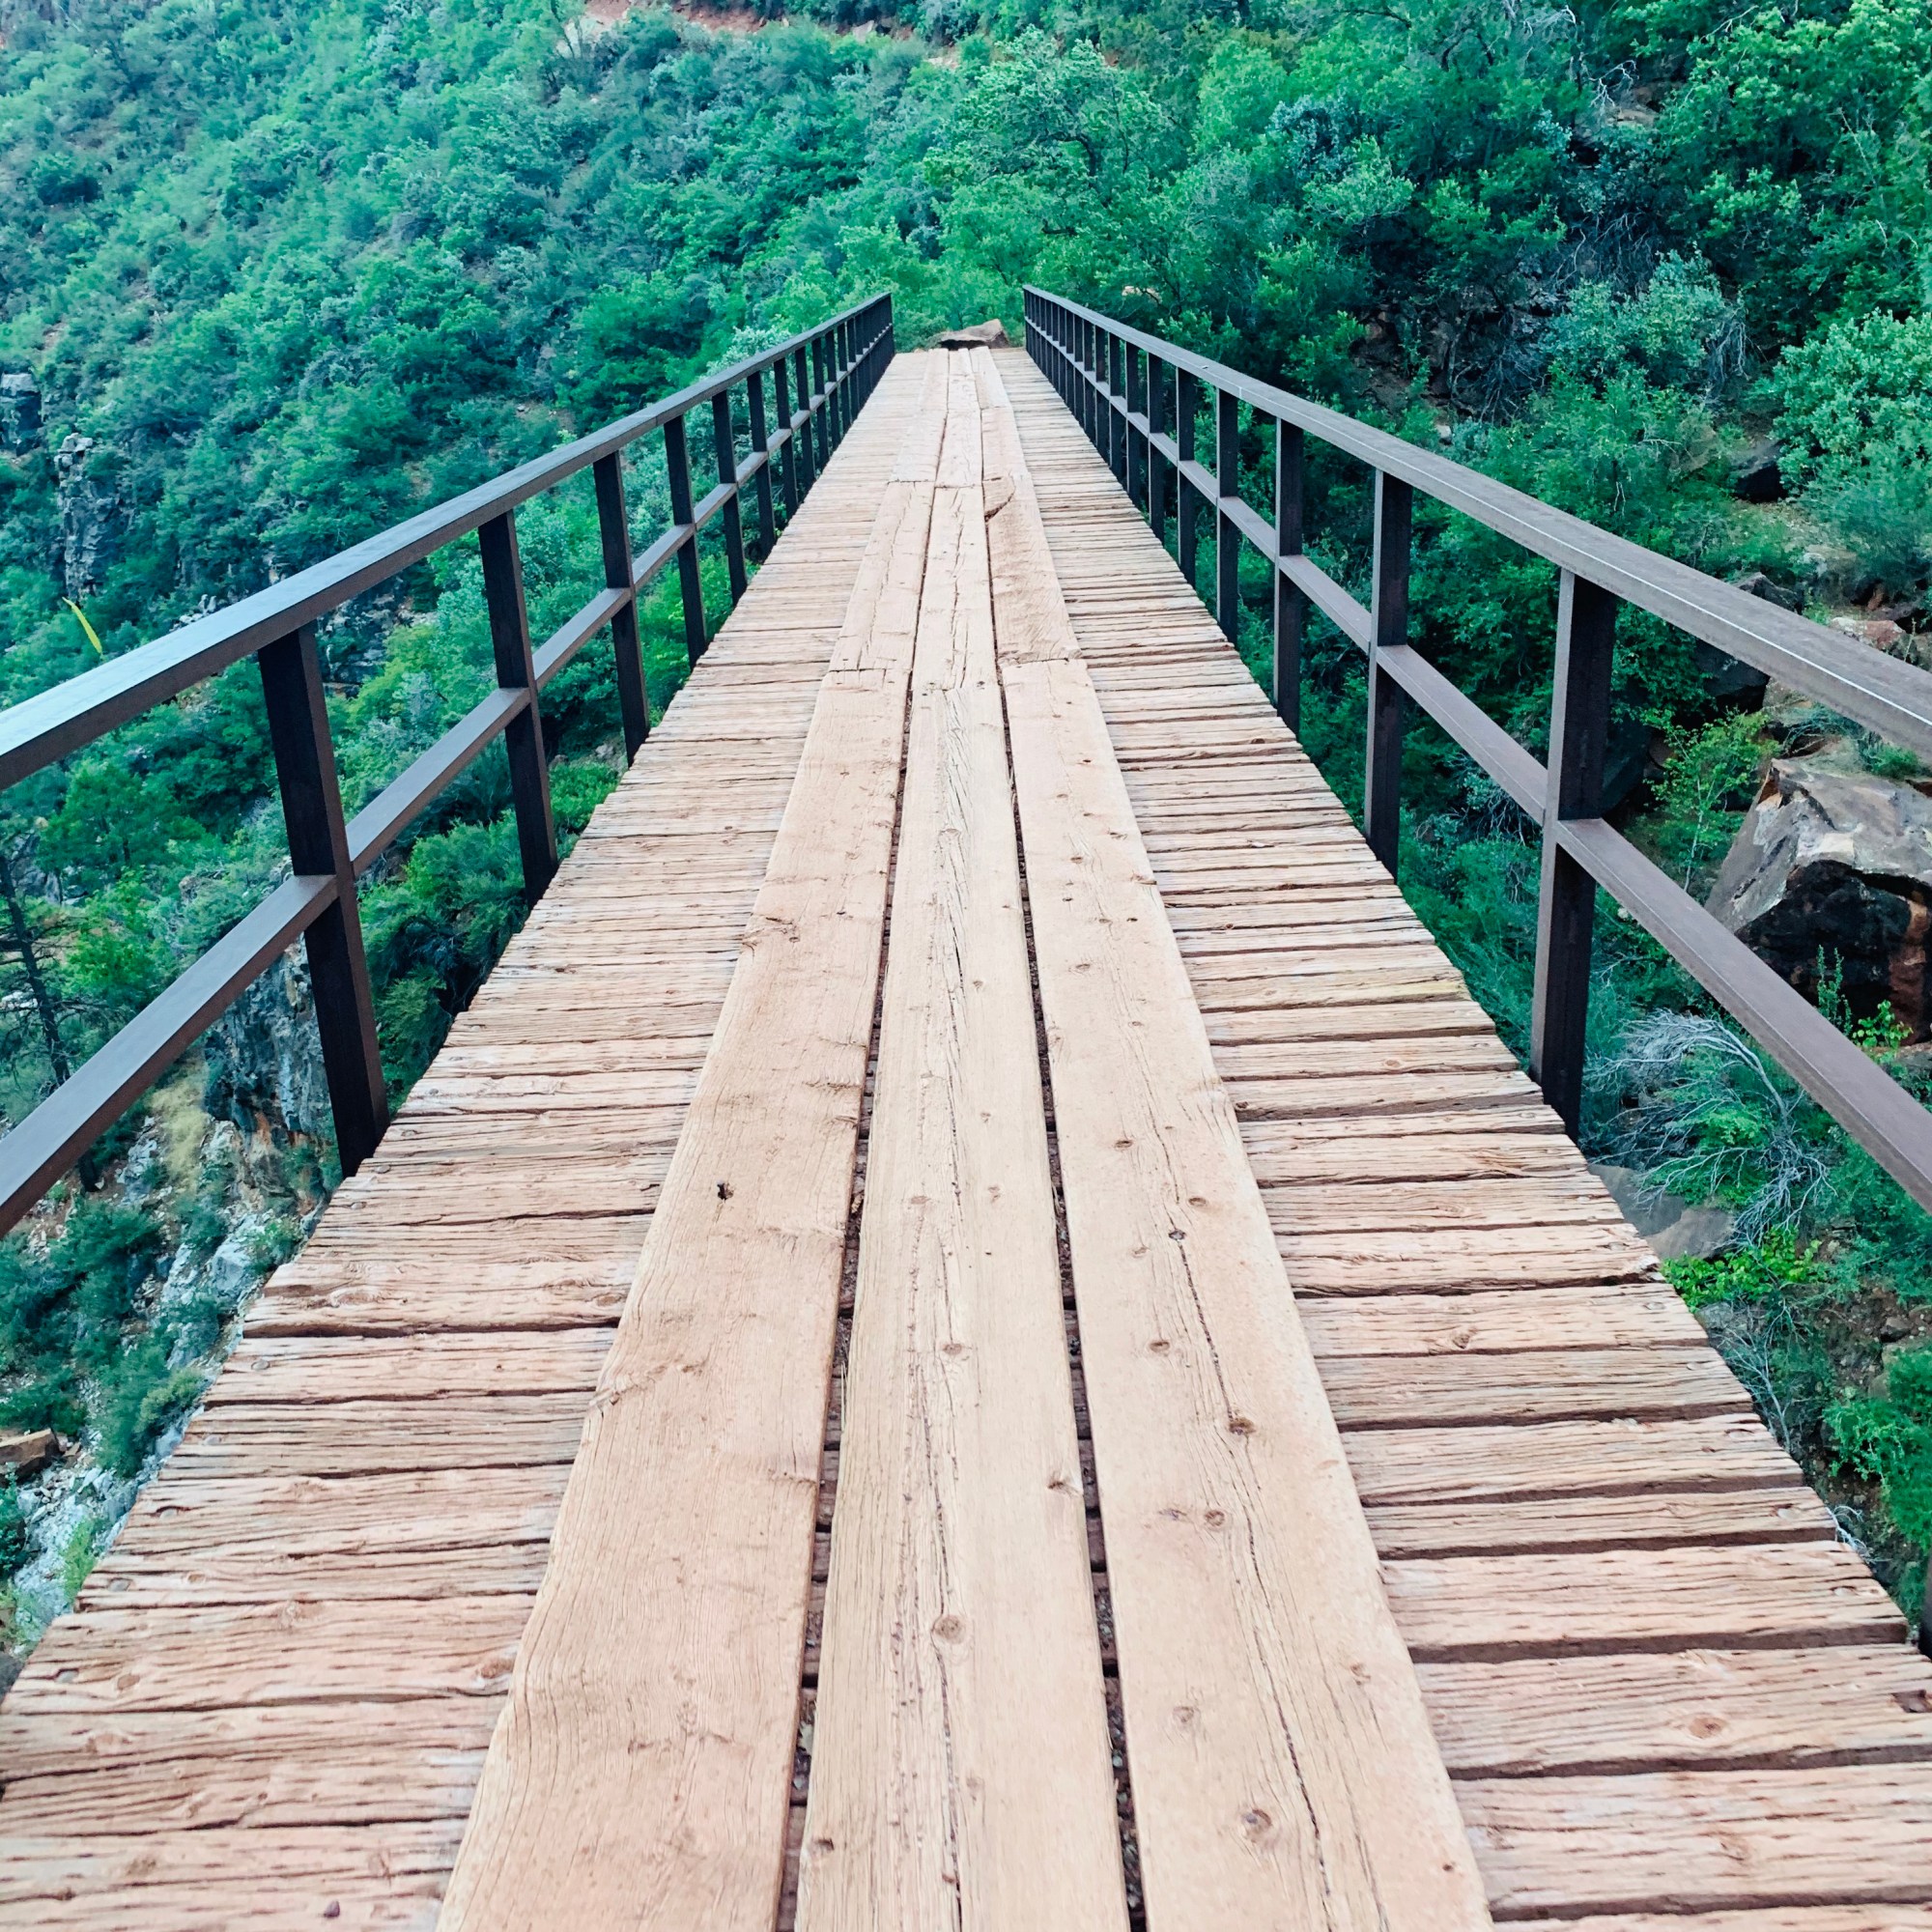
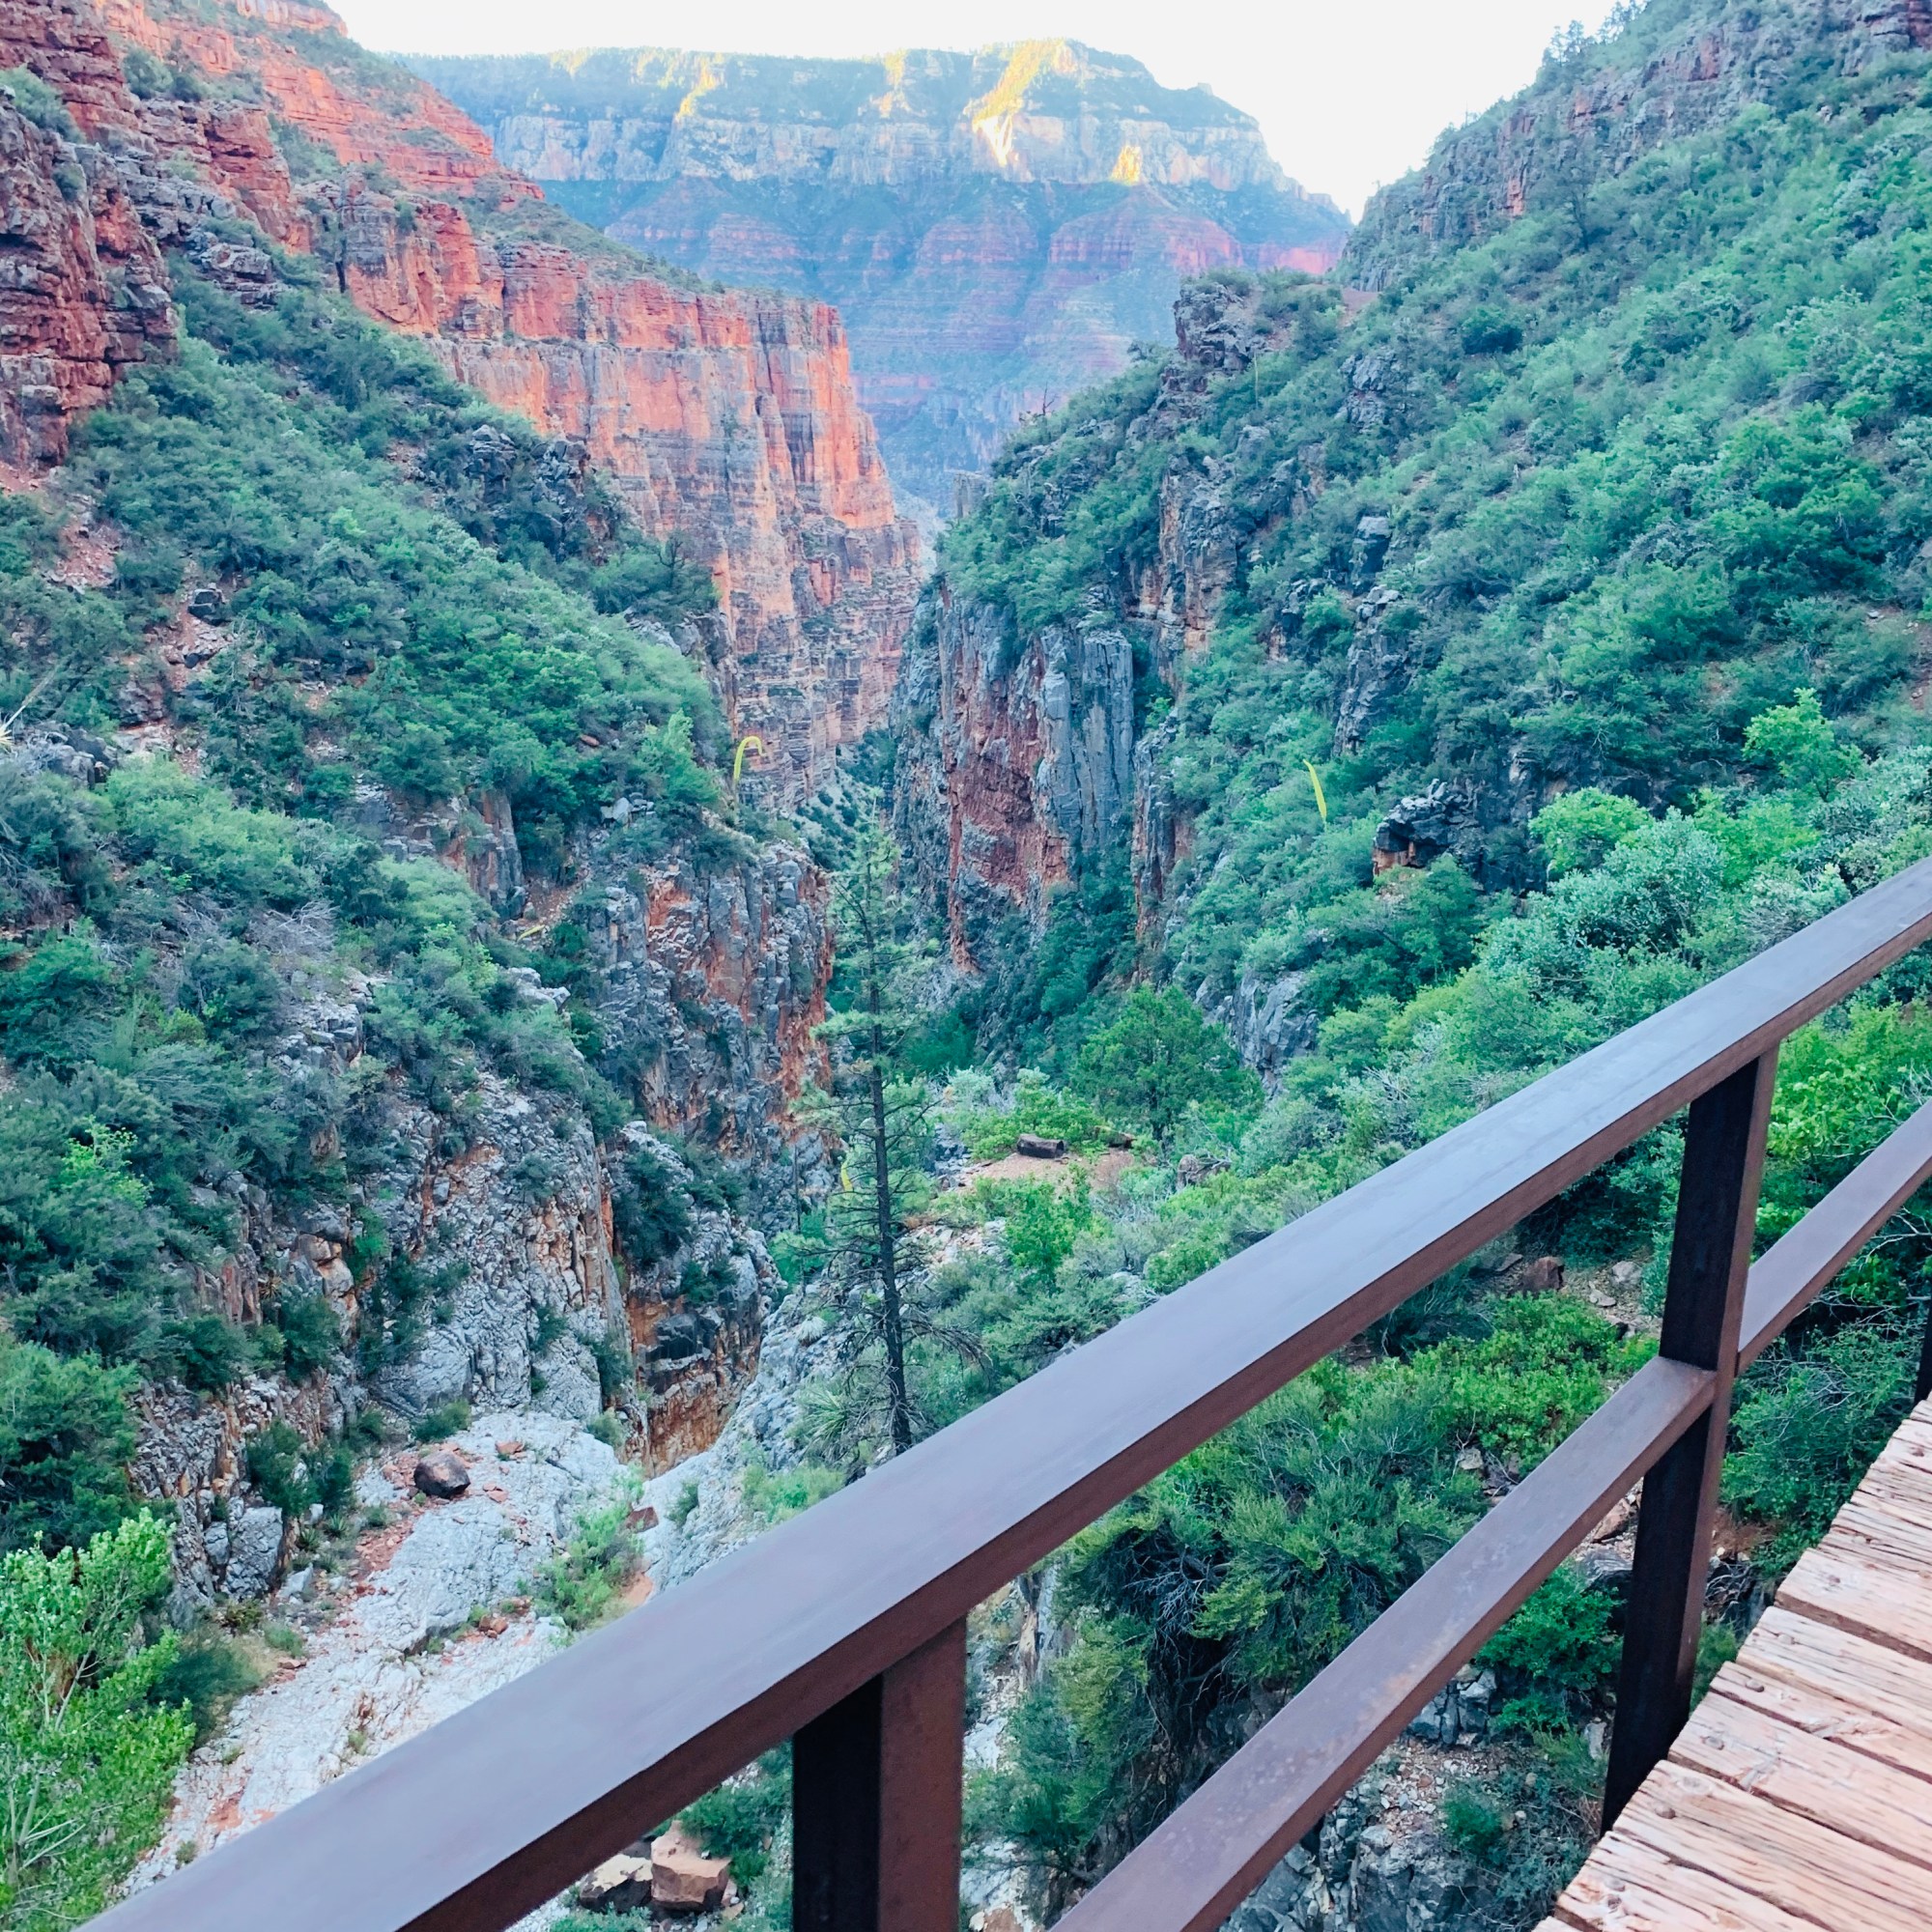
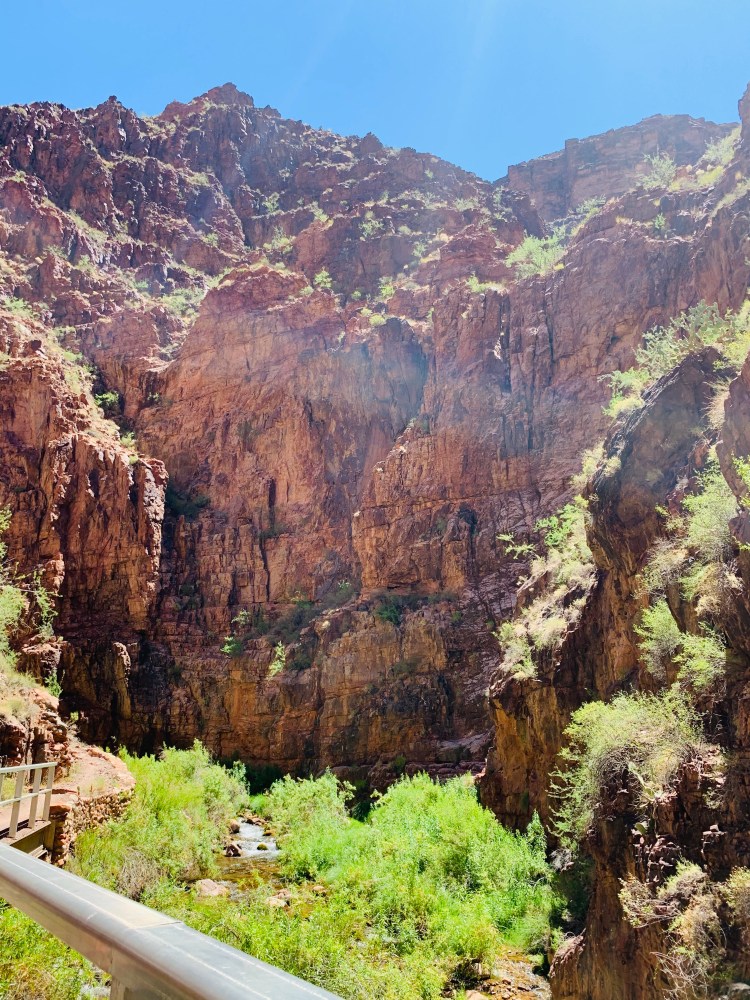
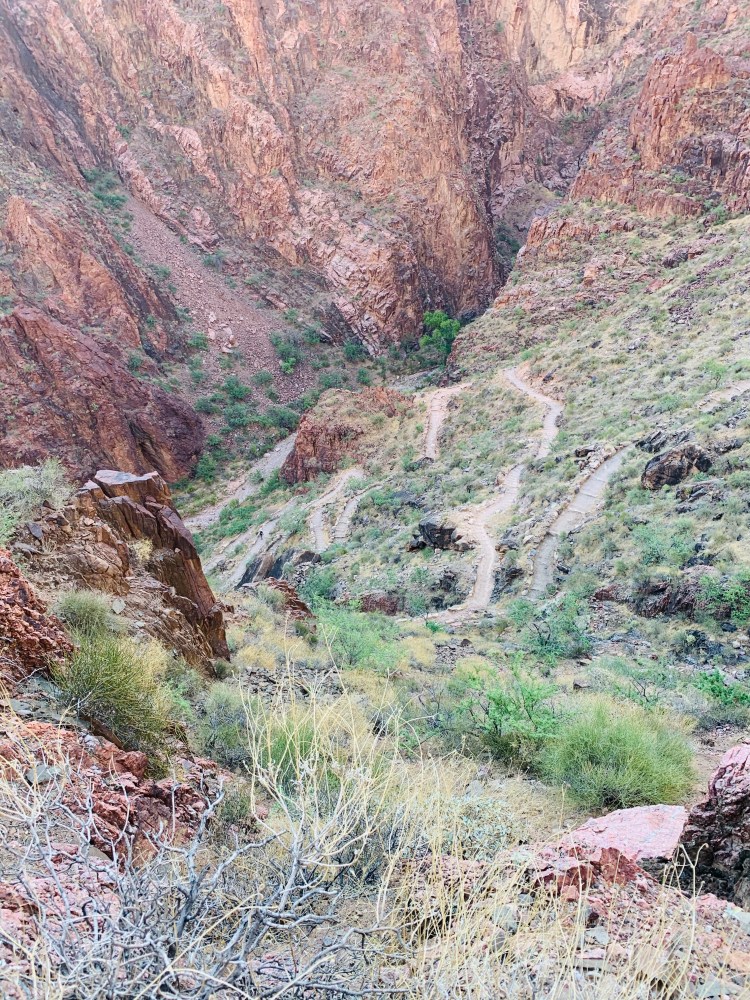
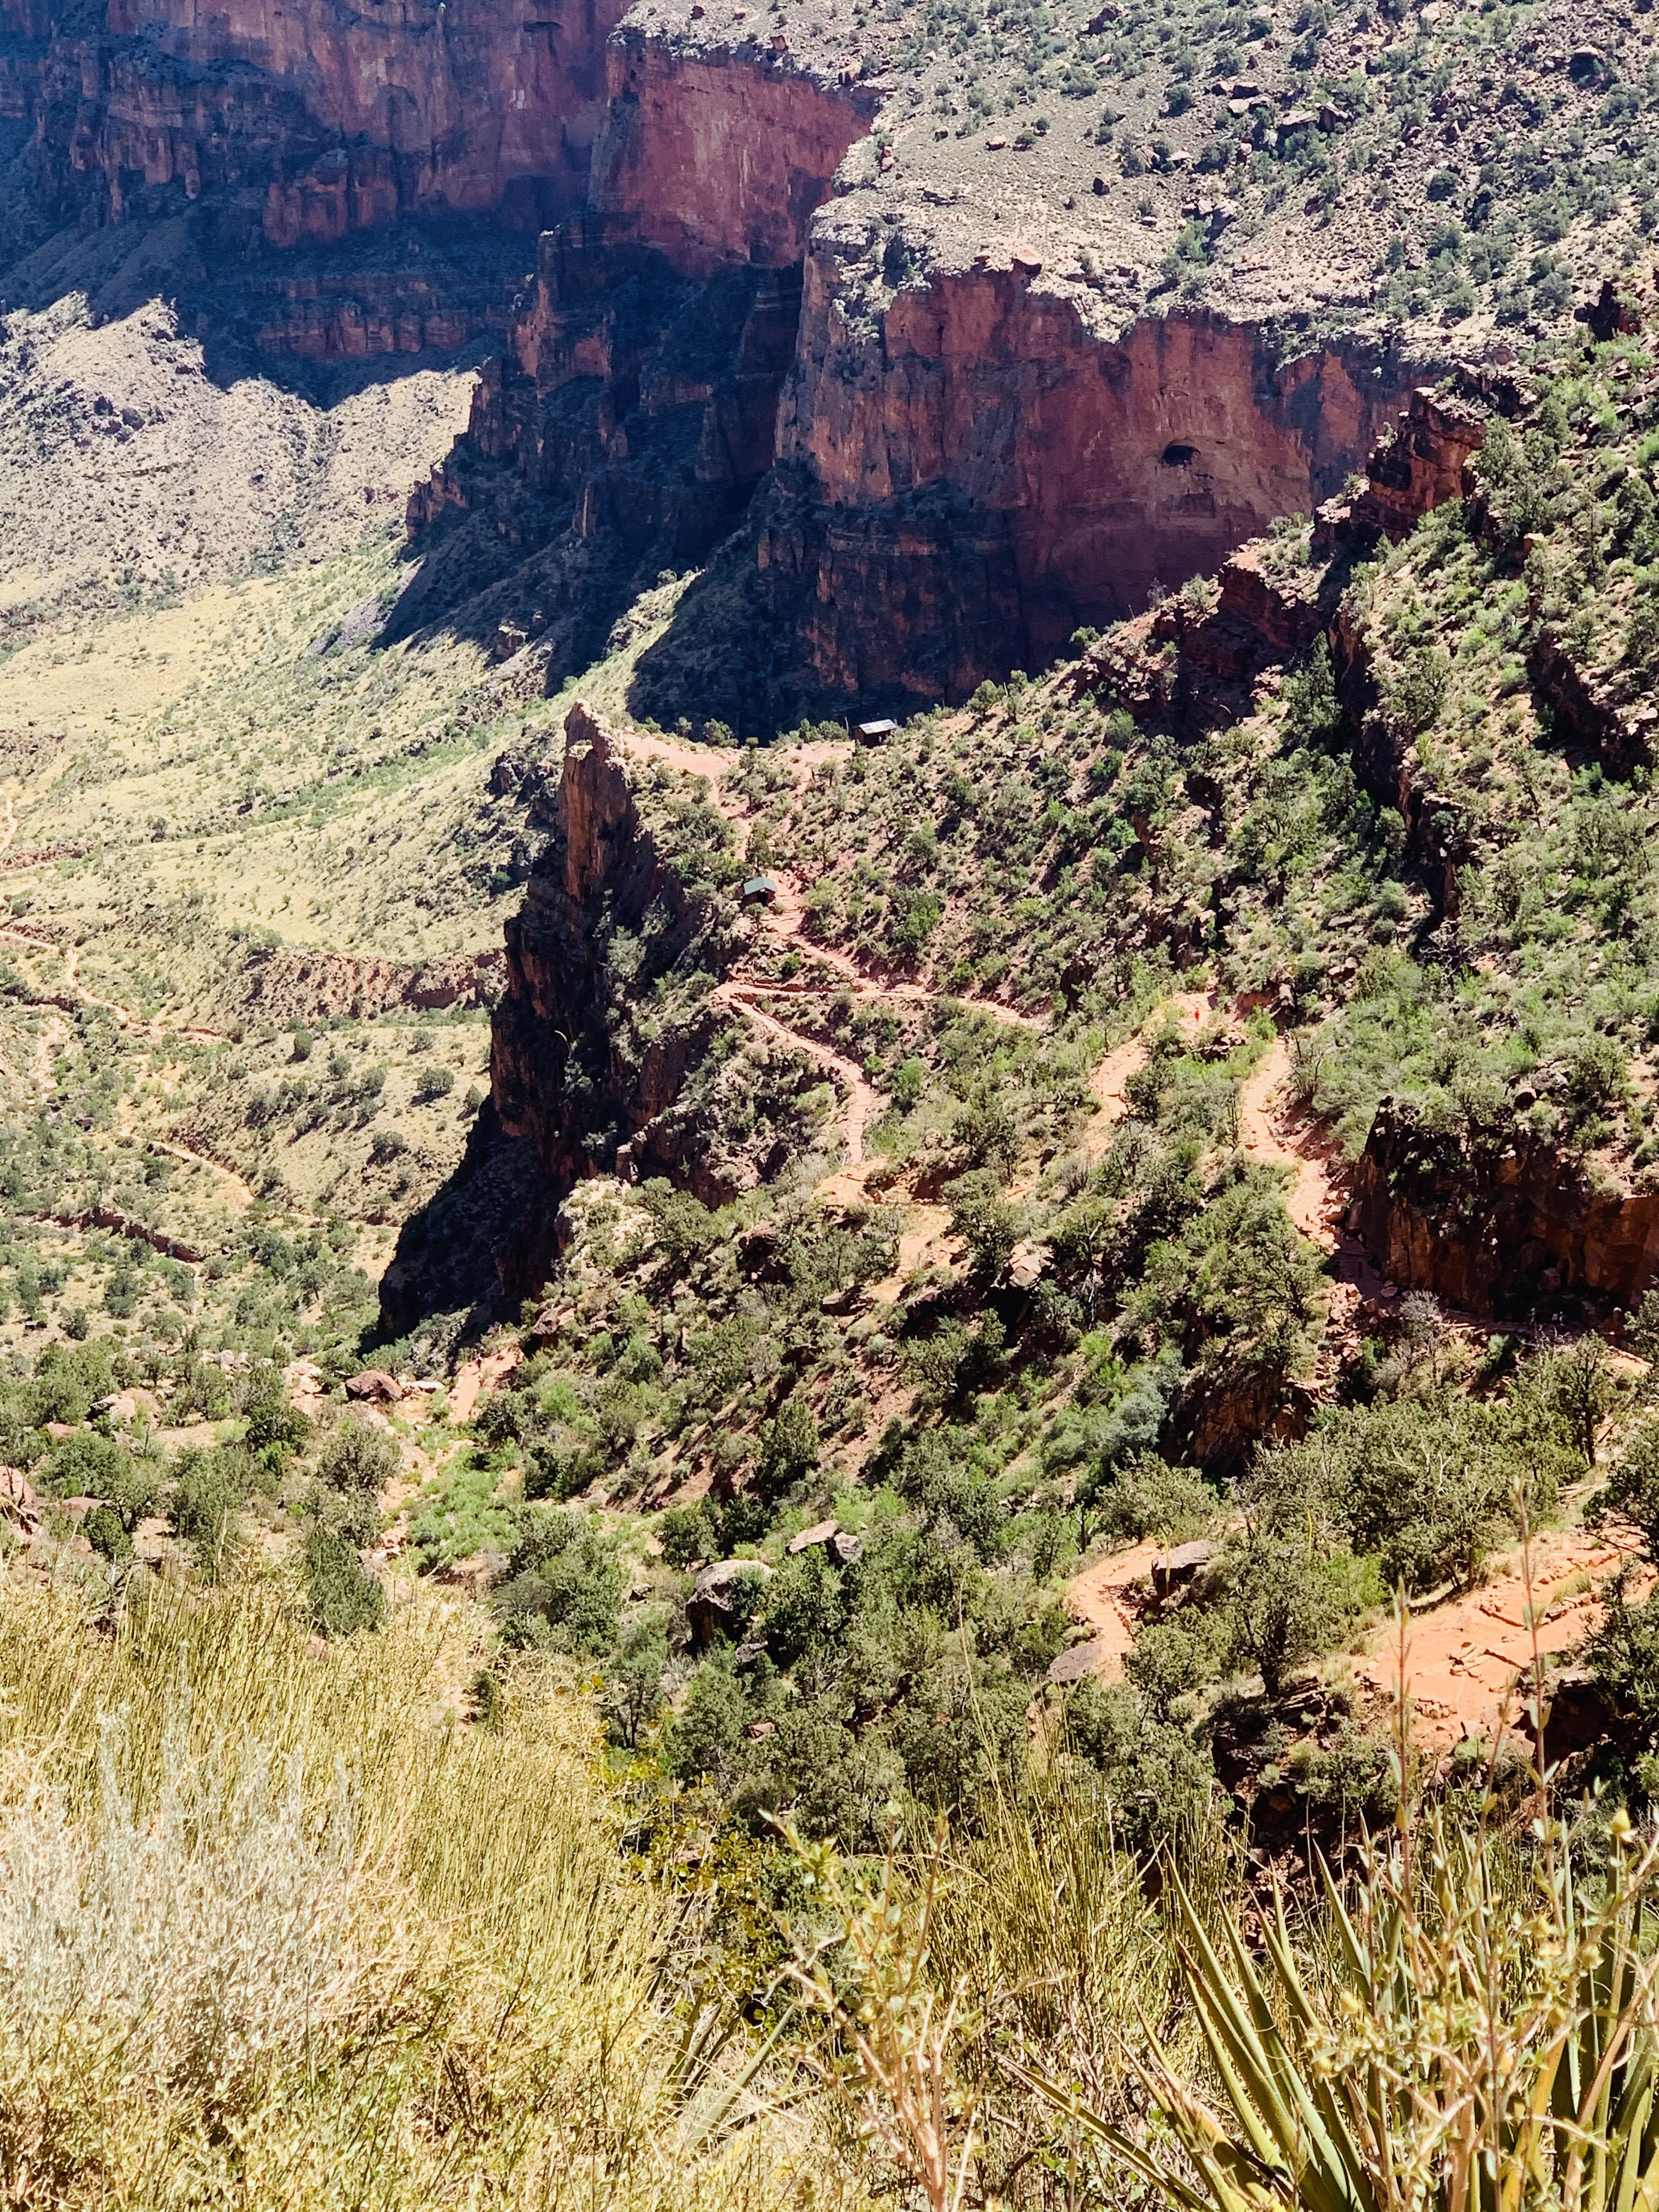
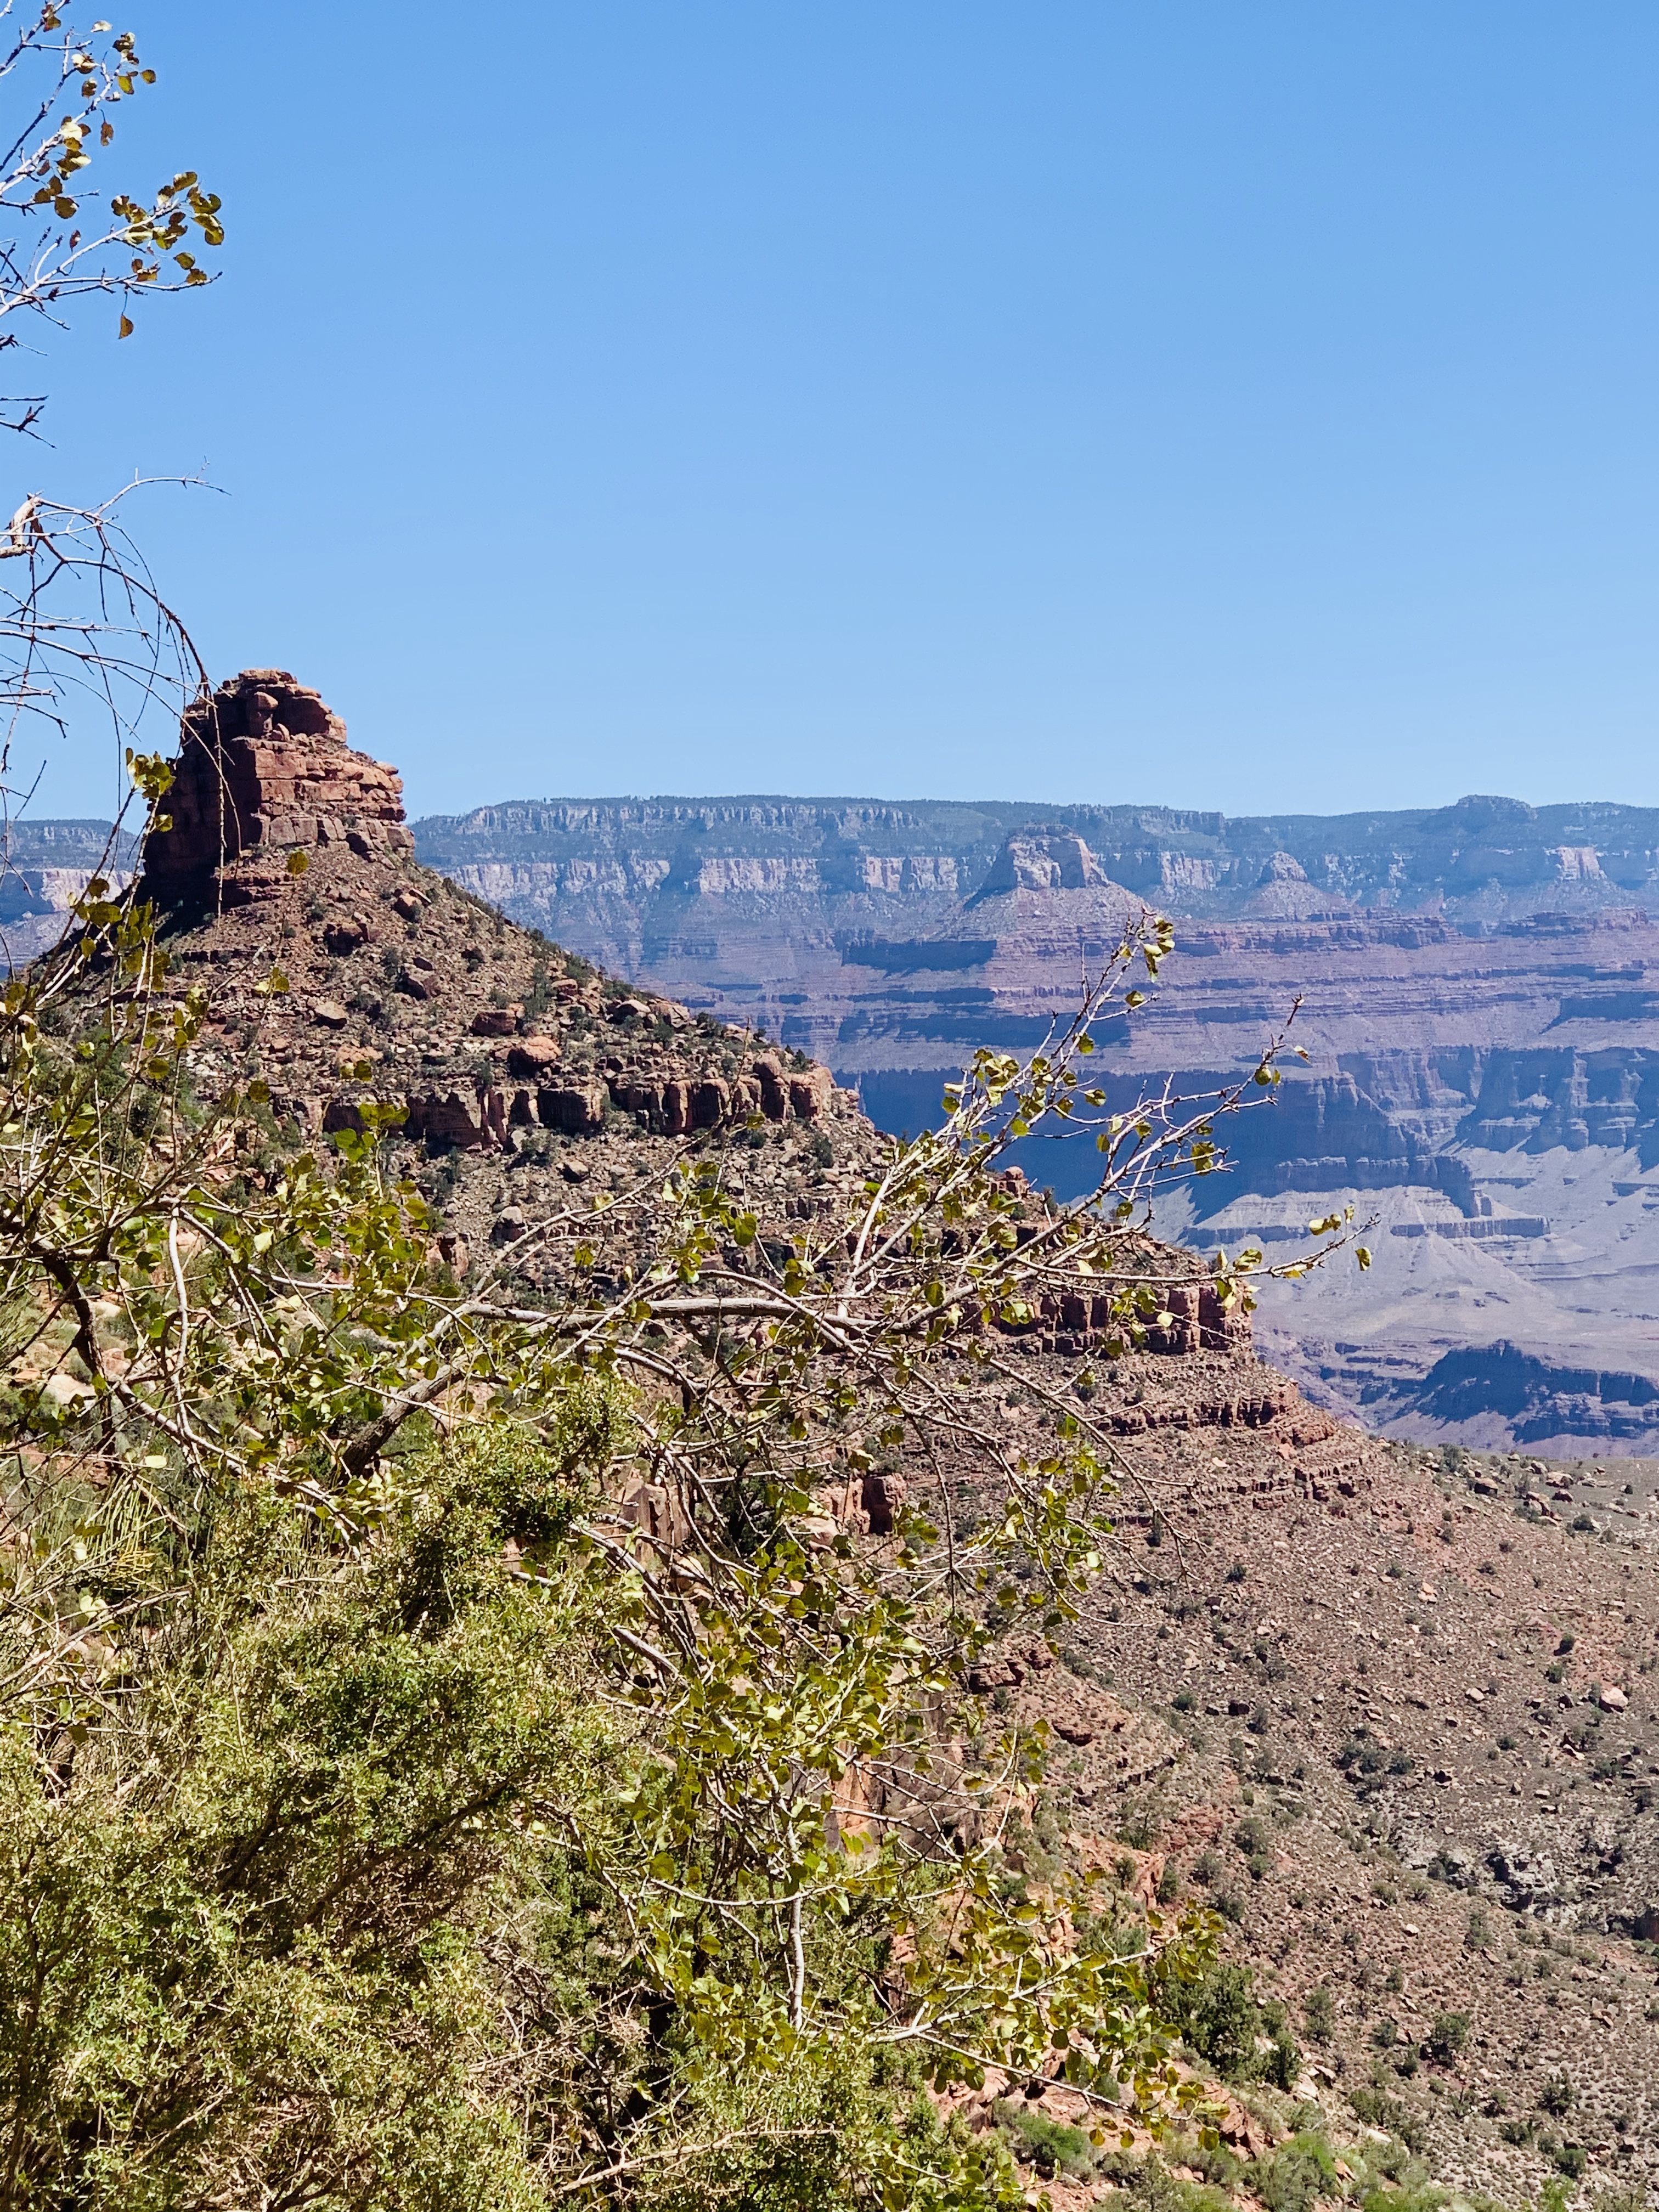
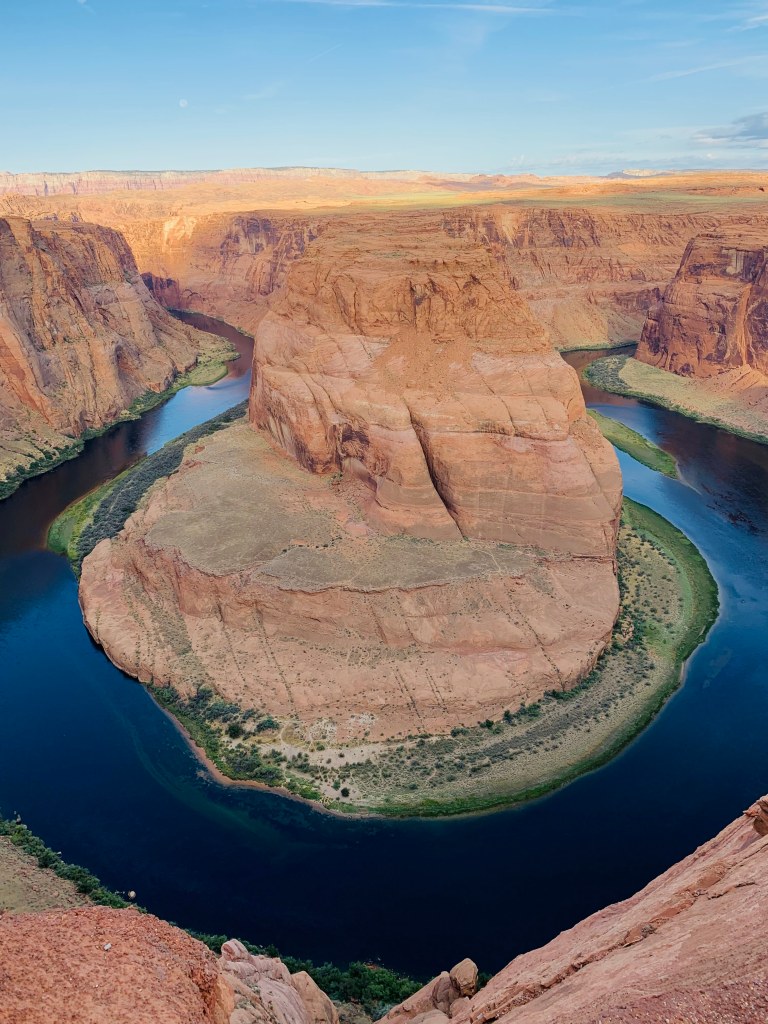
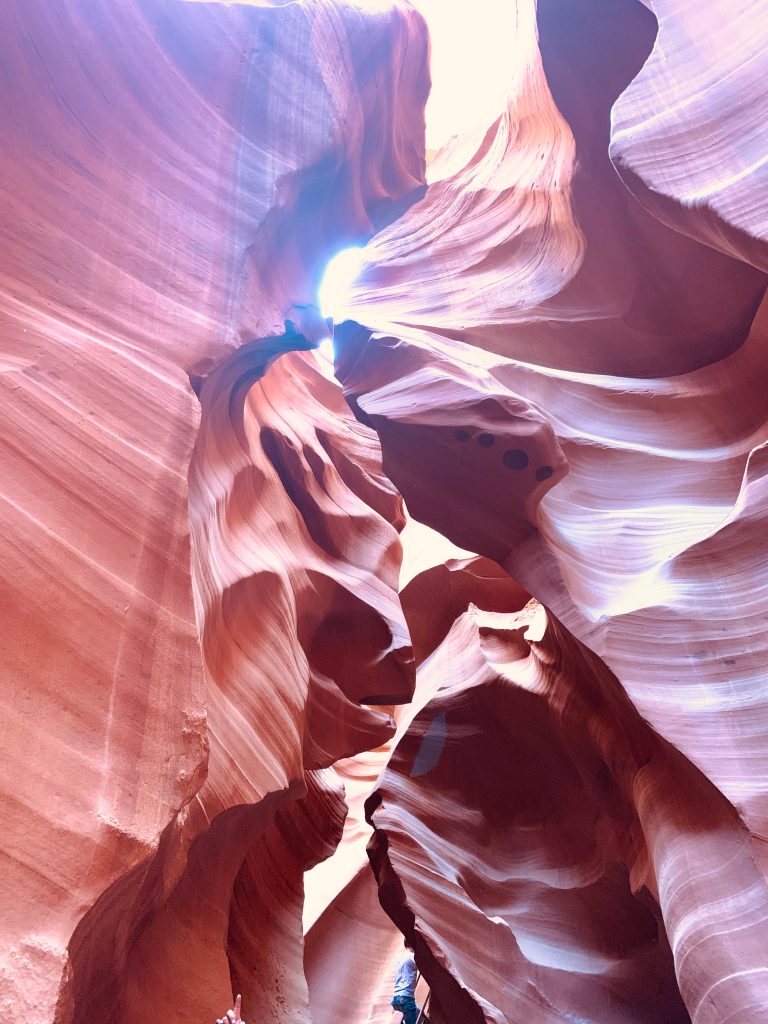
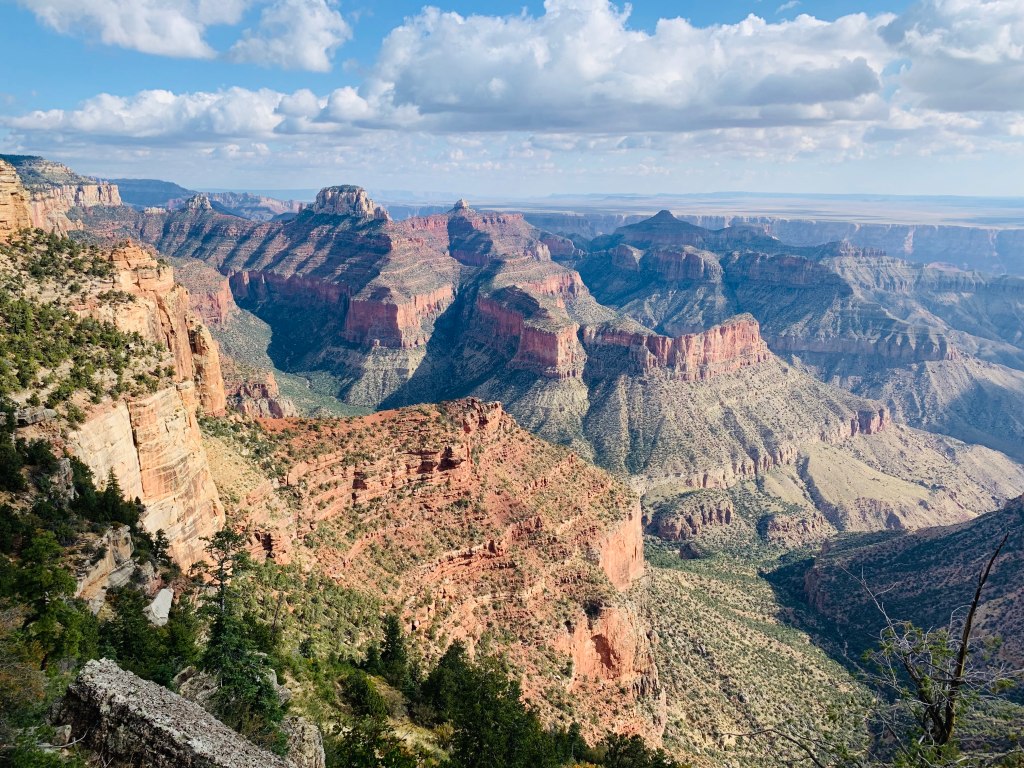
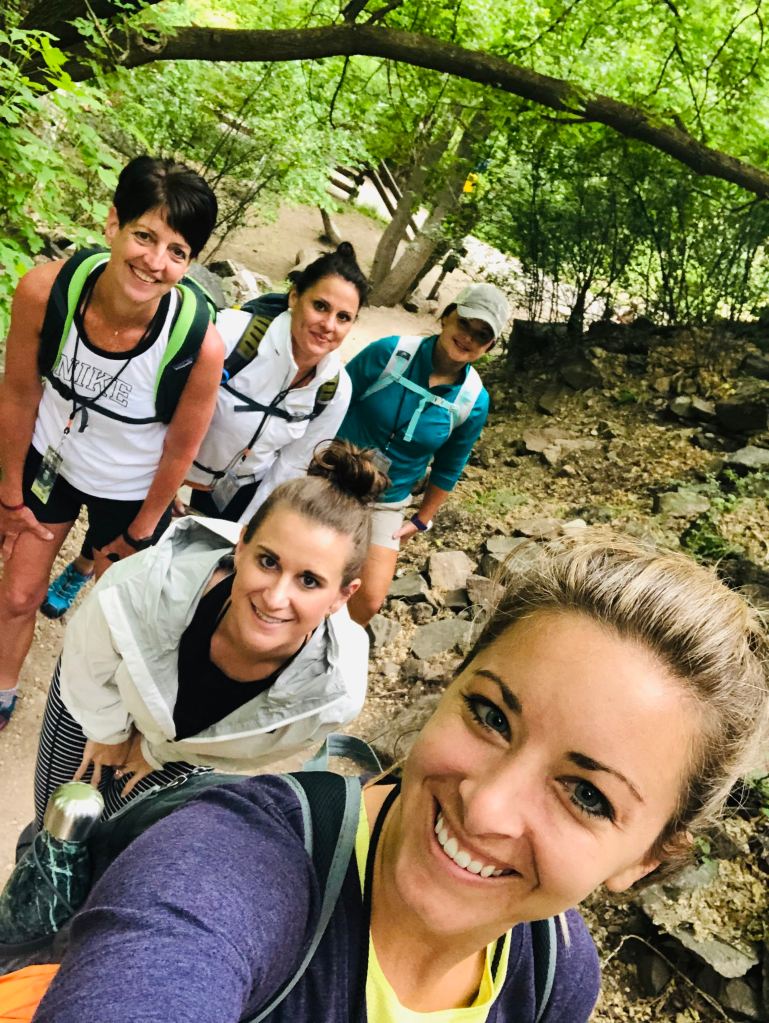
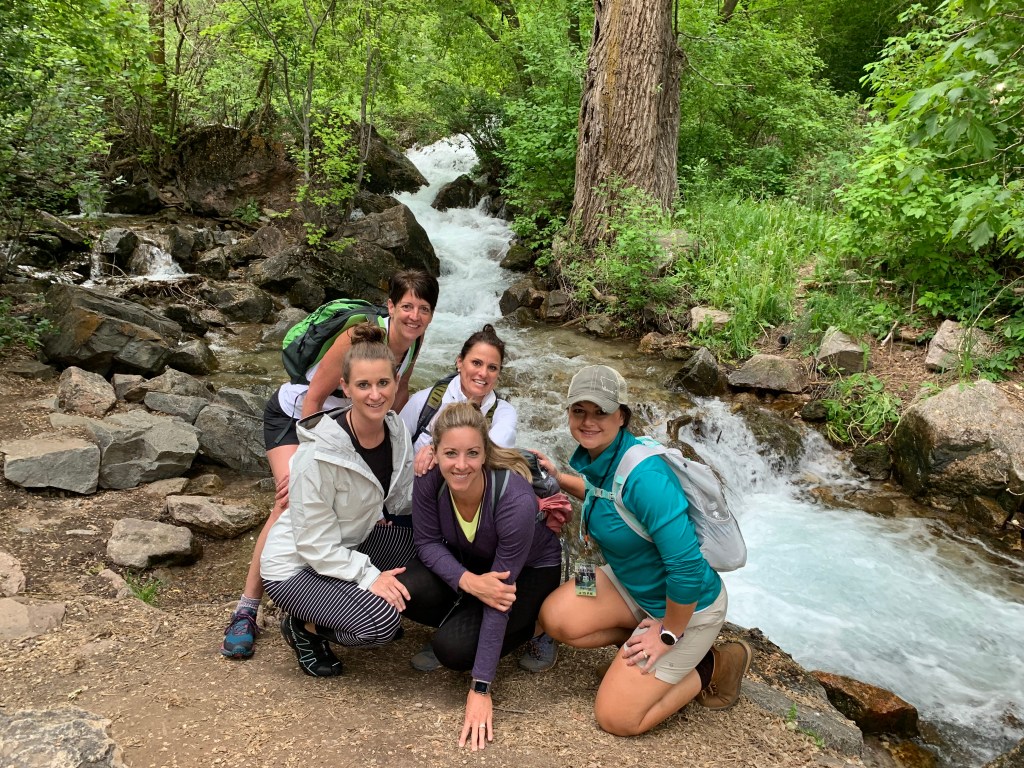
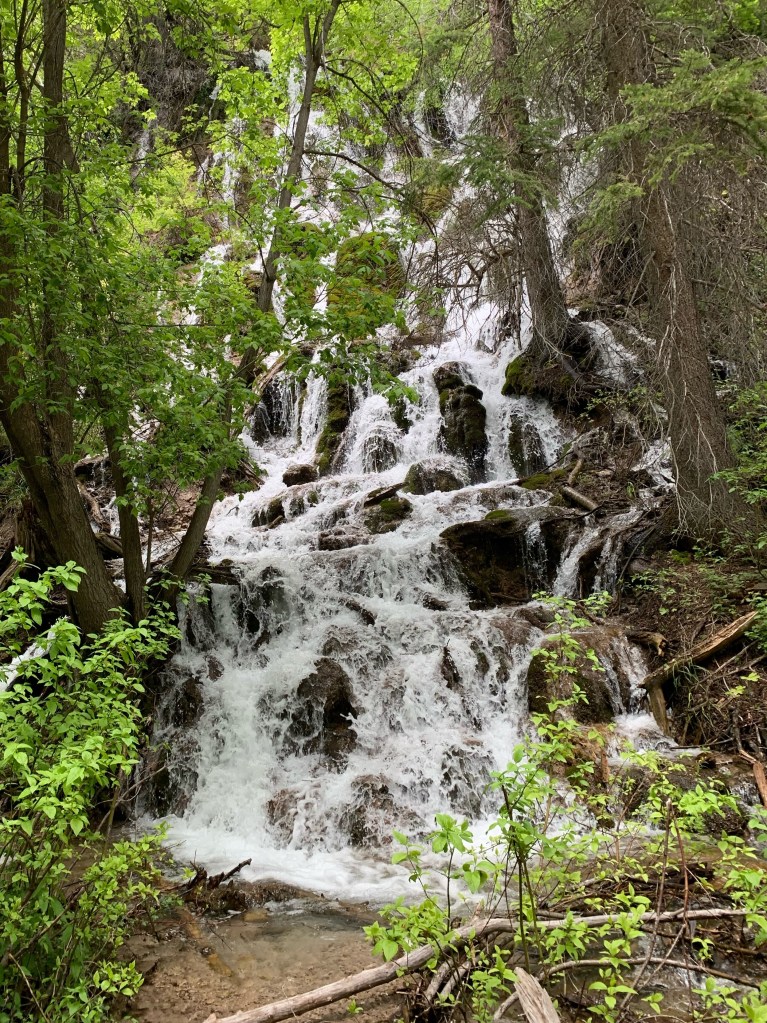
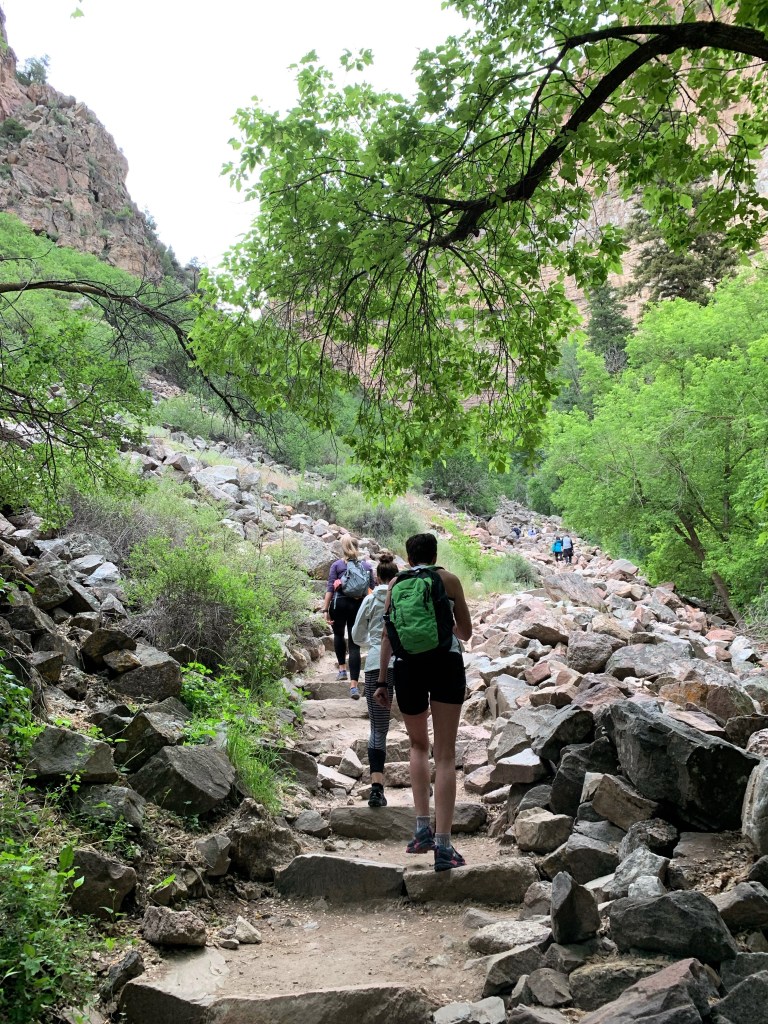
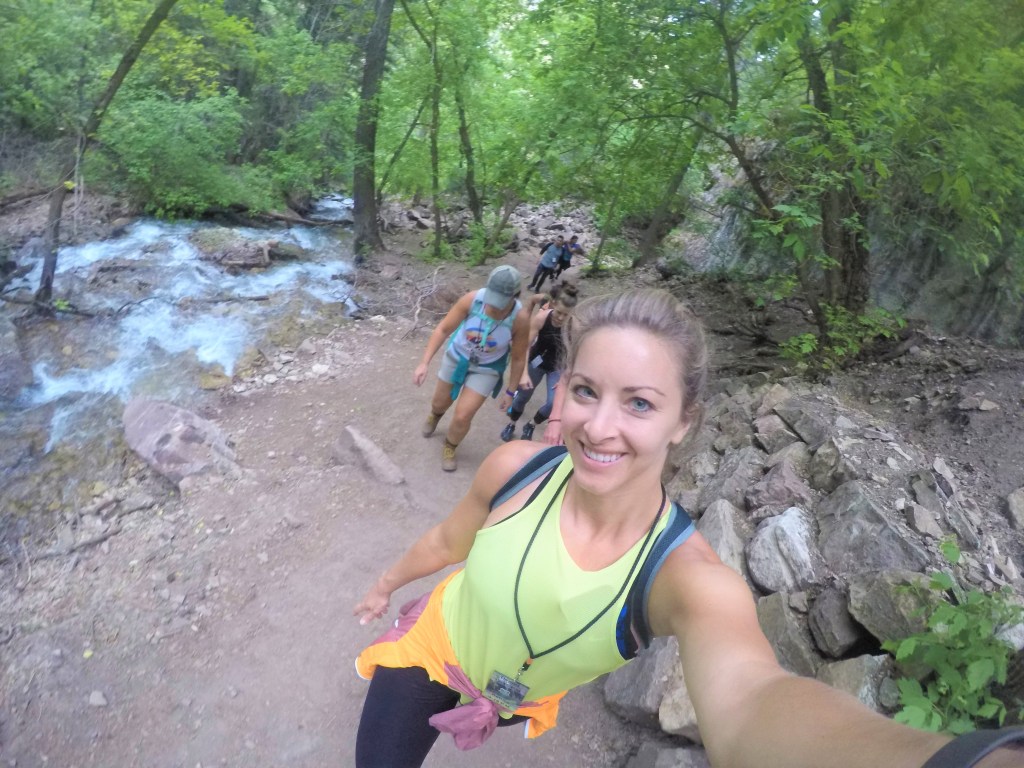
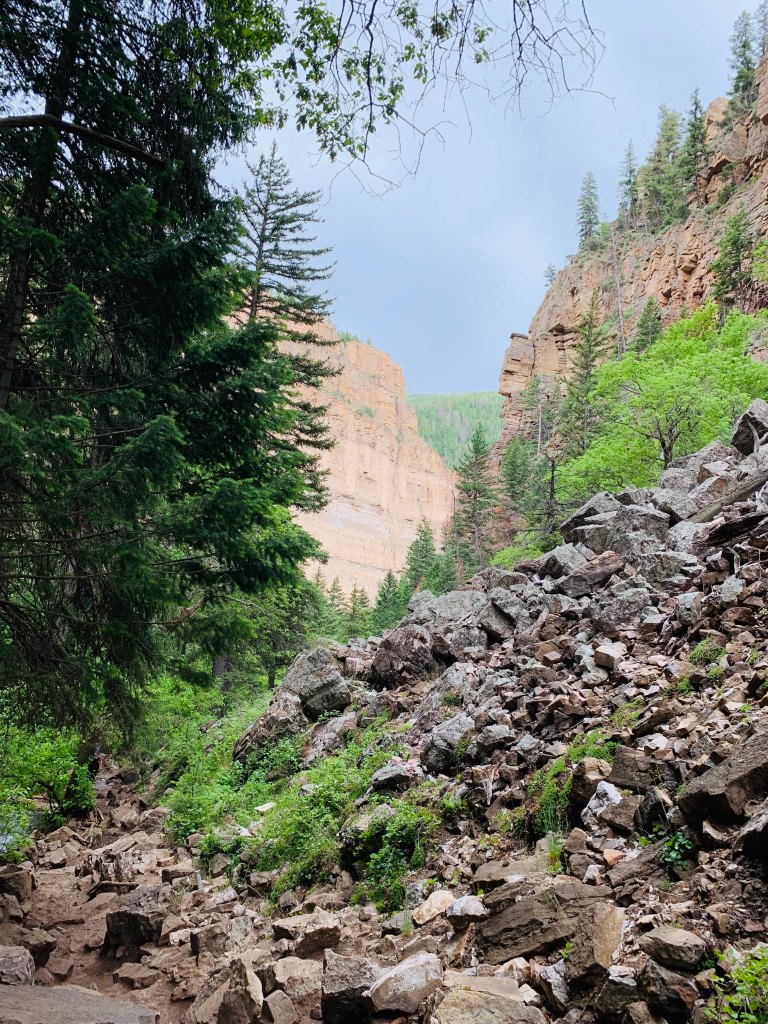
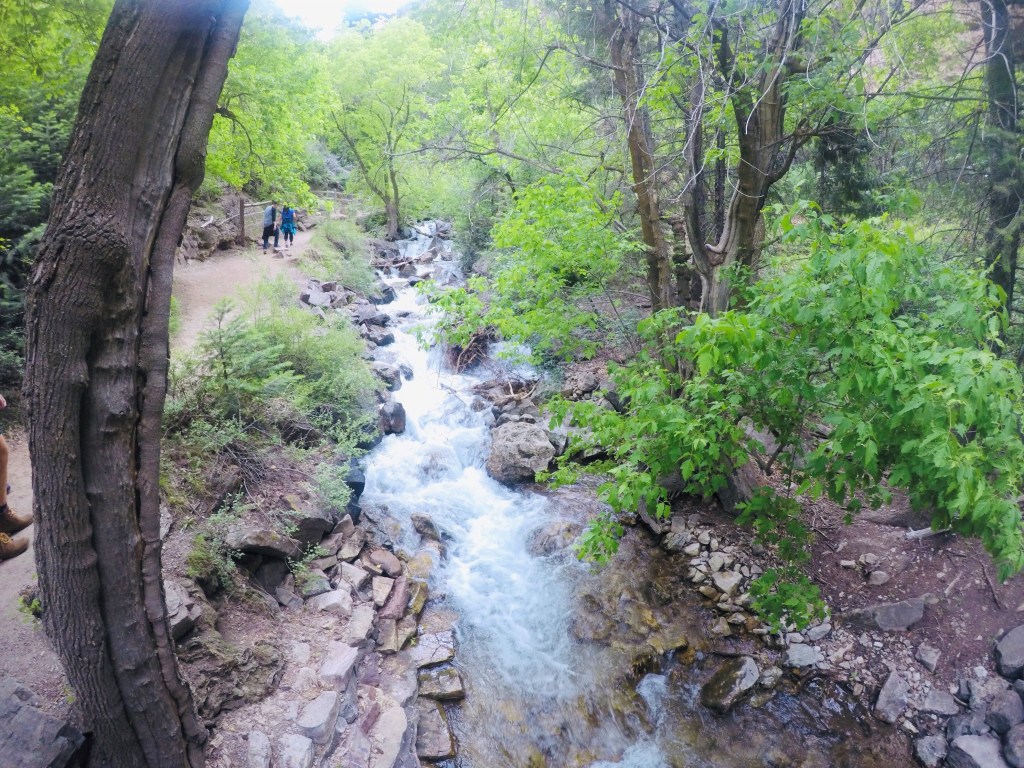
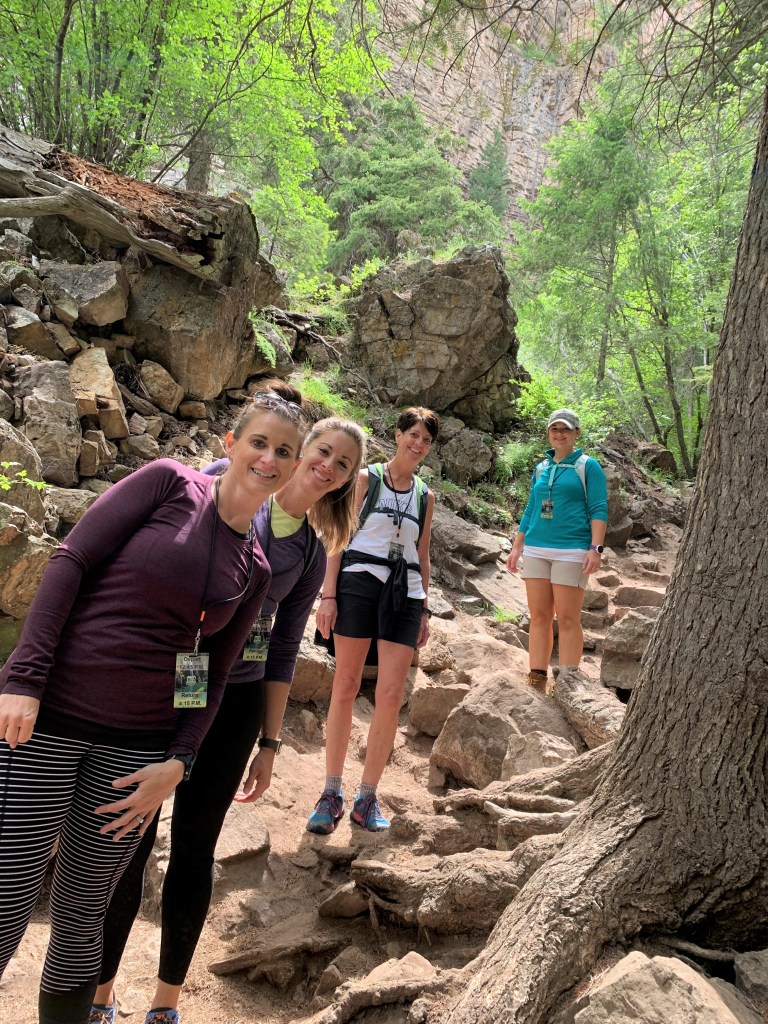
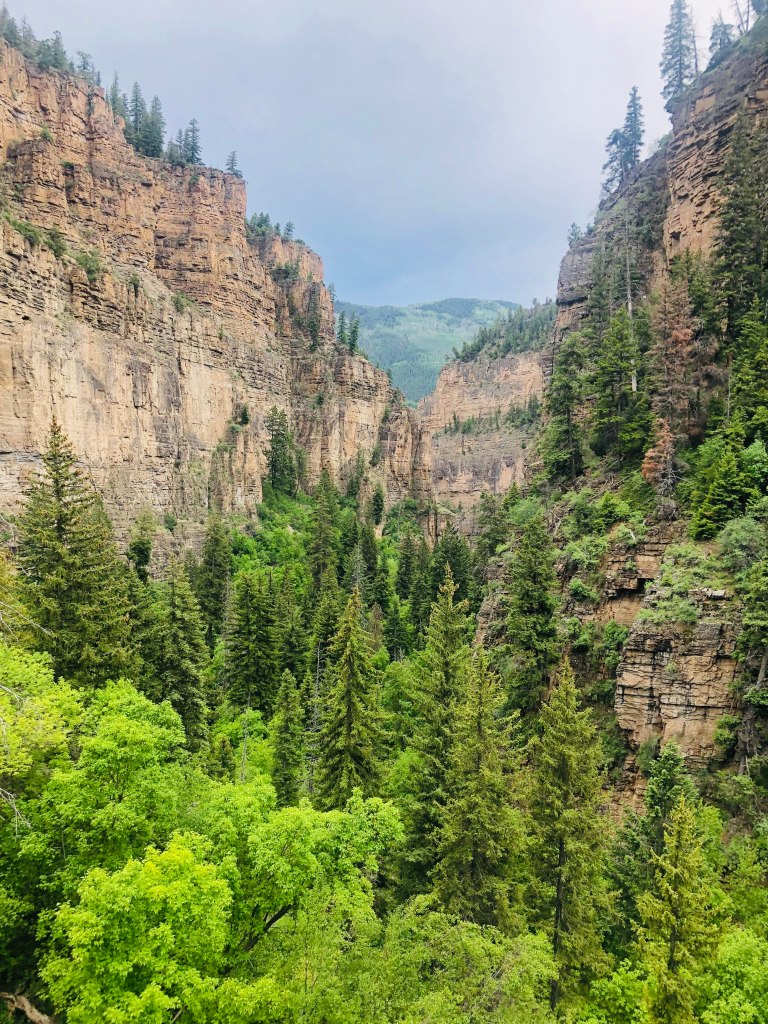
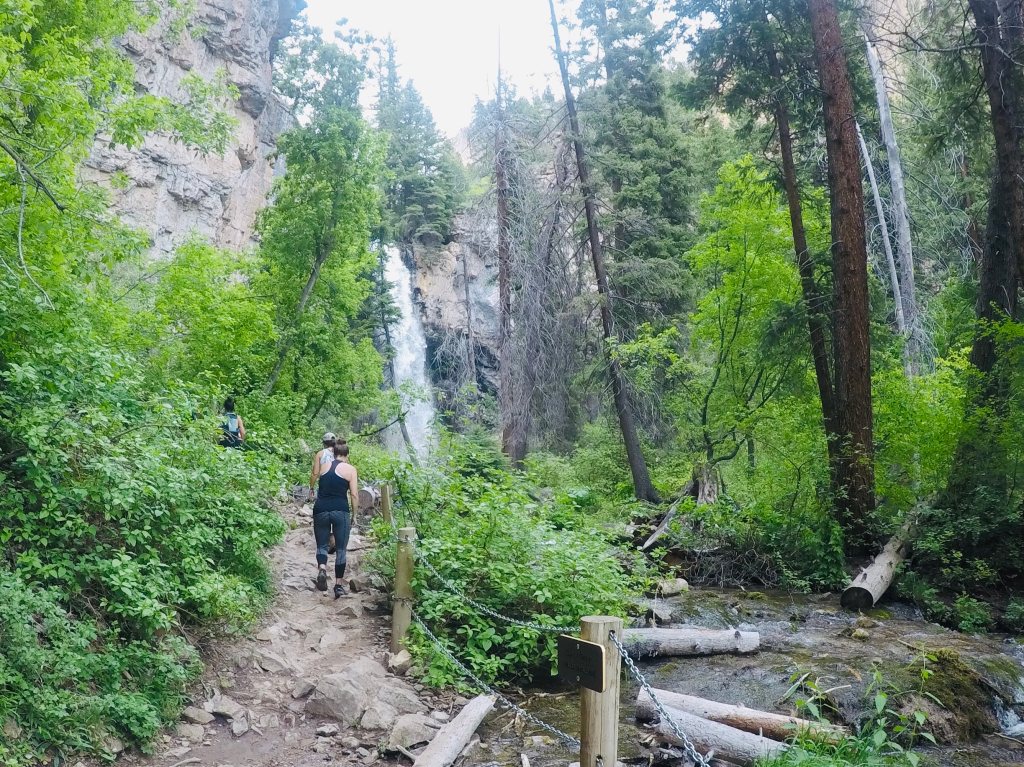
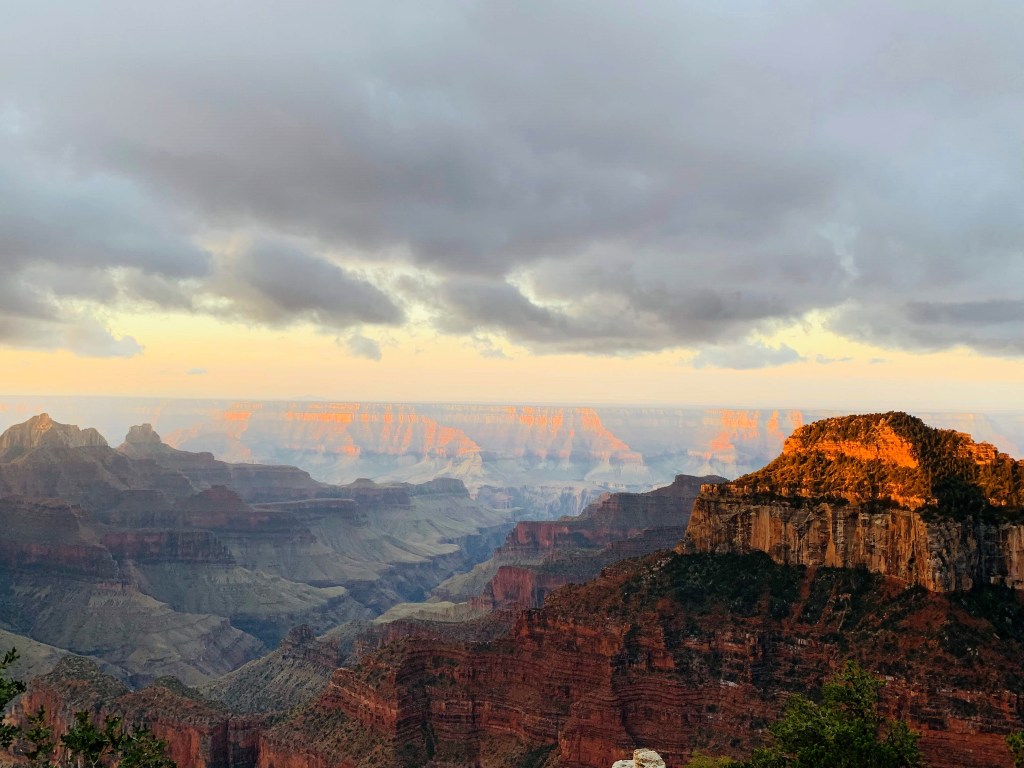
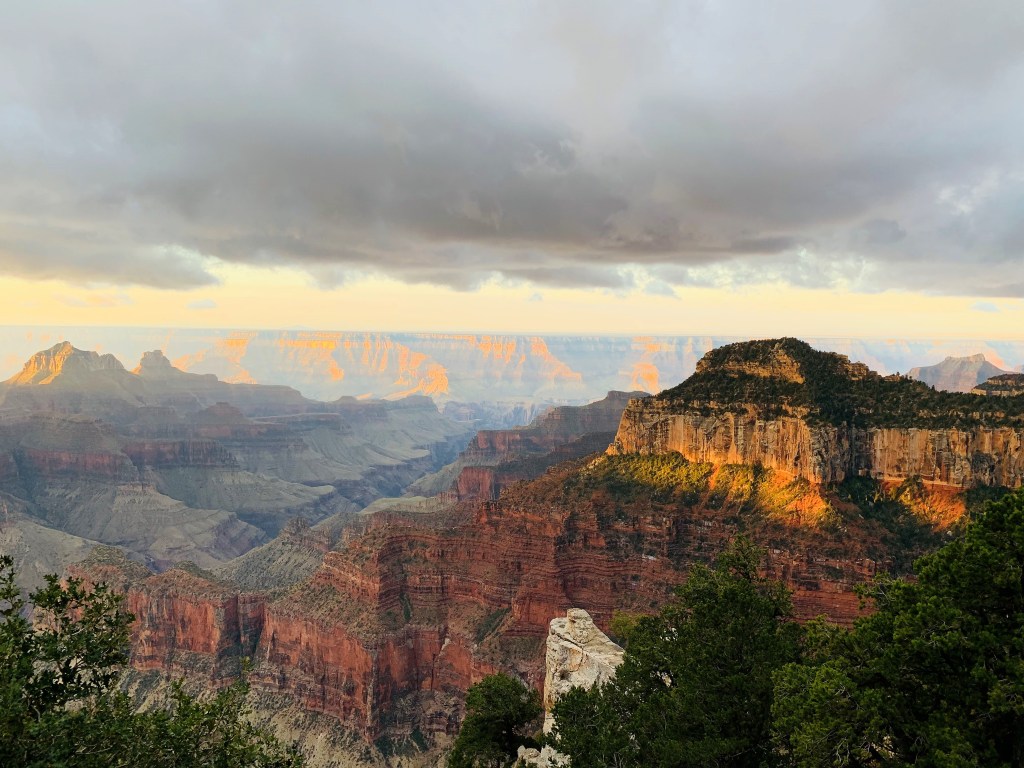
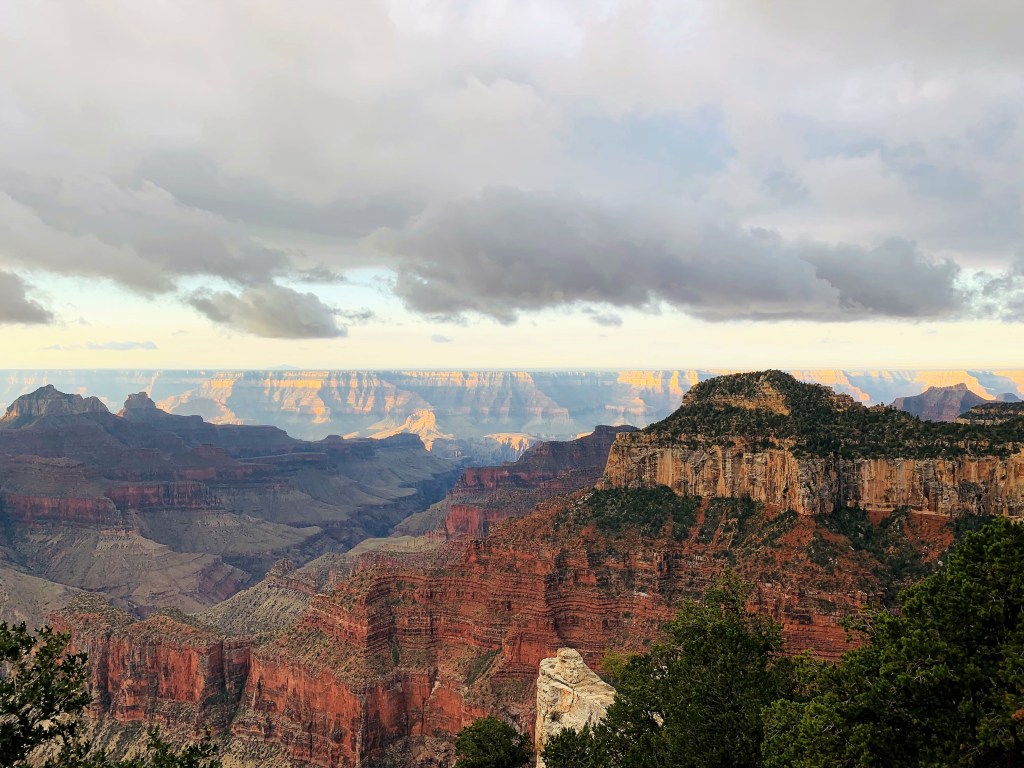
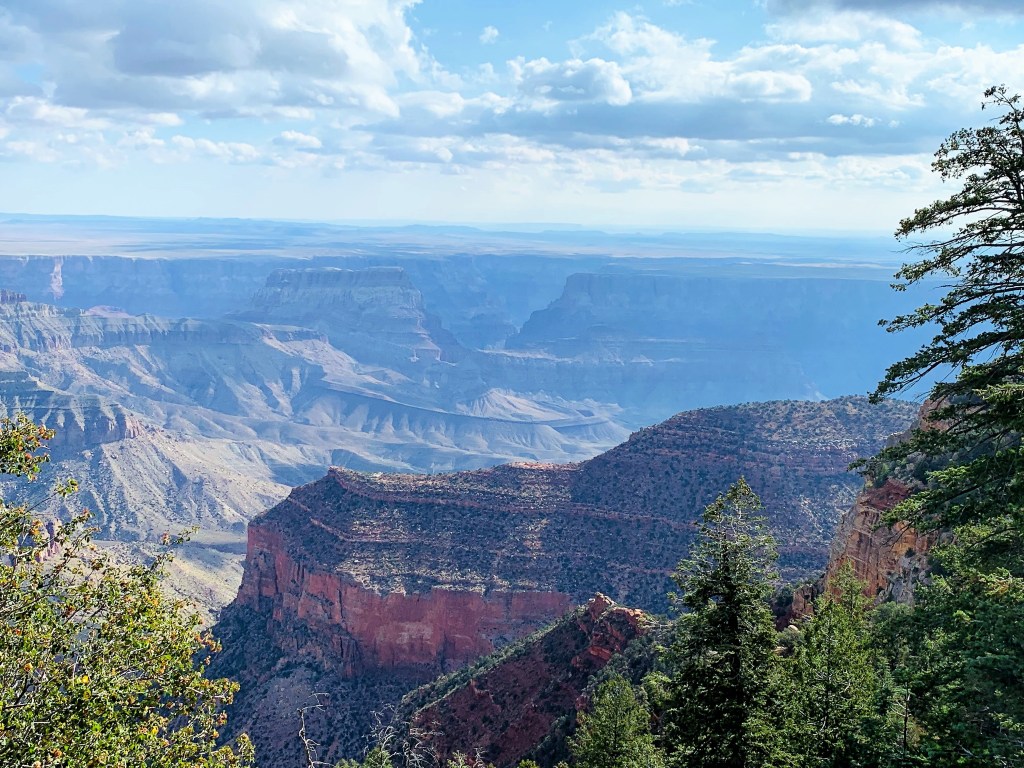
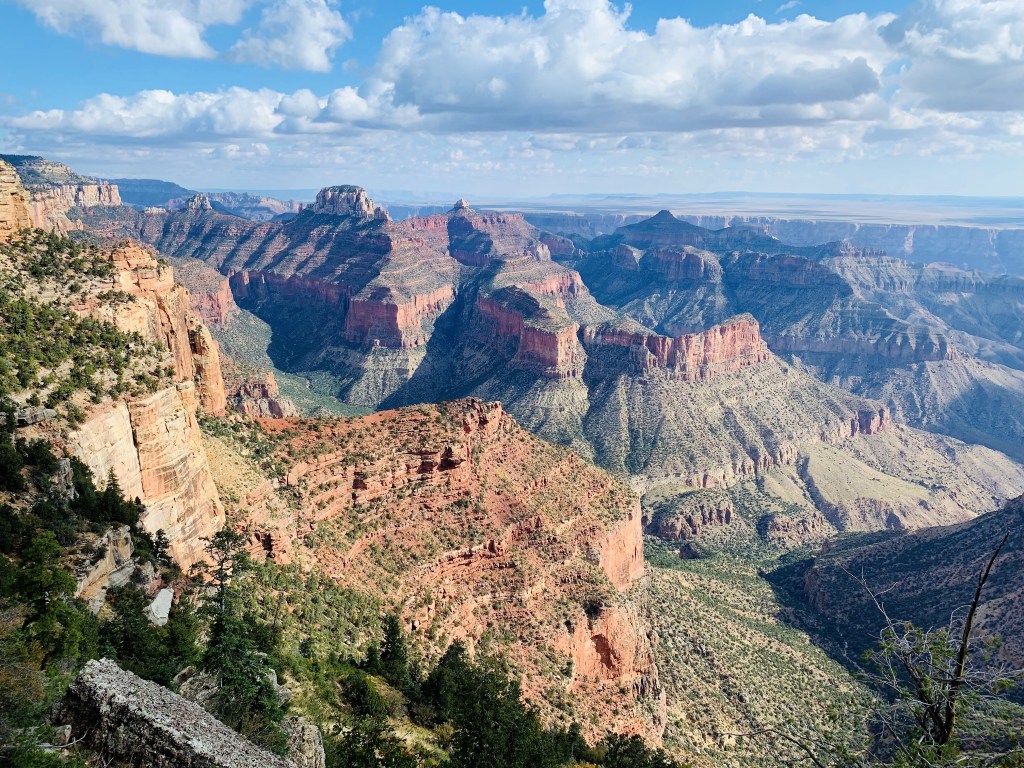
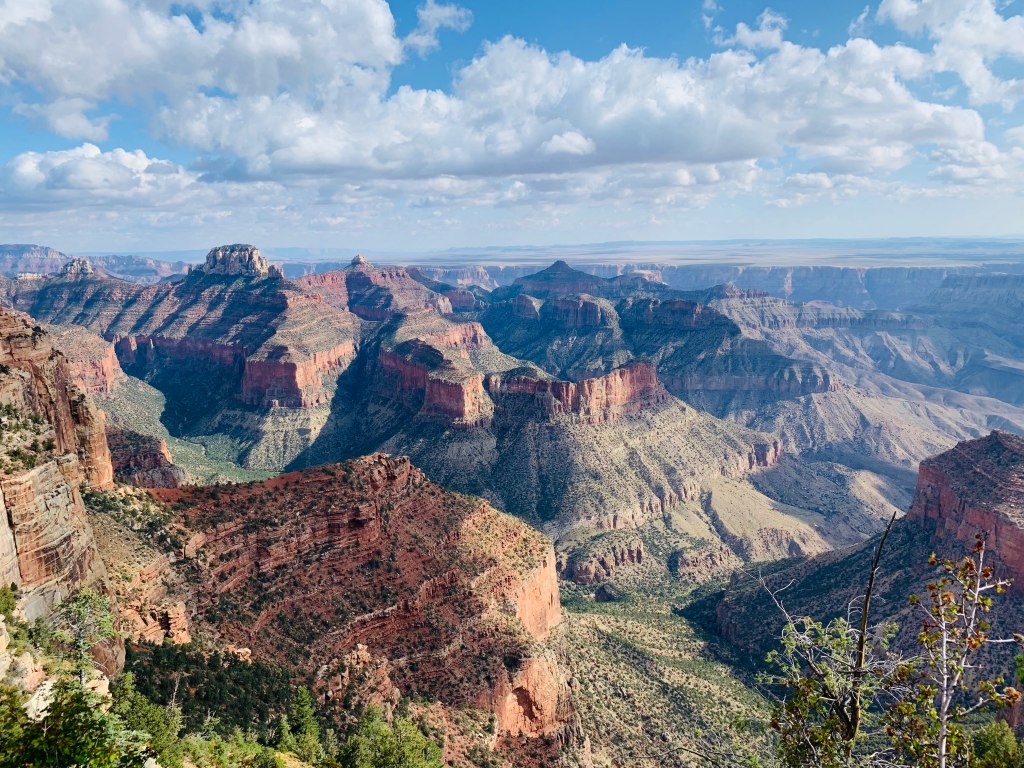
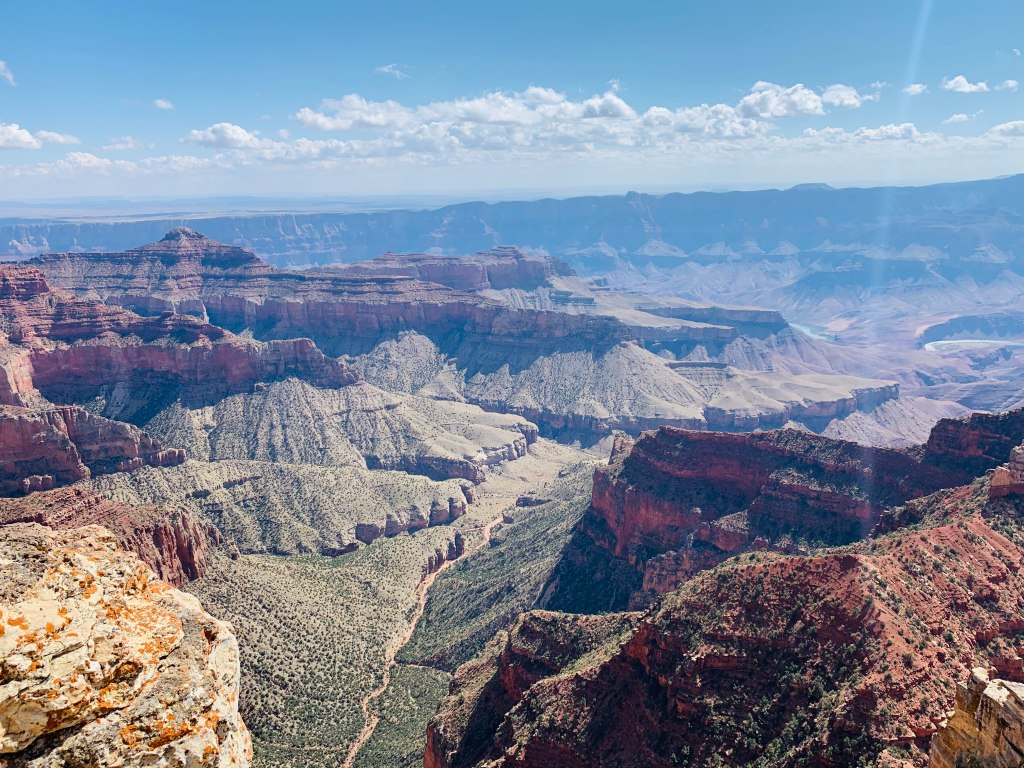
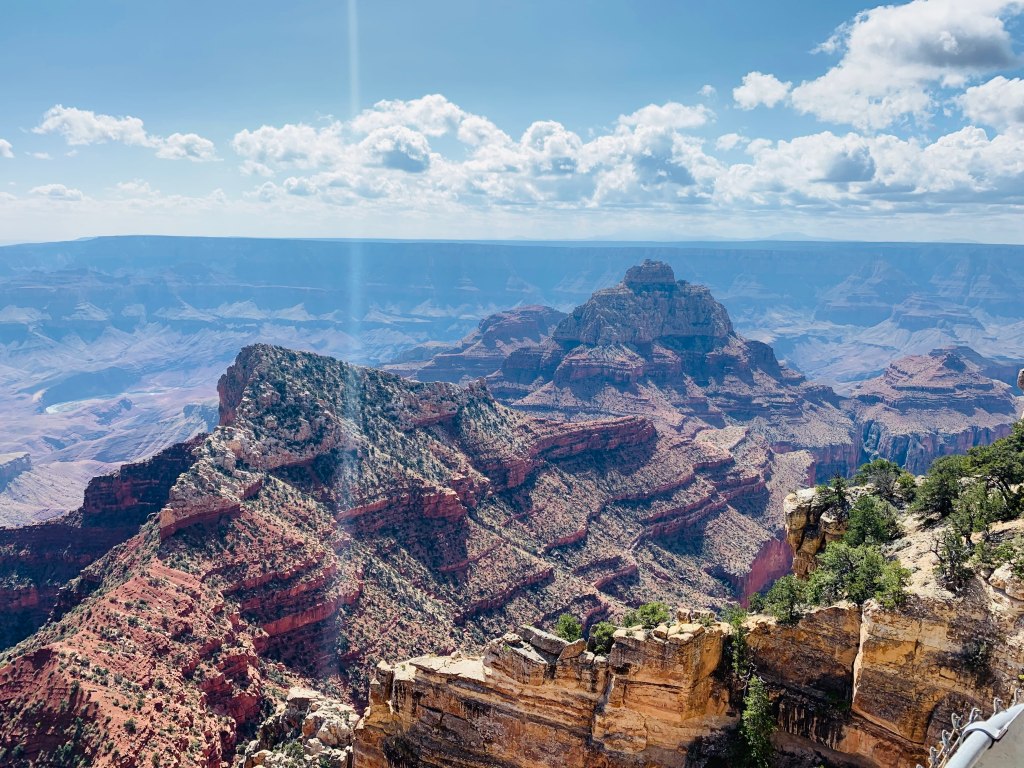
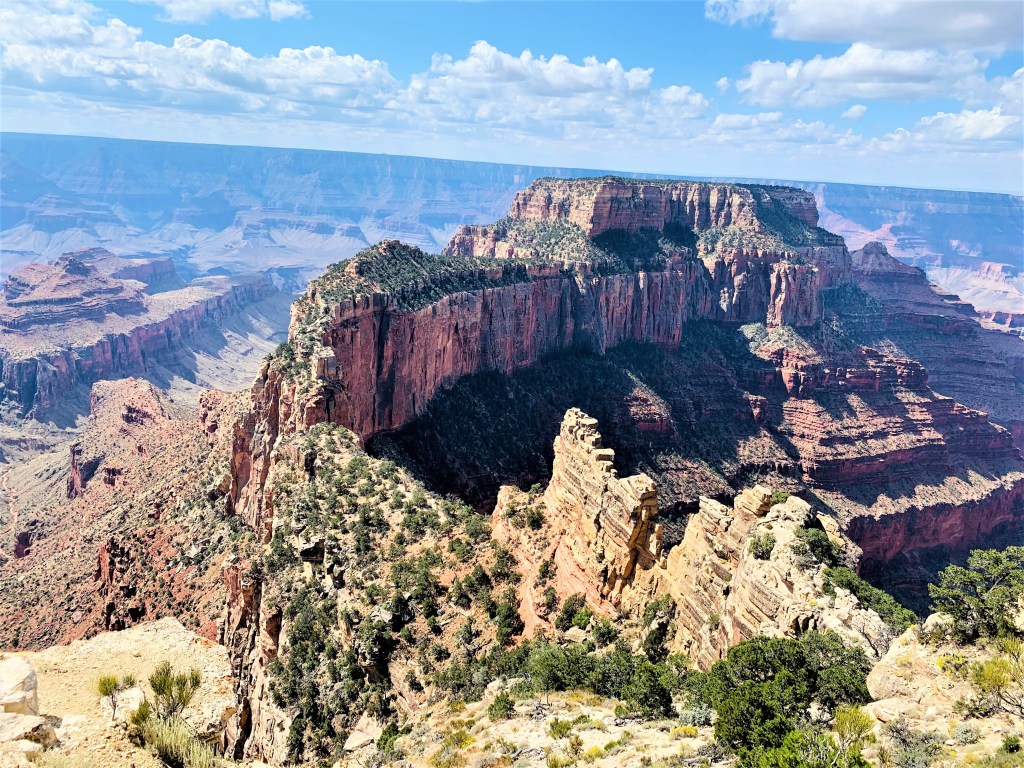
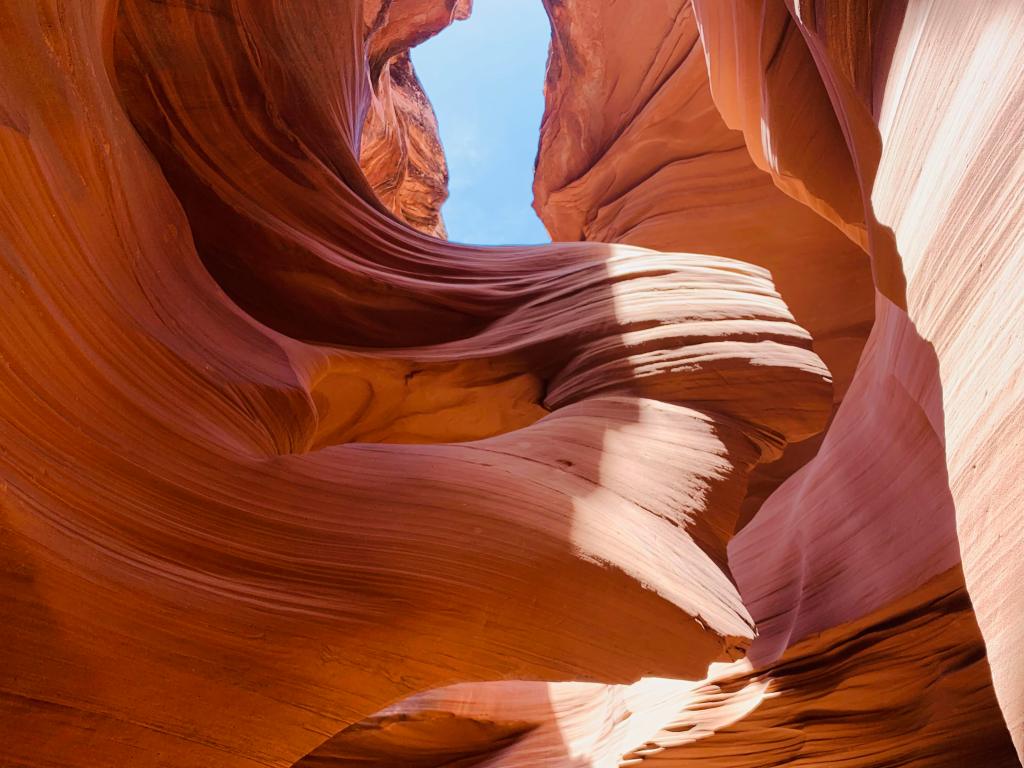
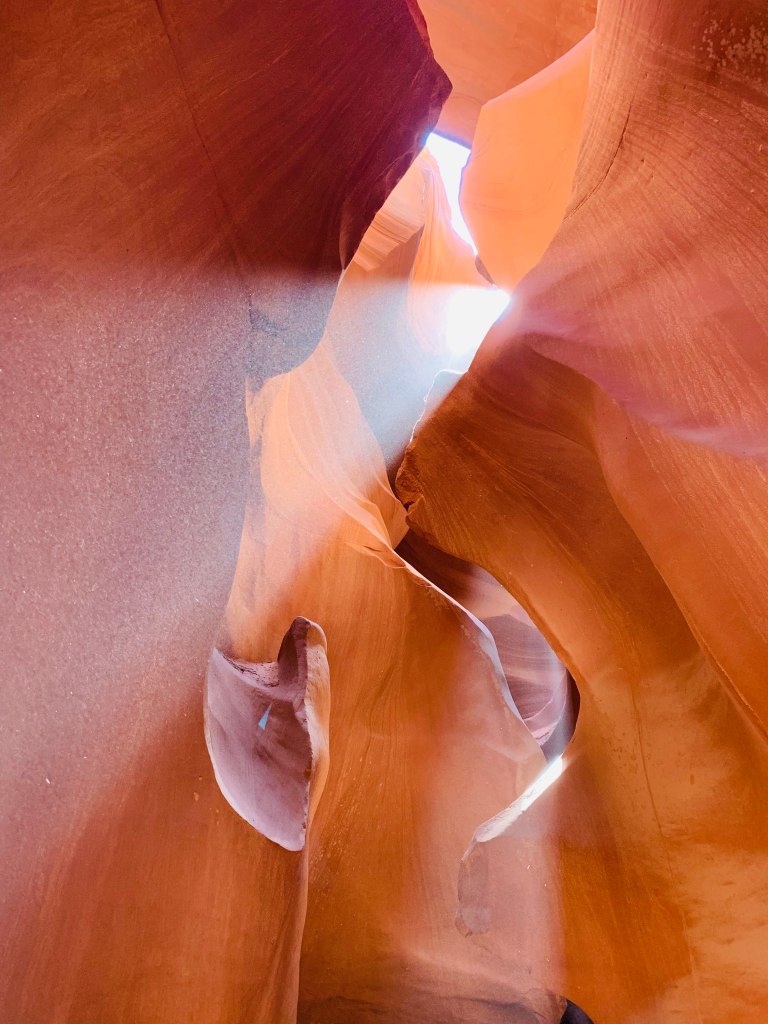
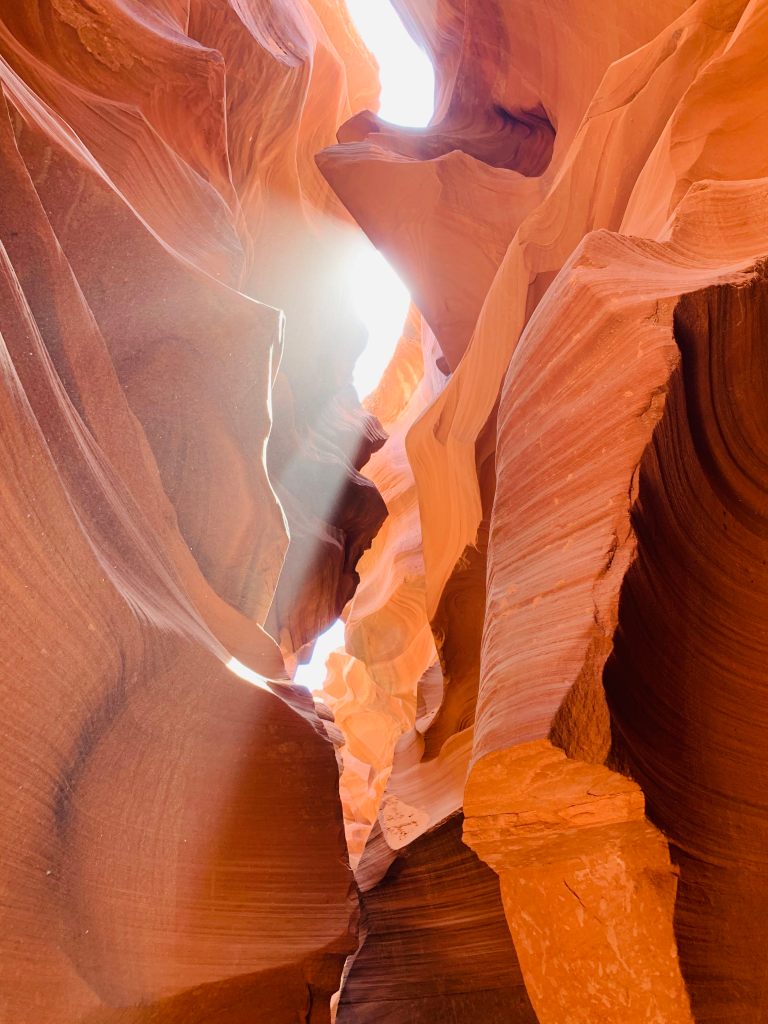
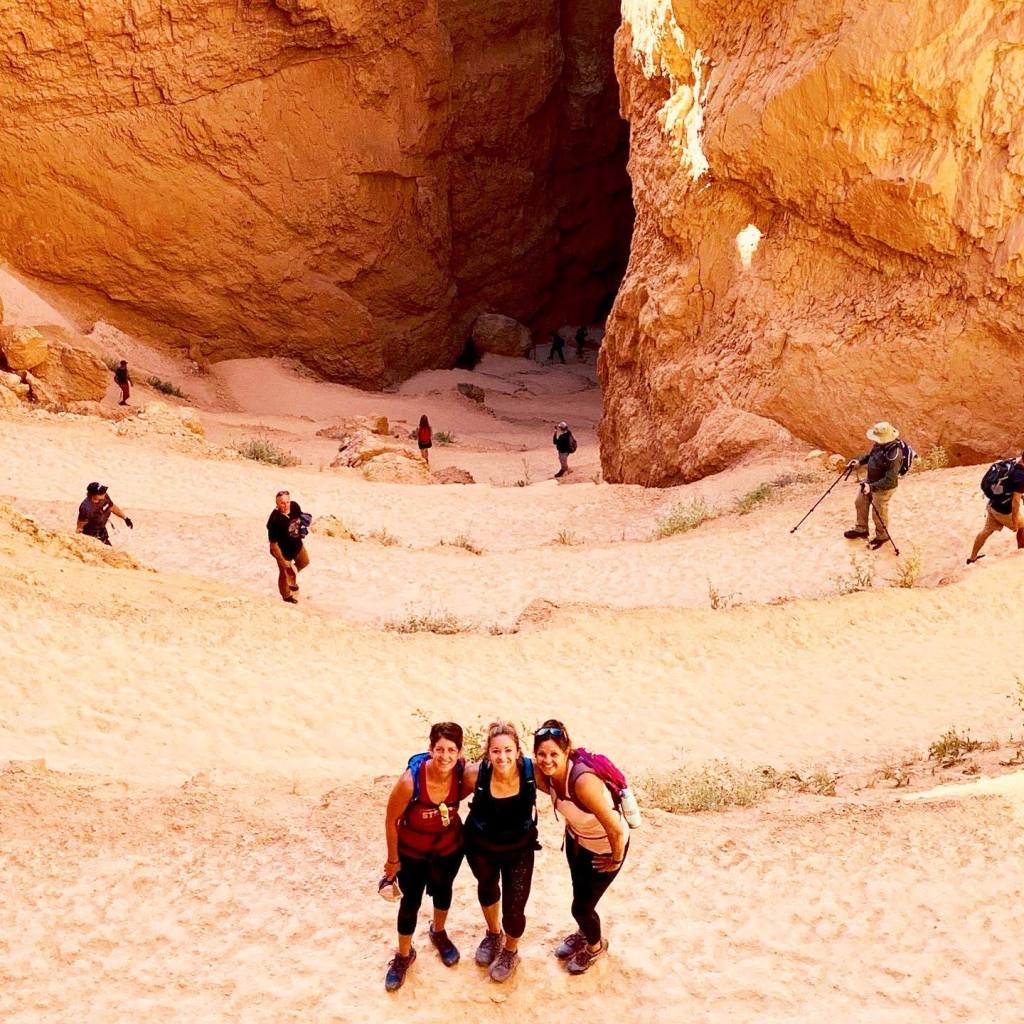
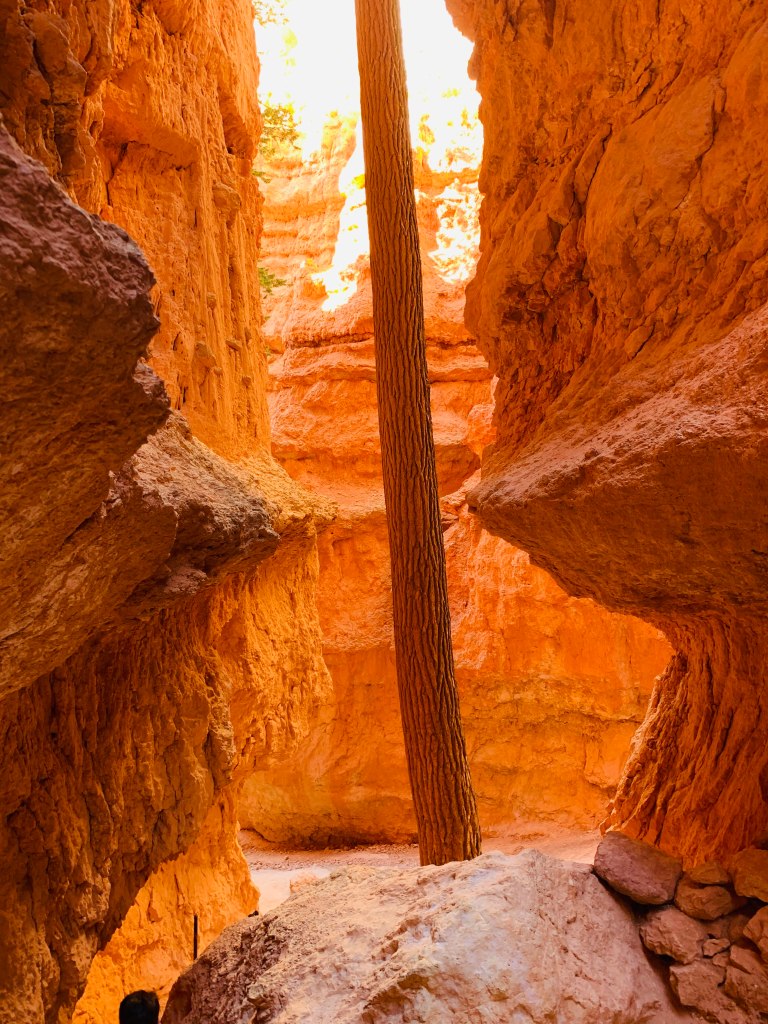
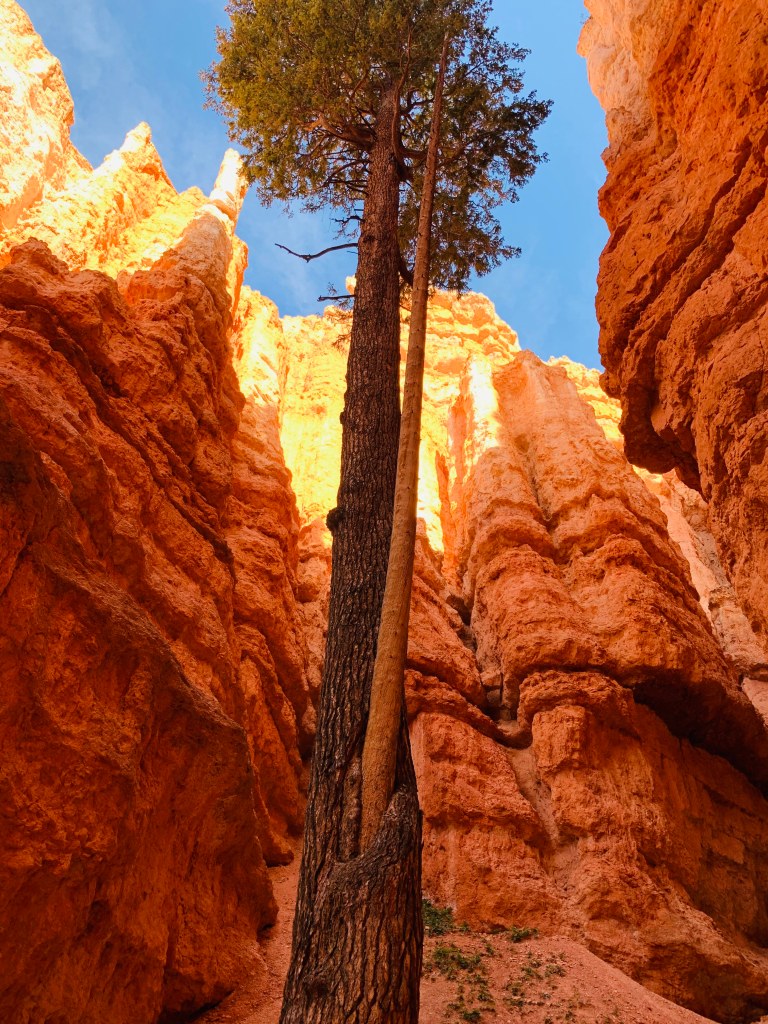
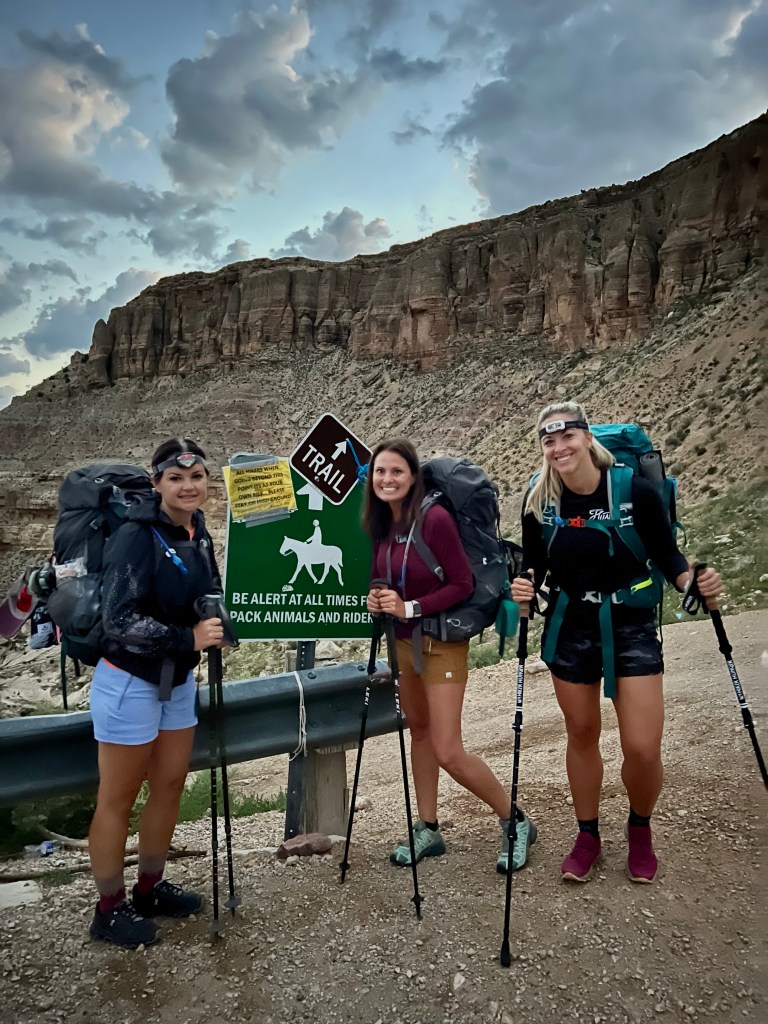
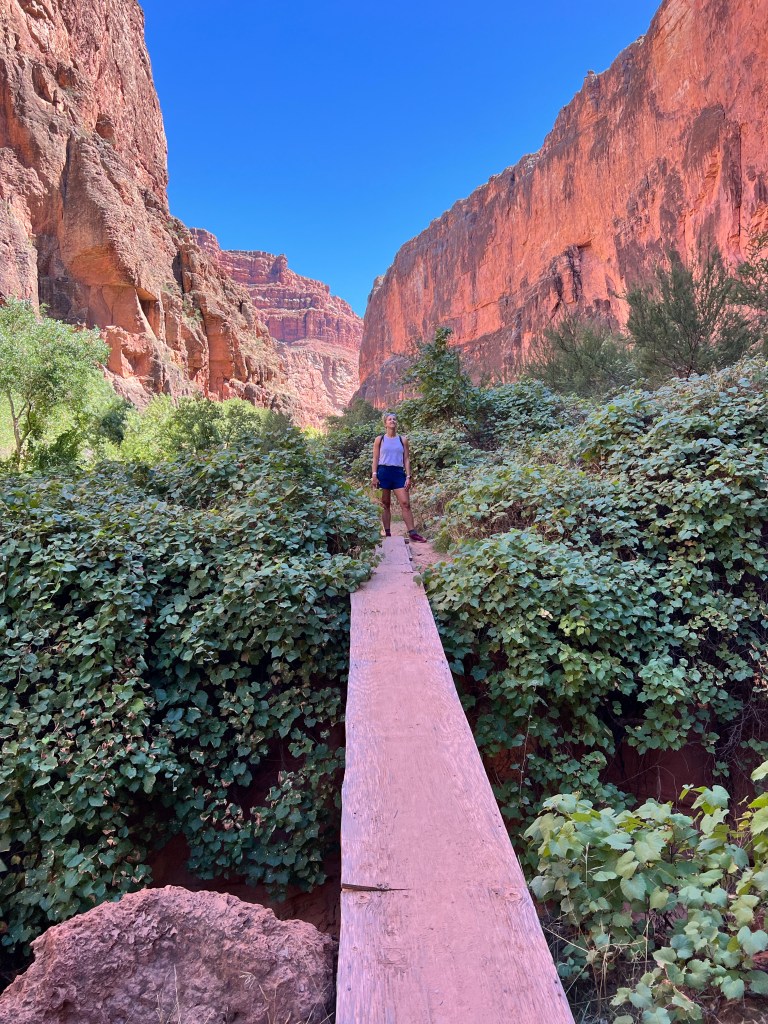
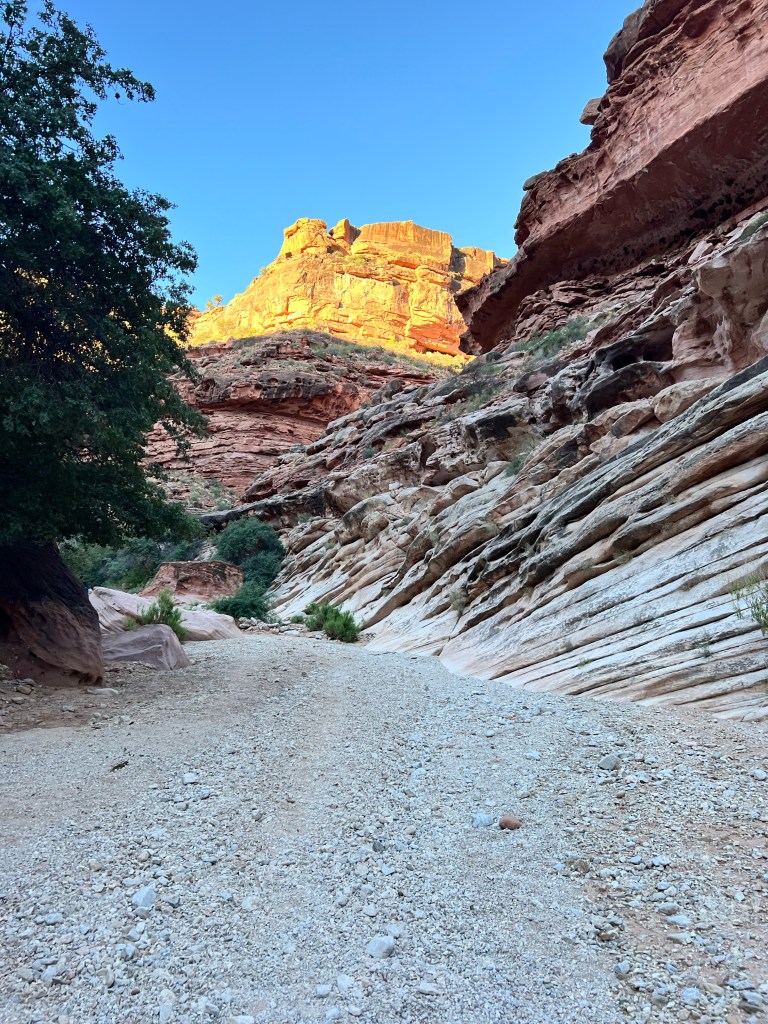
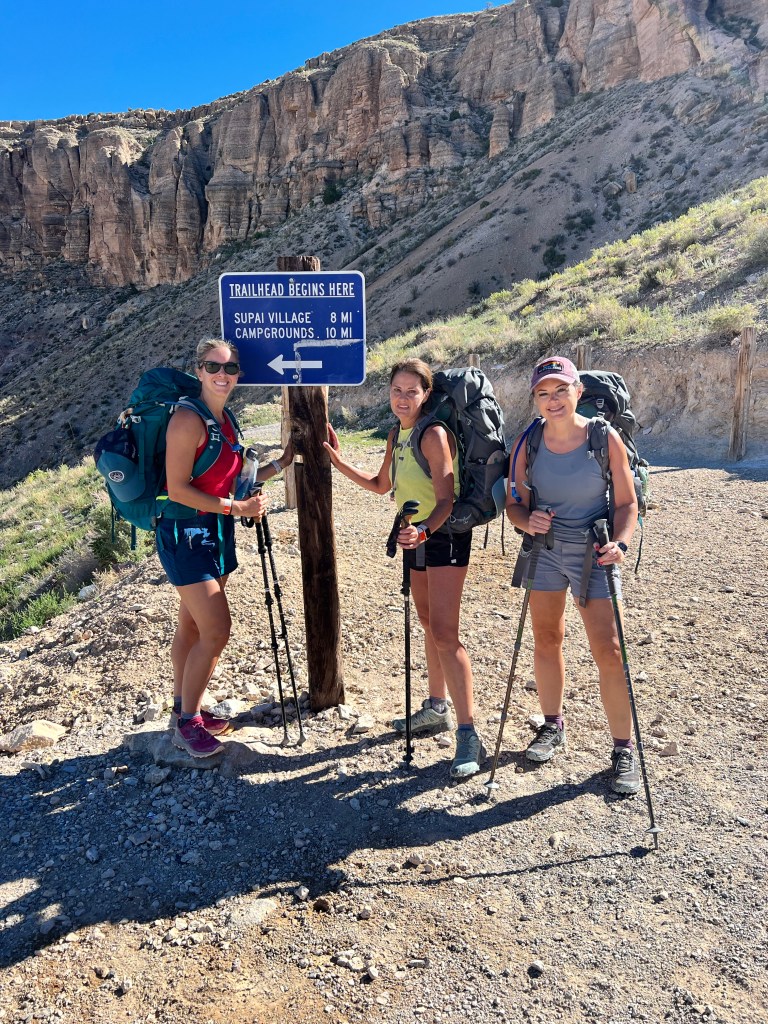
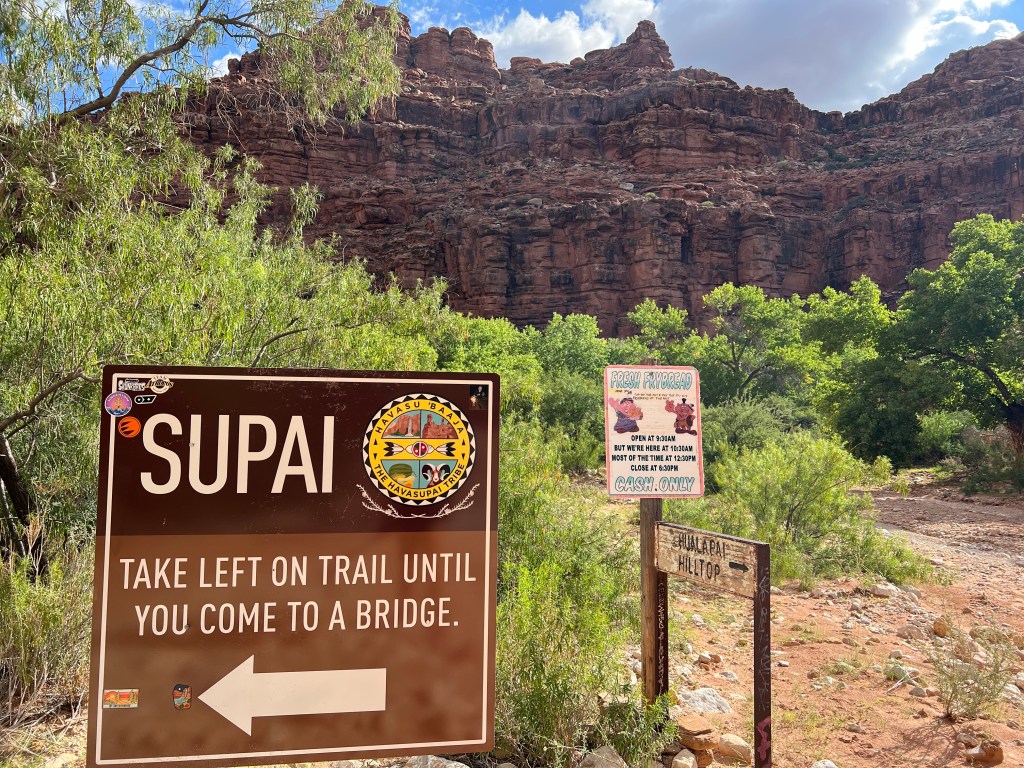
Our adventure began with the 65 mile drive to the hilltop where the trailhead was located. Our hotel was the closest to the trailhead so an early morning drive on the 65 mile stretch is inevitable. It is also an open range road making navigating the elk and cattle that much more exciting in the darkness! We finally made it to the hilltop and found a parking spot (pro tip: don’t park along rock wall, you may return to a broken windshield!). We started the 10 mile descent into the Grand Canyon at 5 am heading toward the small village of Supai, the gateway to Havasu Falls. The hike in was a challenging but rewarding journey through stunning canyons. Along the way, we encountered incredible vistas and took in the unique beauty all around us. The colors of the canyon walls were changing with every movement of the sun.

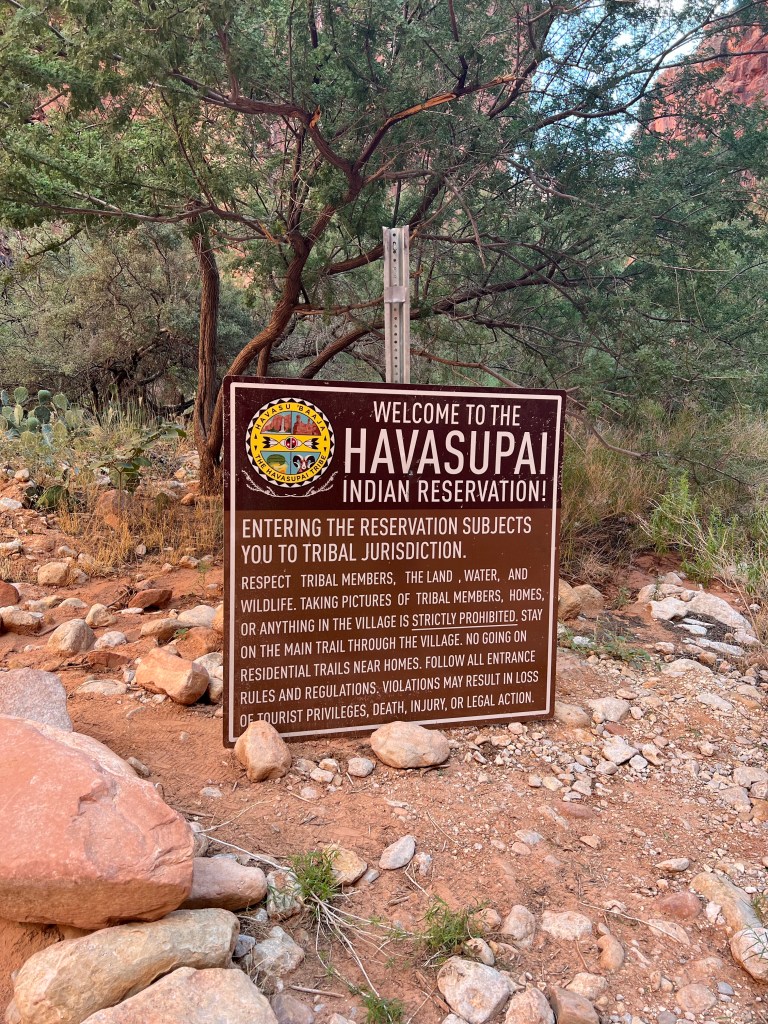
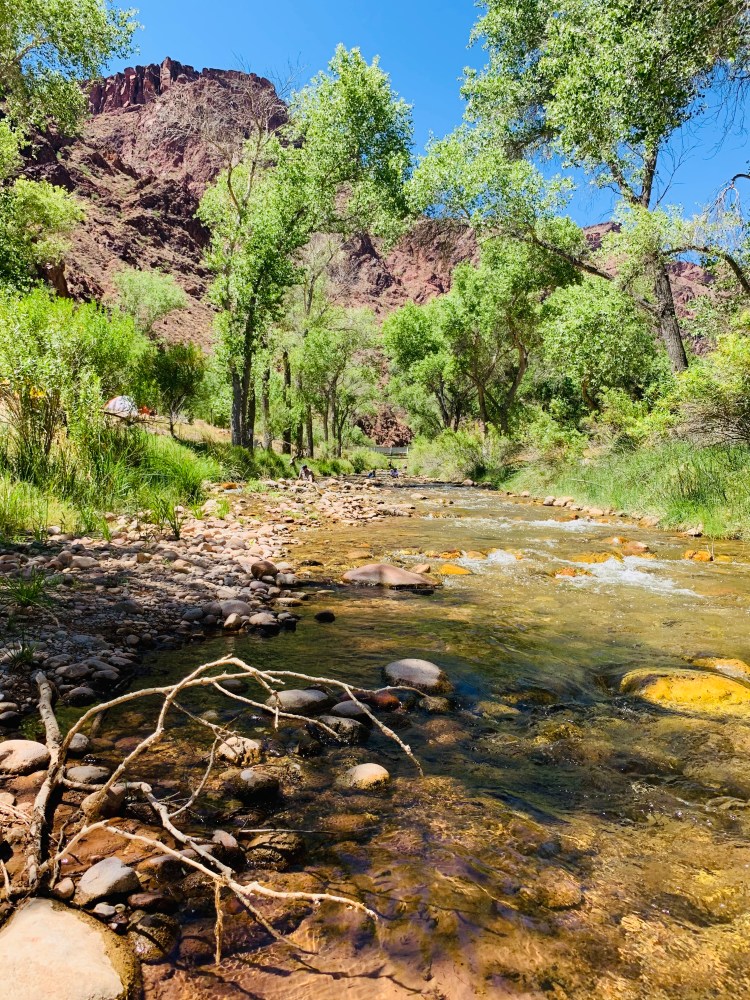
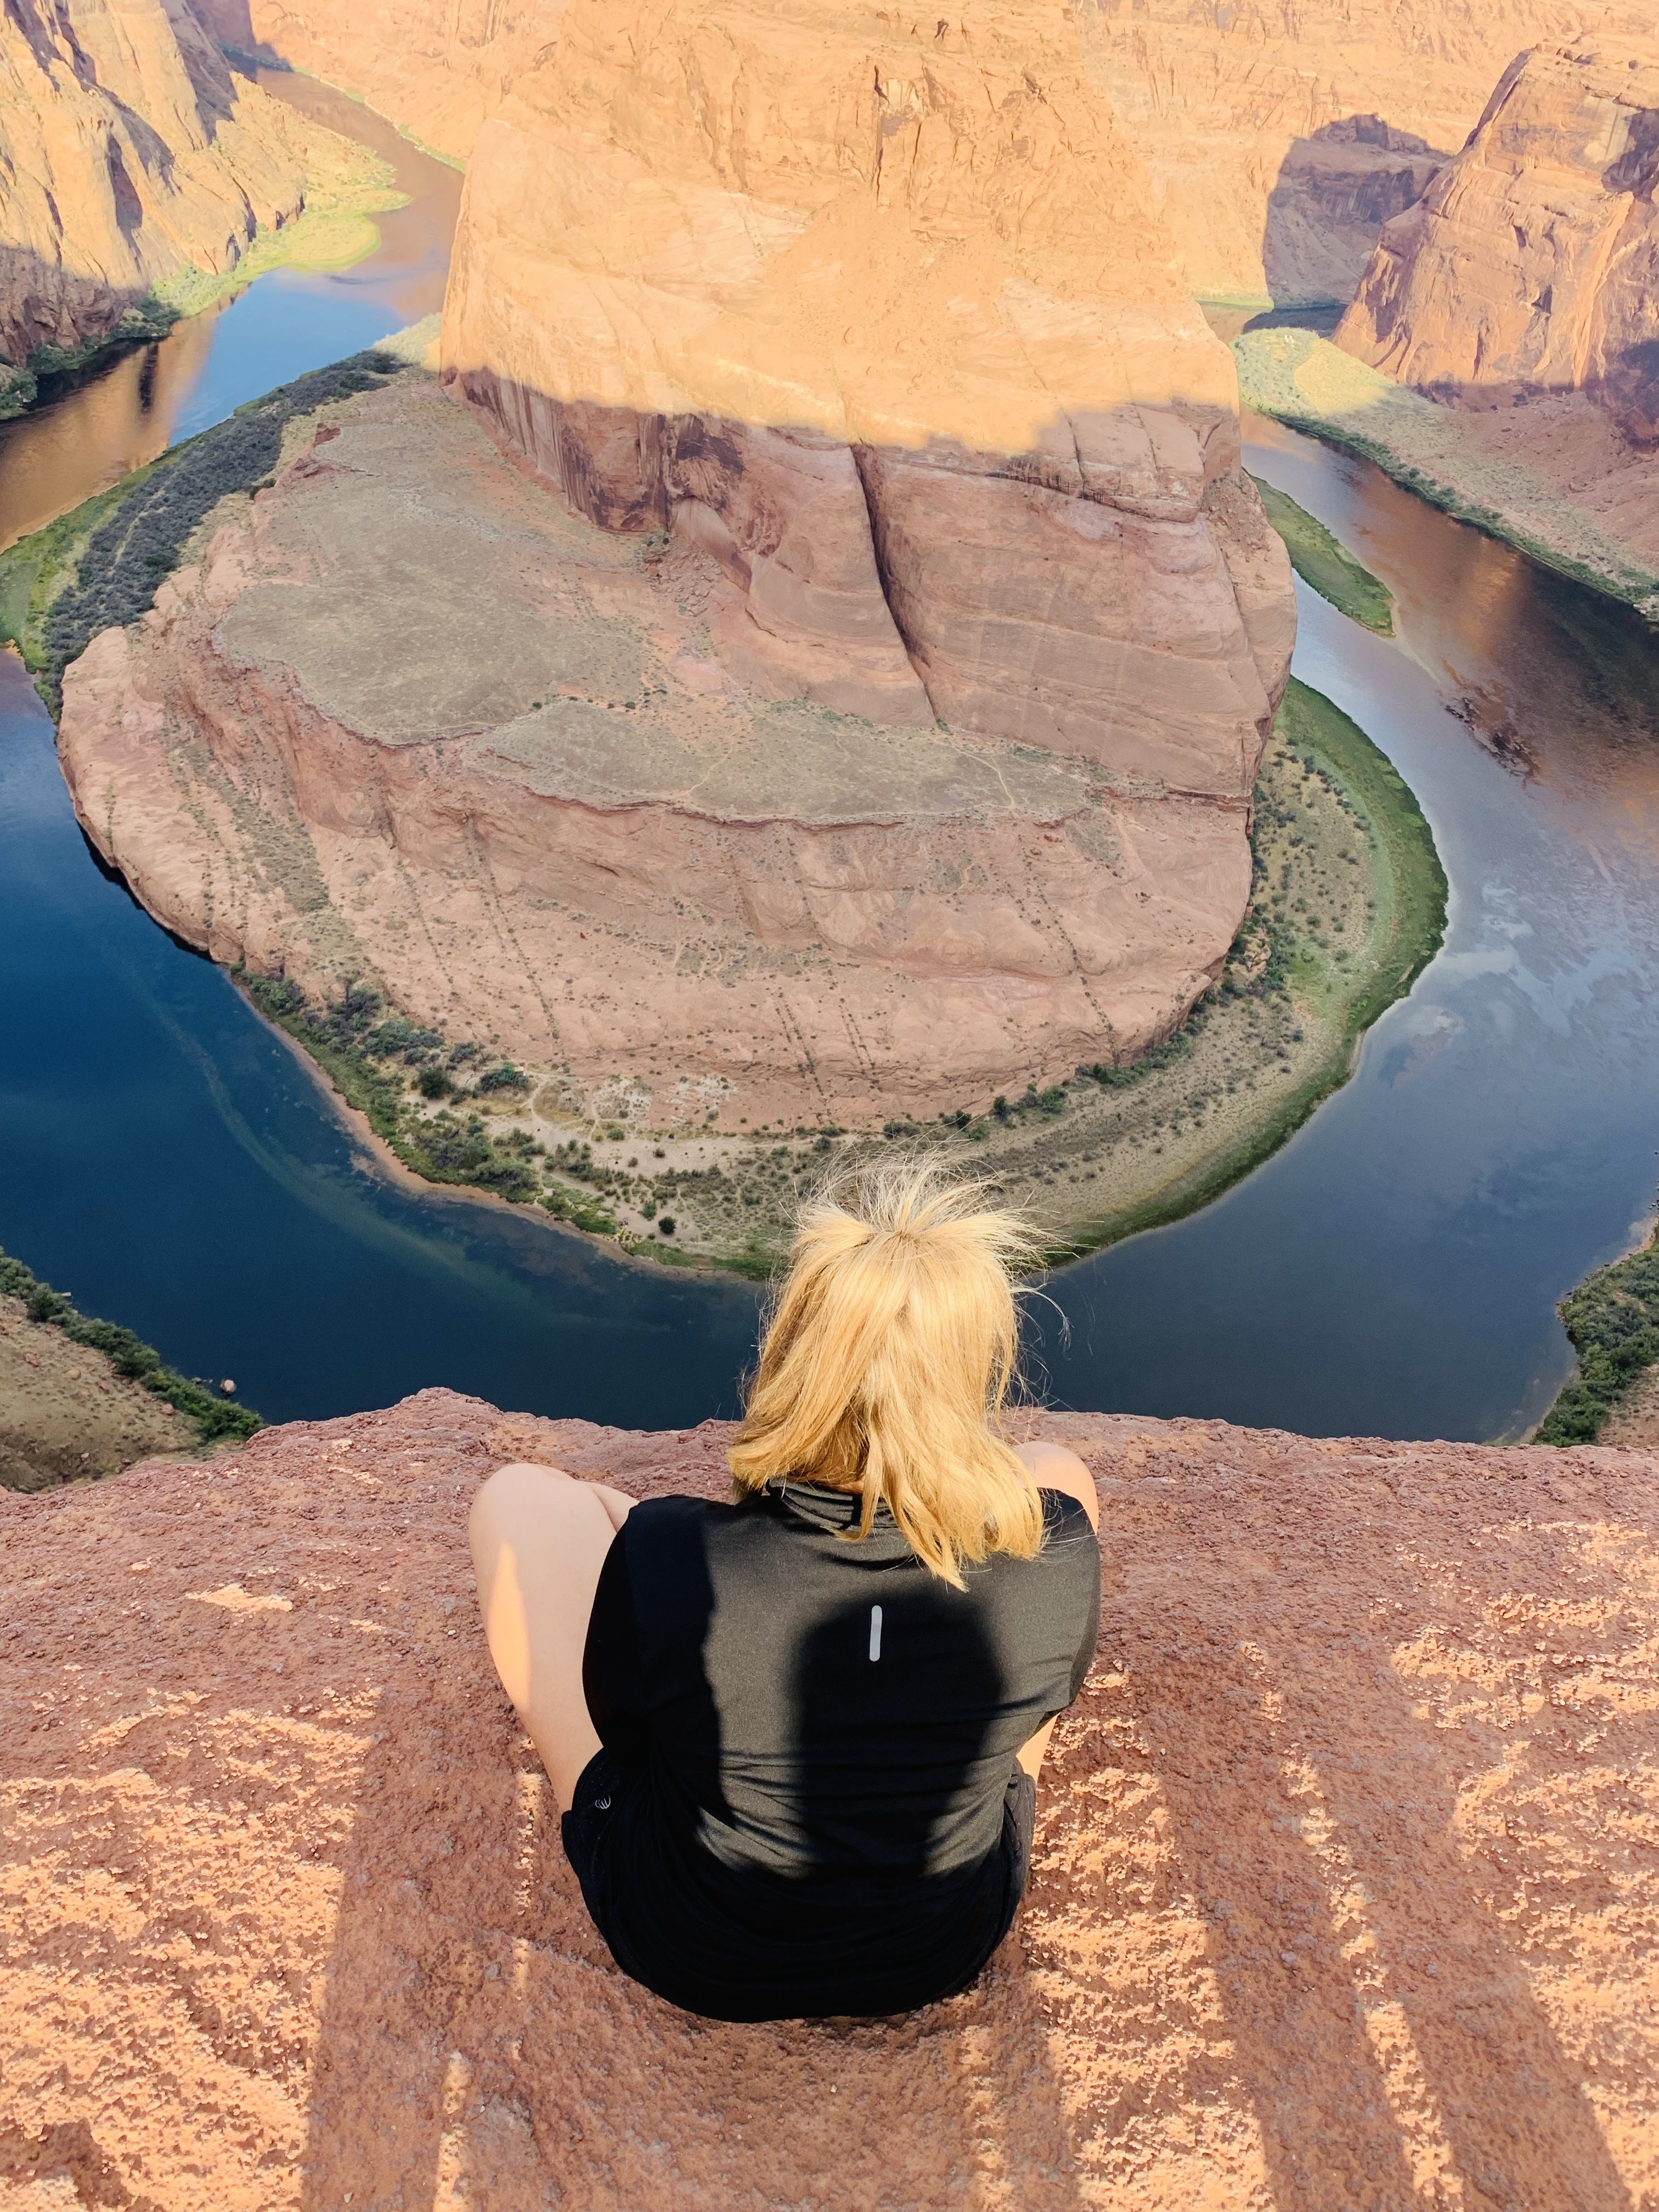
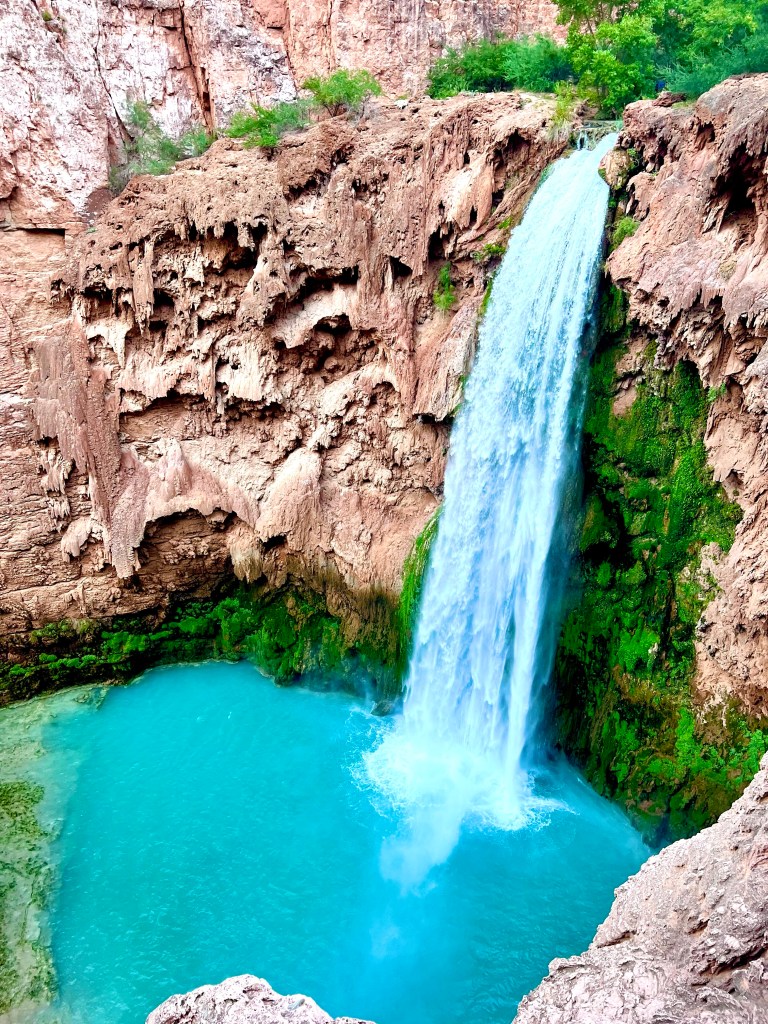
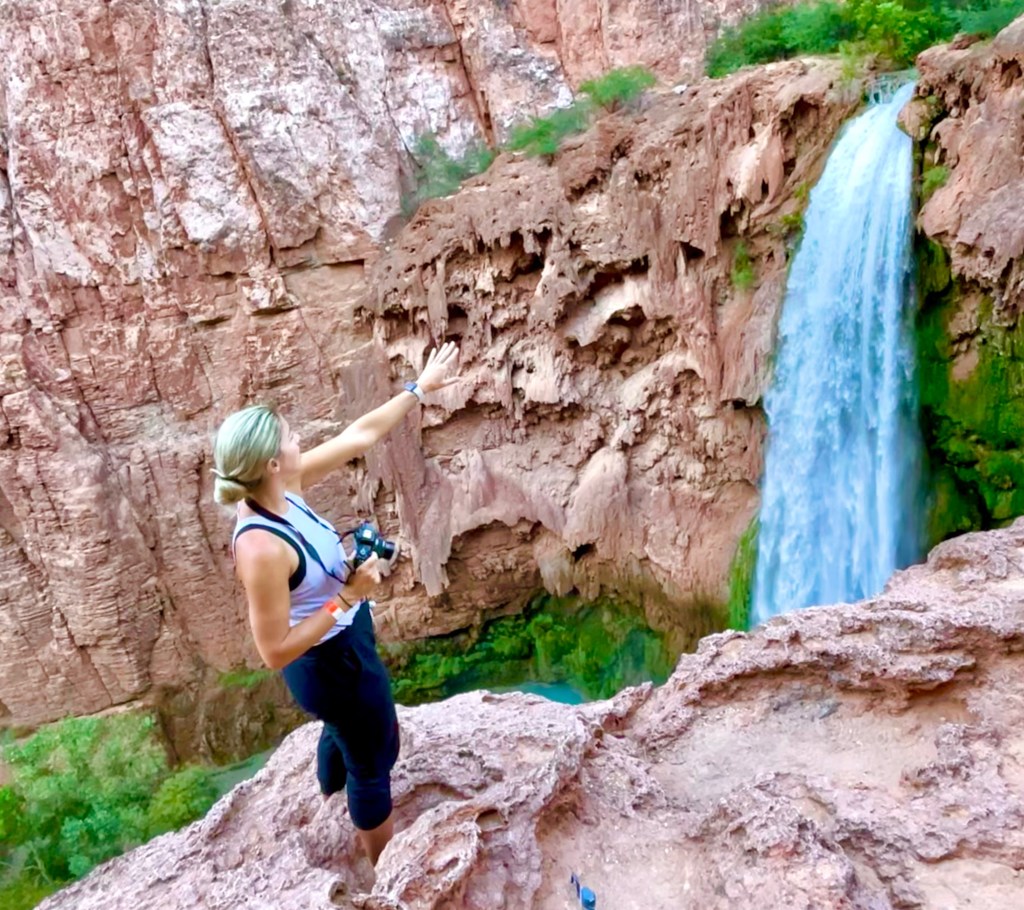
Upon reaching Supai Village (8 miles in), we stopped for one in our group to send postcards to her family that would be carried out of the canyon by mile then continued two more miles to set up camp at the Havasu Falls Campground. About a quarter mile from the campground on your hike in, there is a breathtaking overlook of Havasu Falls which sets the fire in the soul for the next few days!

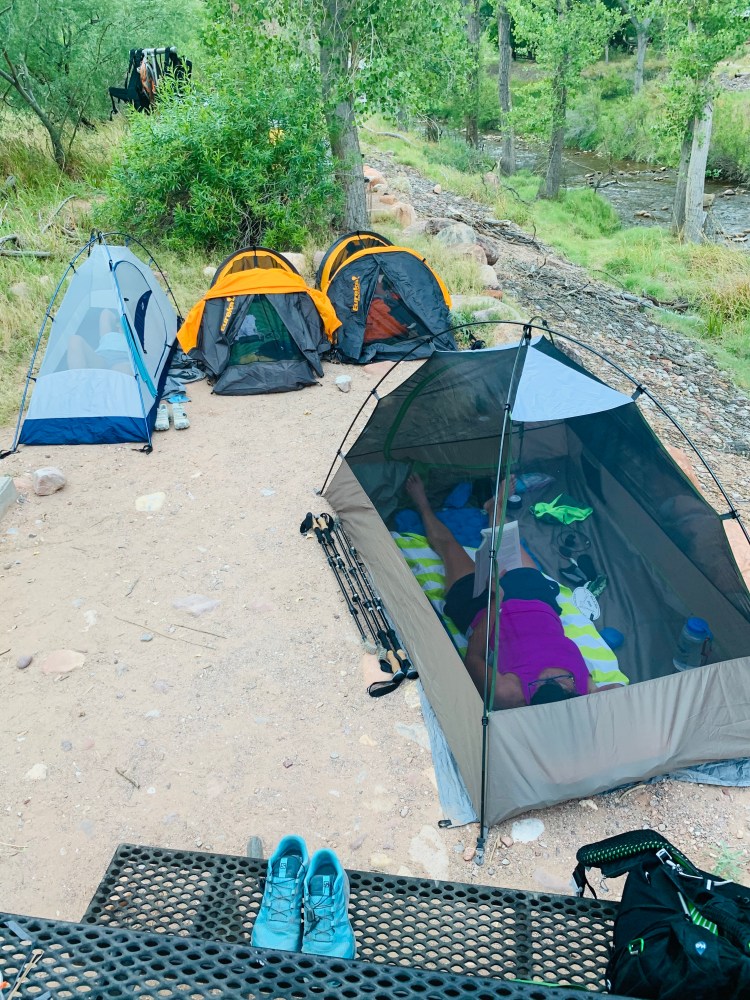
The campground is a one mile stretch of first come, first serve camp sites. We found one potential spot early in and set our bags down and left them with one member in our group to claim it while the other two ventured on (without the 30 pounds on our back thankfully!) to find other potential sites. We were glad we did! We ended up finding a spot right along the water with two picnic tables and plenty of space! There were two campers in the spot but I saw they were leaving the next morning so I asked if we stayed out of their way that evening if we could share the space and they were completely fine with it!

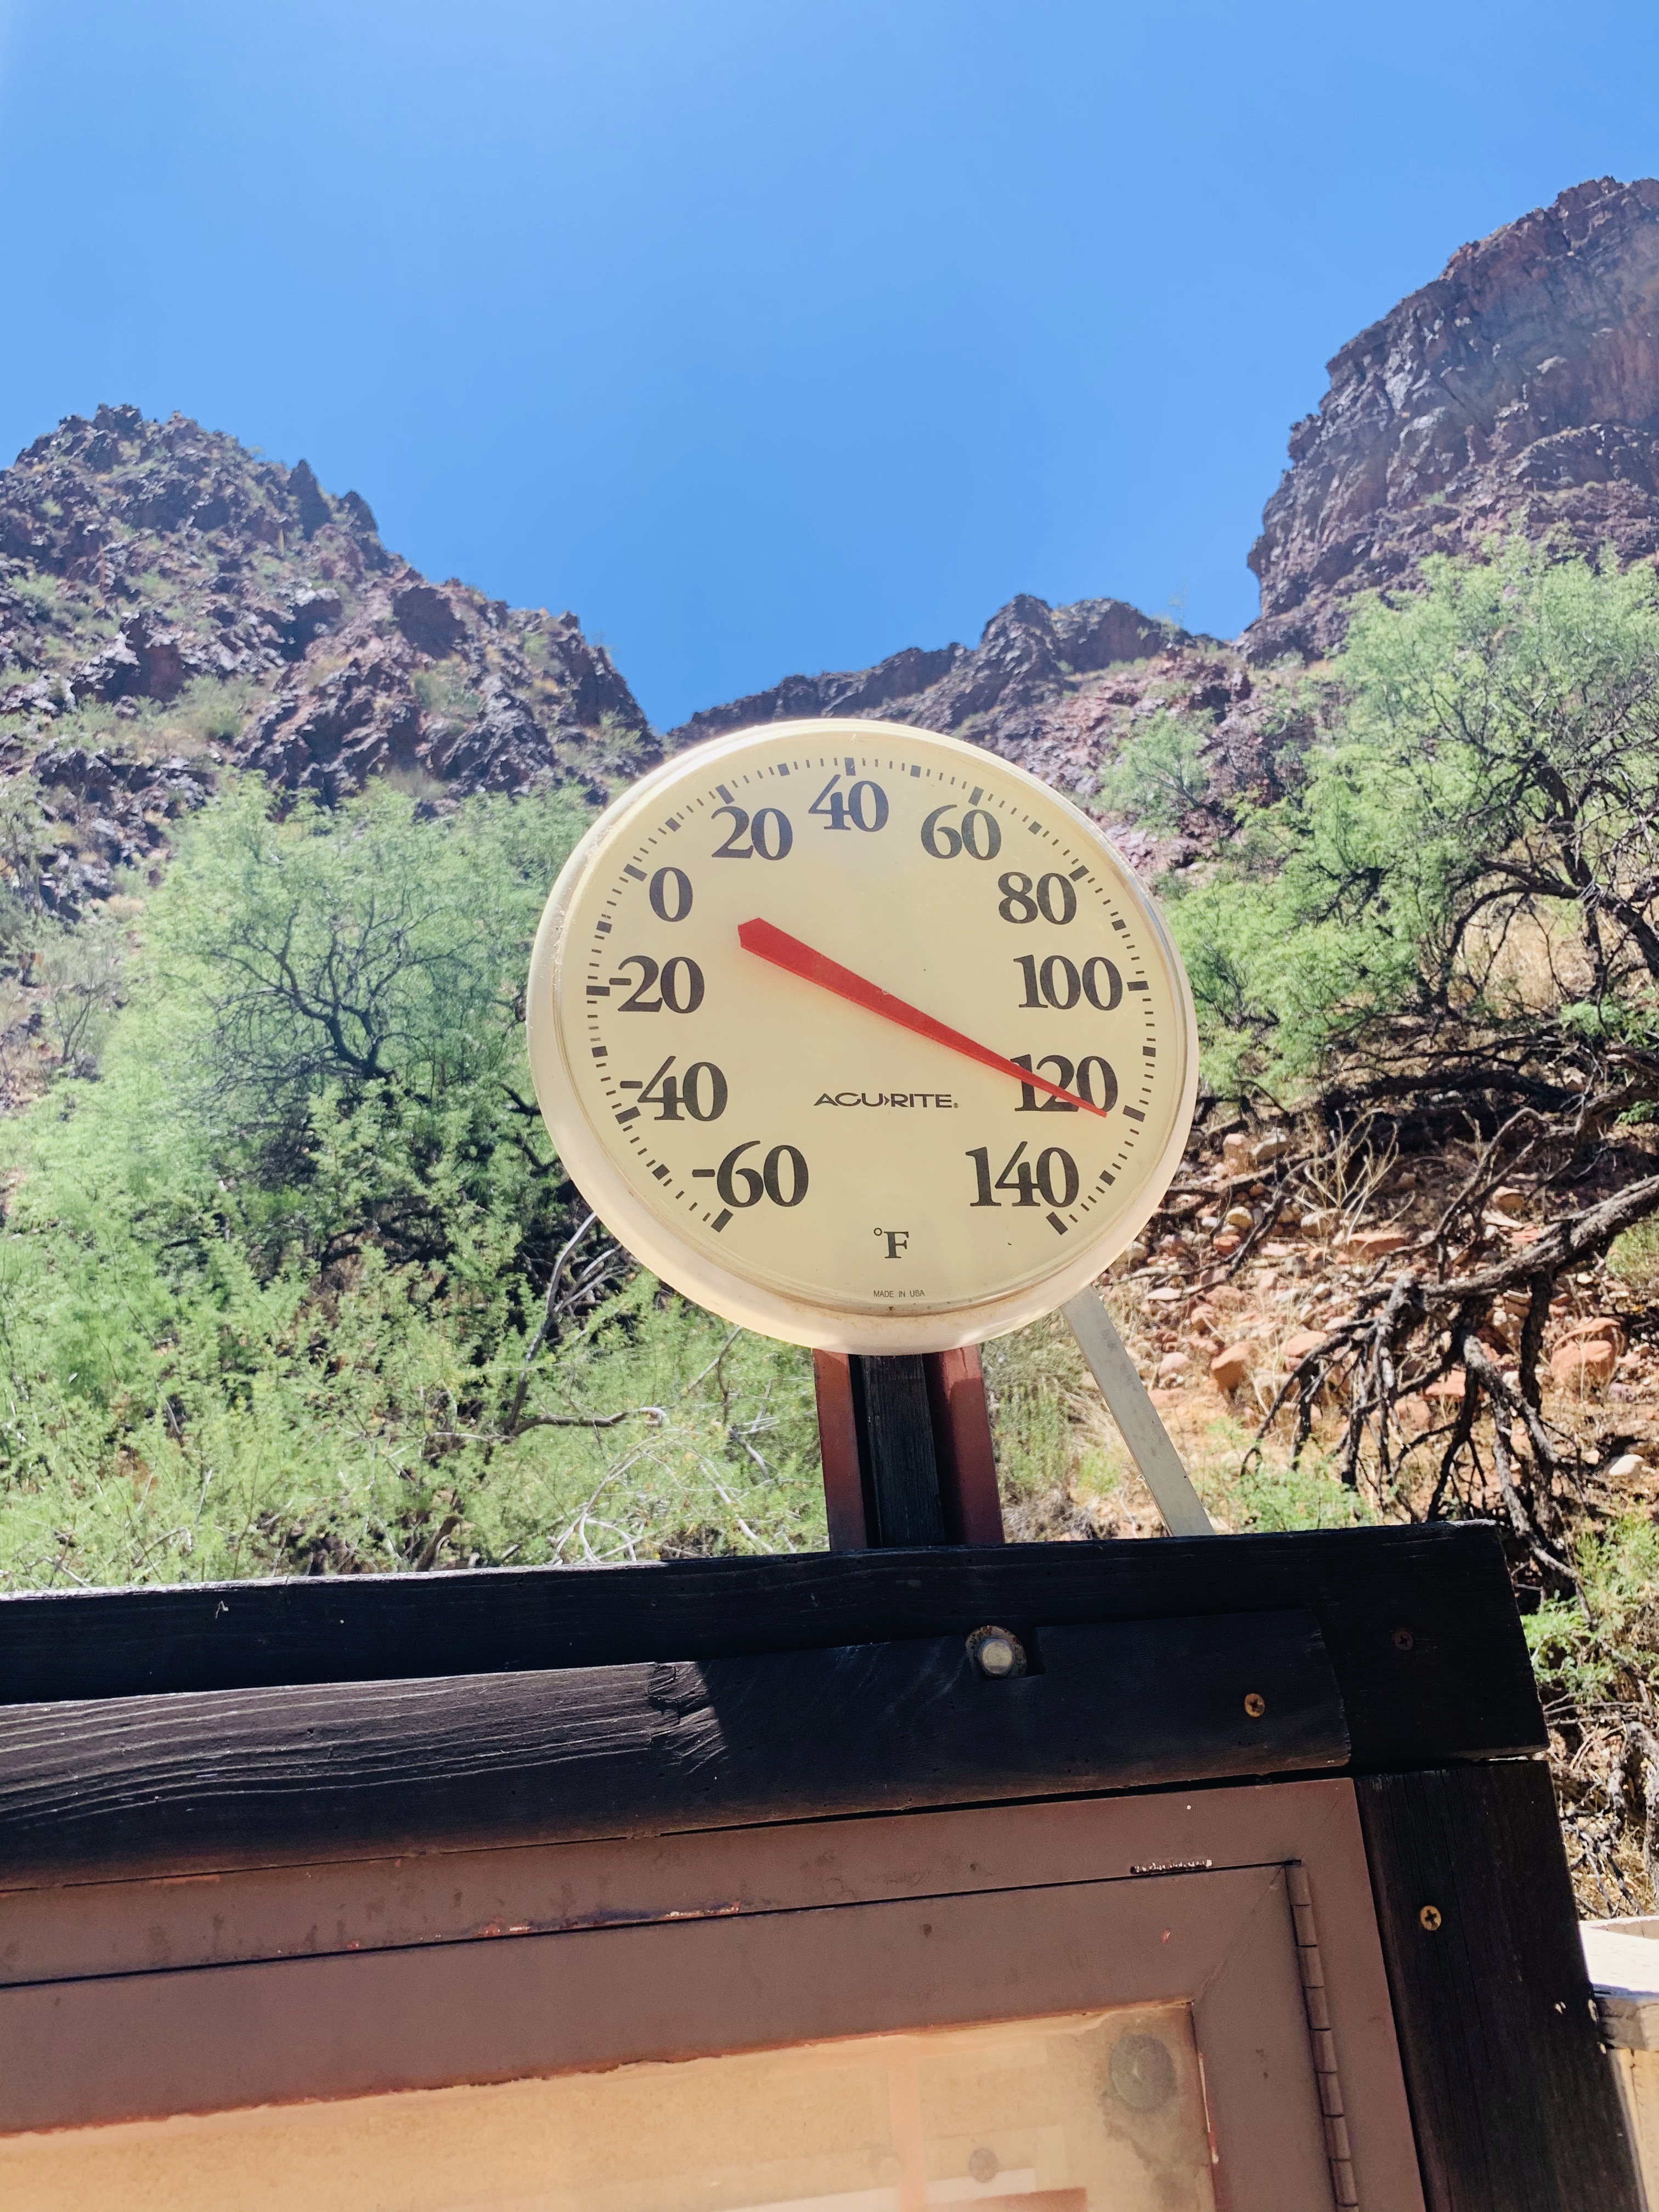
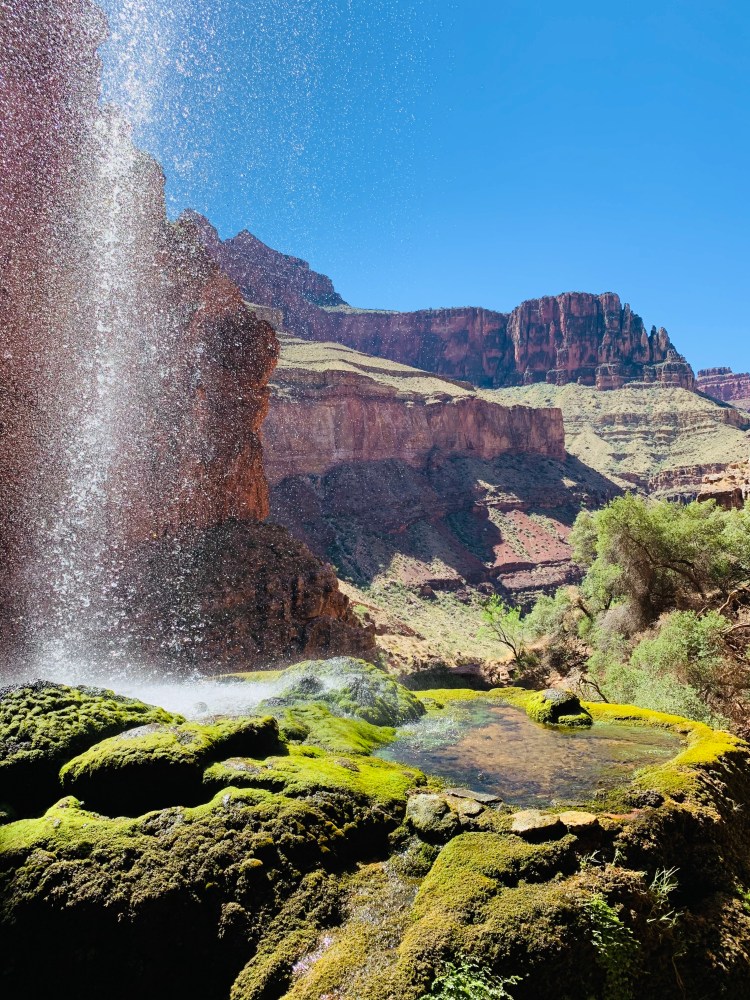
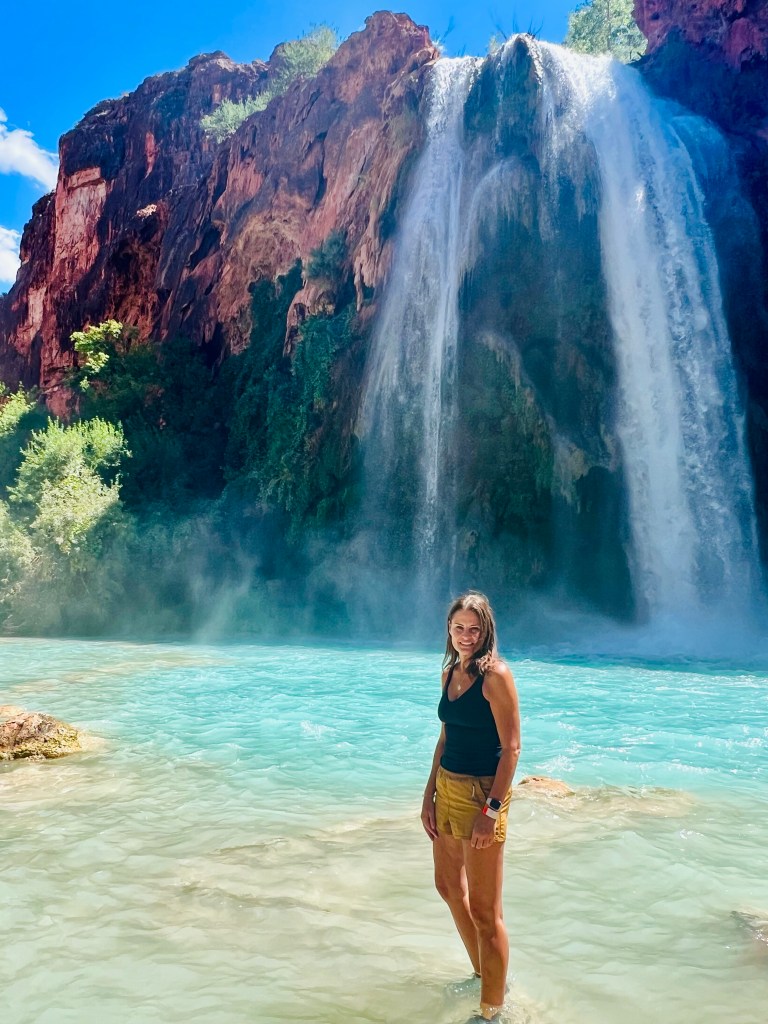
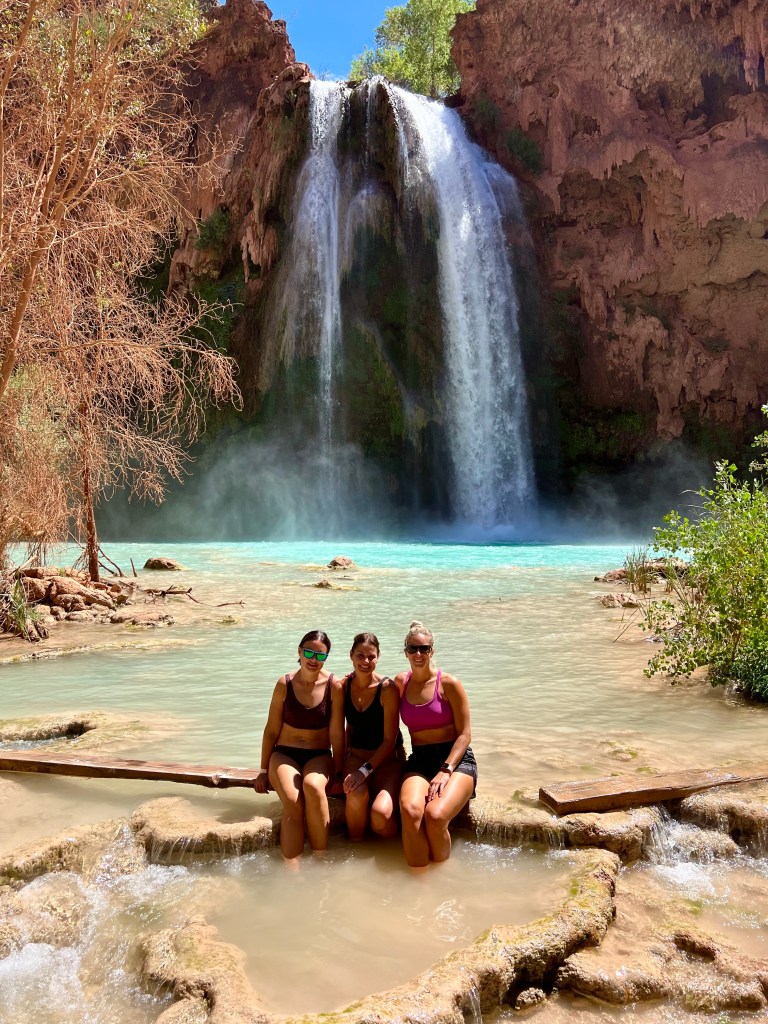
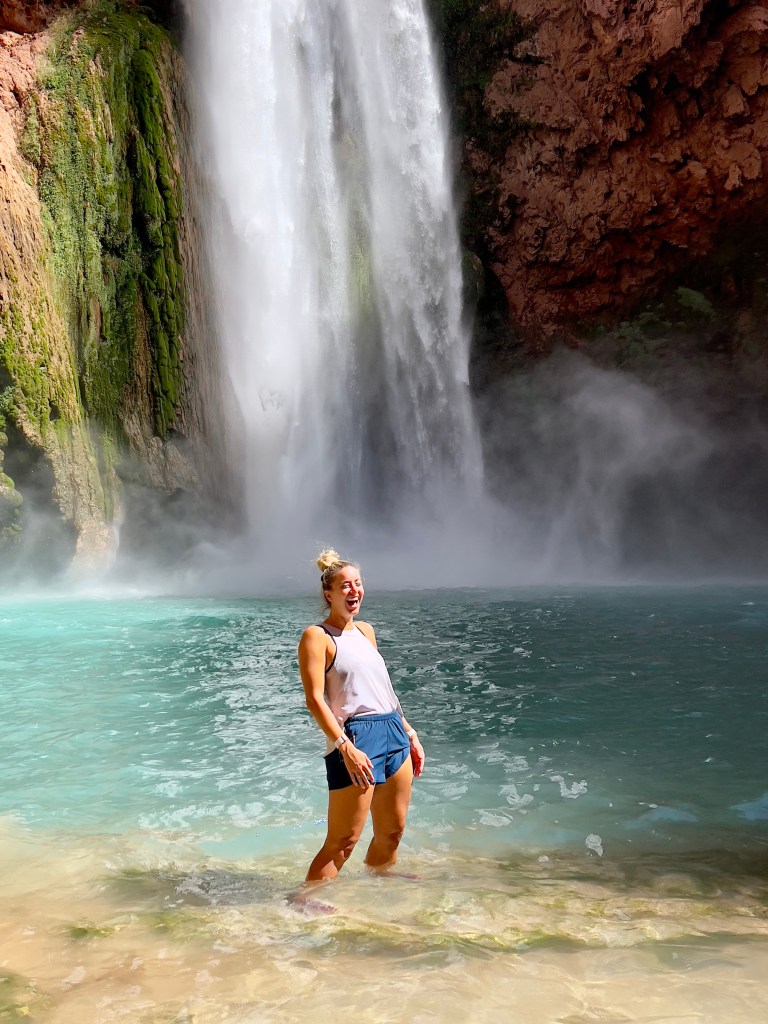
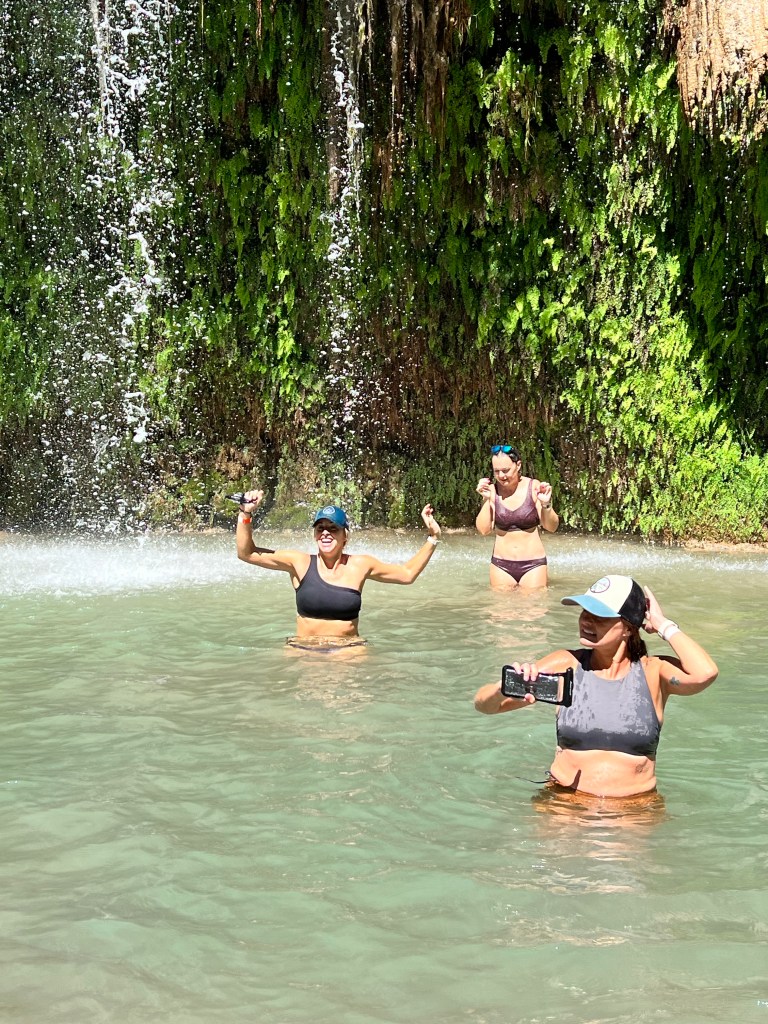
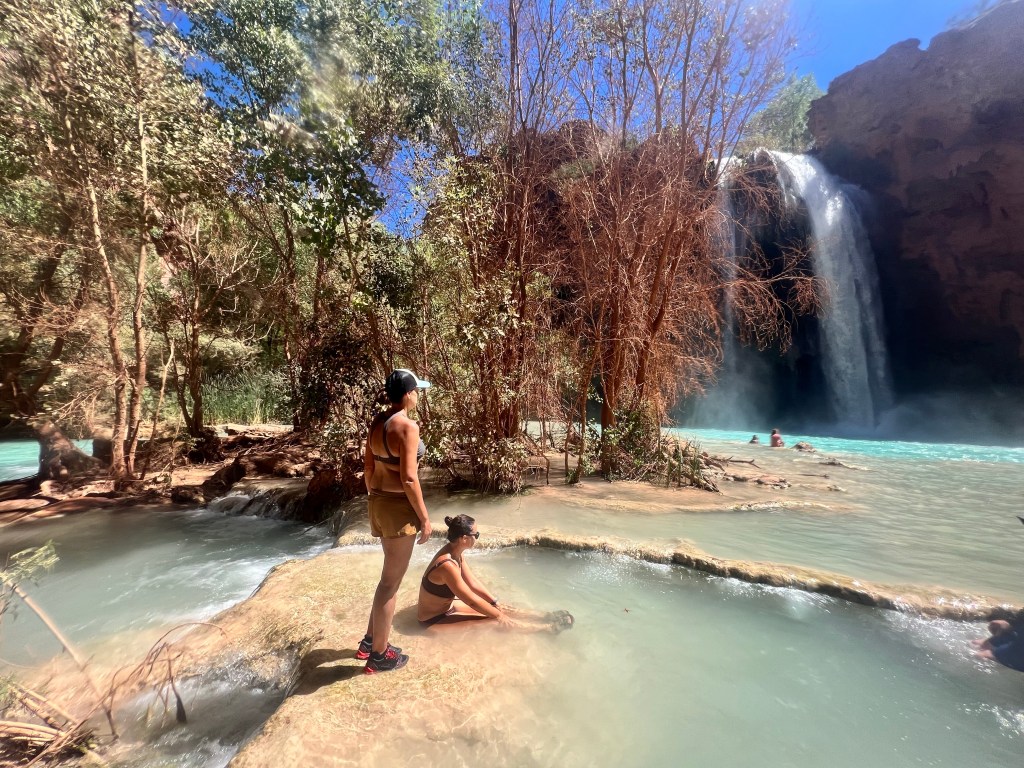
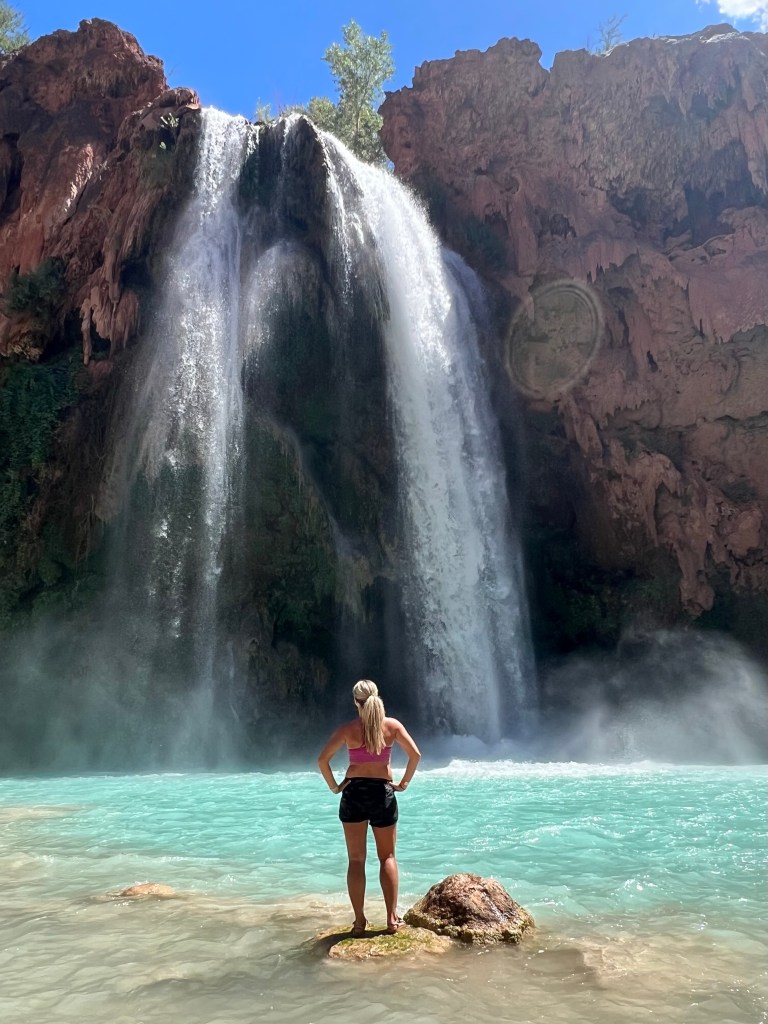
We set up our tents and got our campsite situated with things like hanging our food in rat sacks before headed to the base of Havasu Falls the rest of the day to take photos and take in the views of that magical teal water! The temperature of all the water is about 70 year-round but it was 100 degrees the week we went so it was refreshing! Definitely cool at first but we acclimated after a few minutes. We loved sitting in the little pools that are created from the power of the waterfall at the base of Havasu. The cold water was a godsend all week, replenishing our worked muscles!

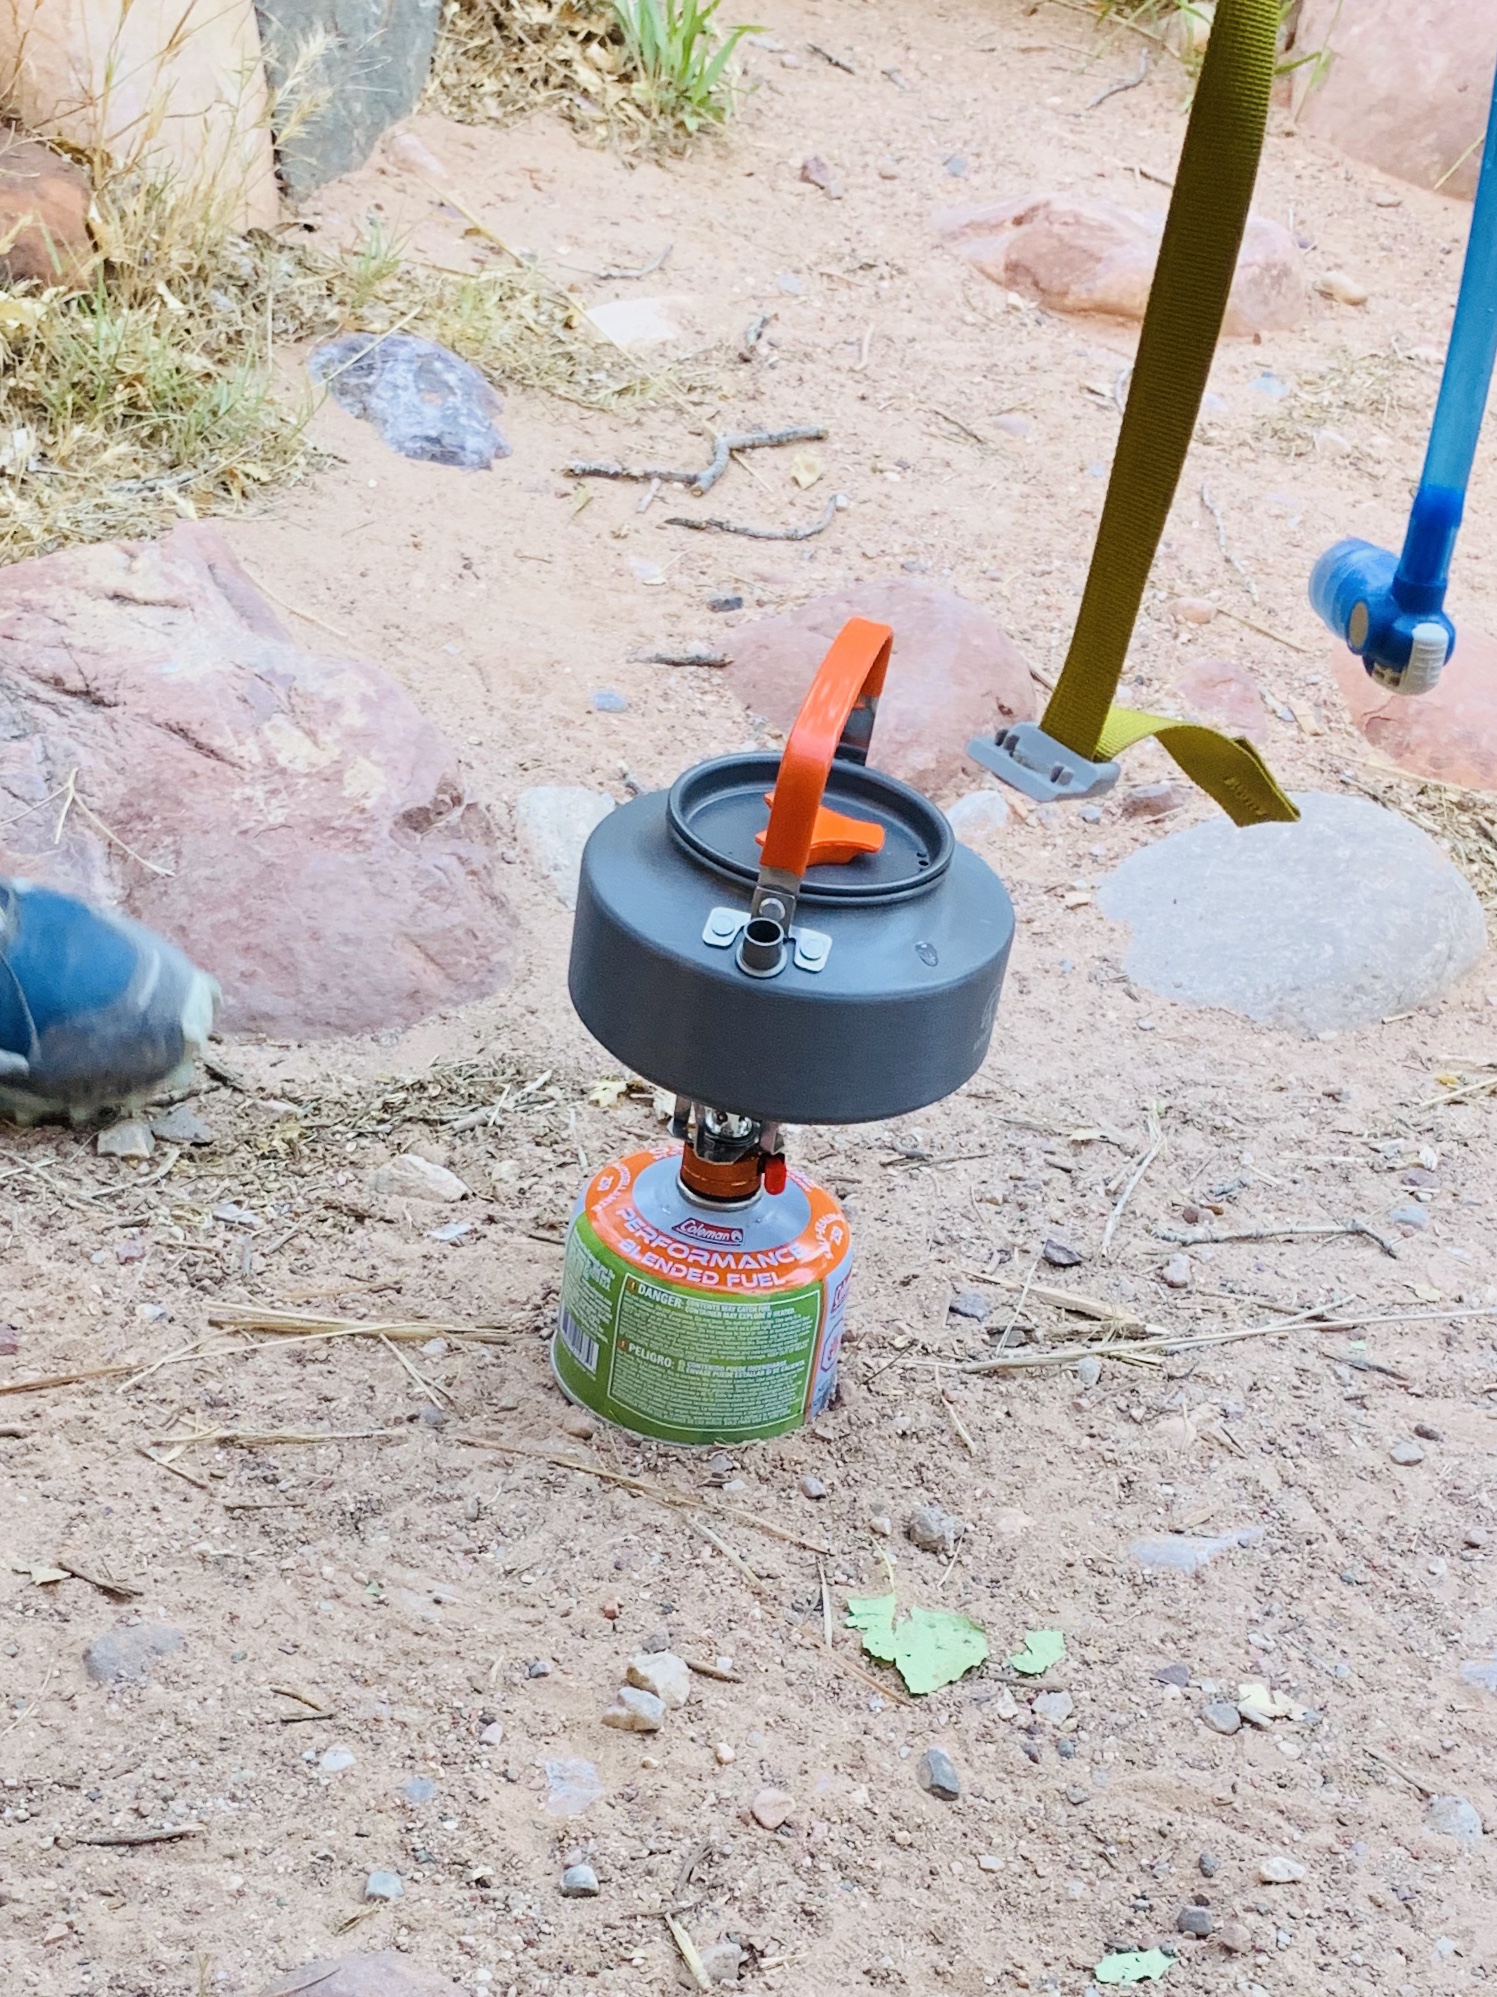
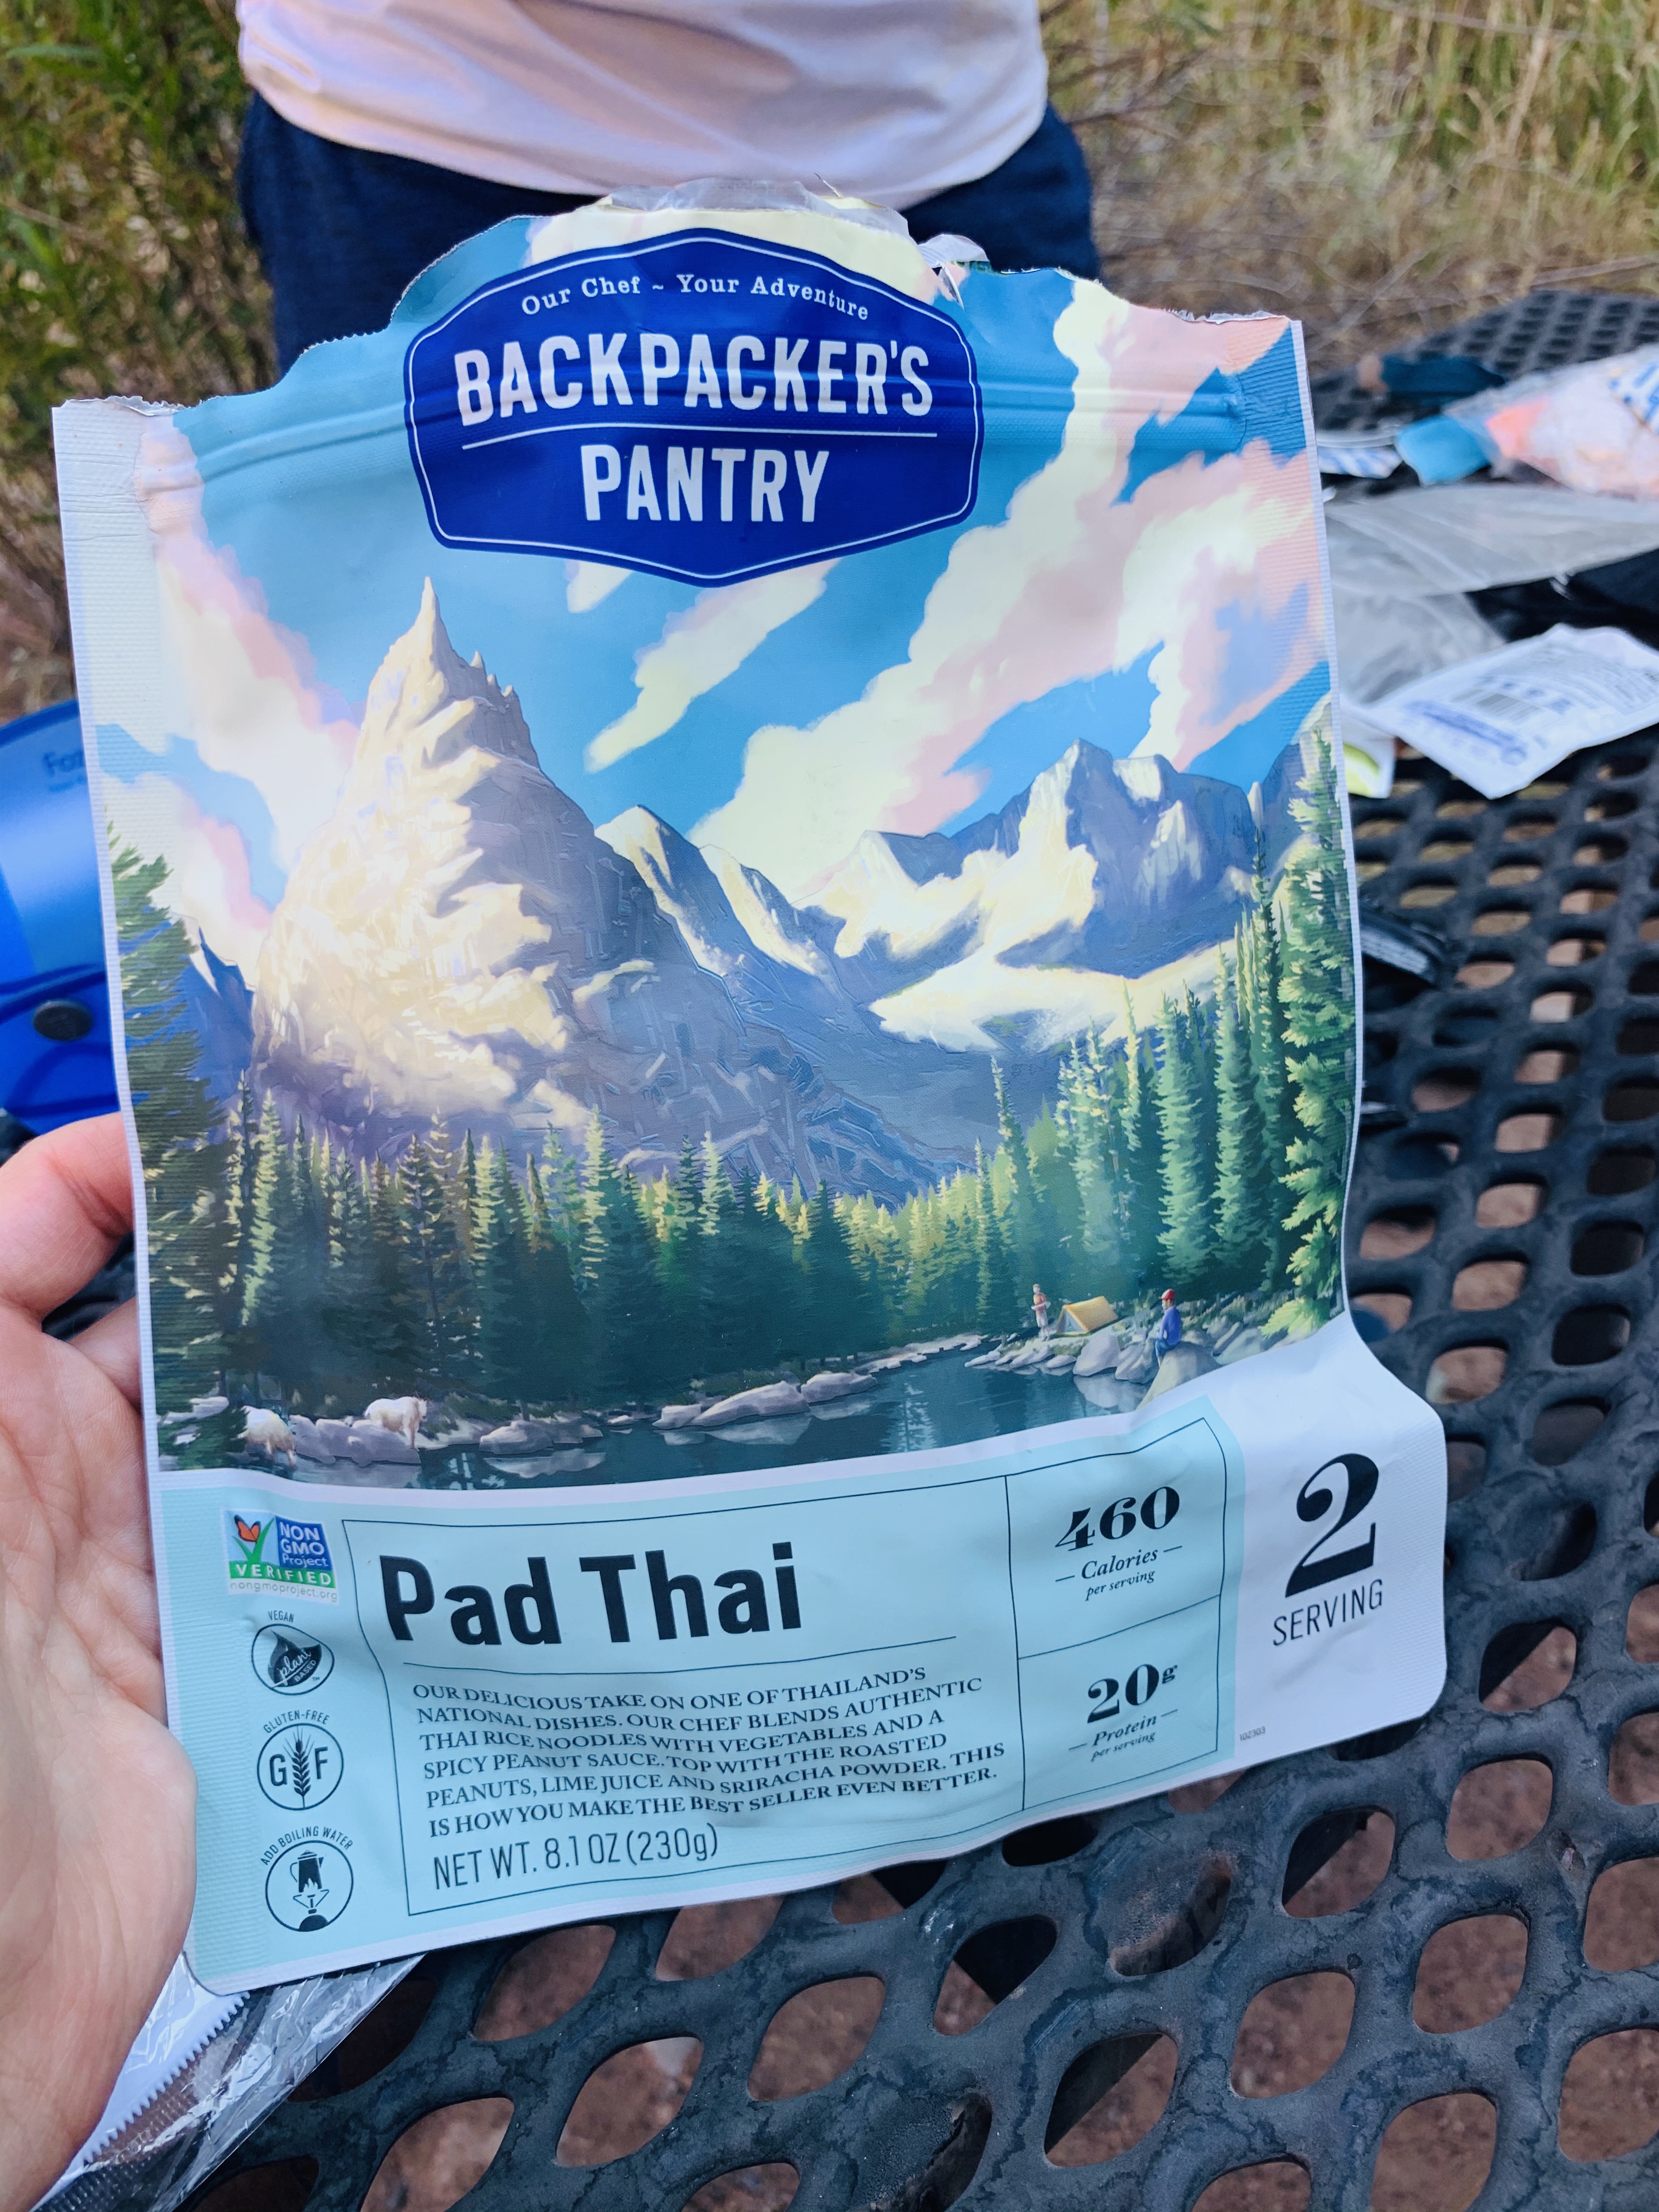
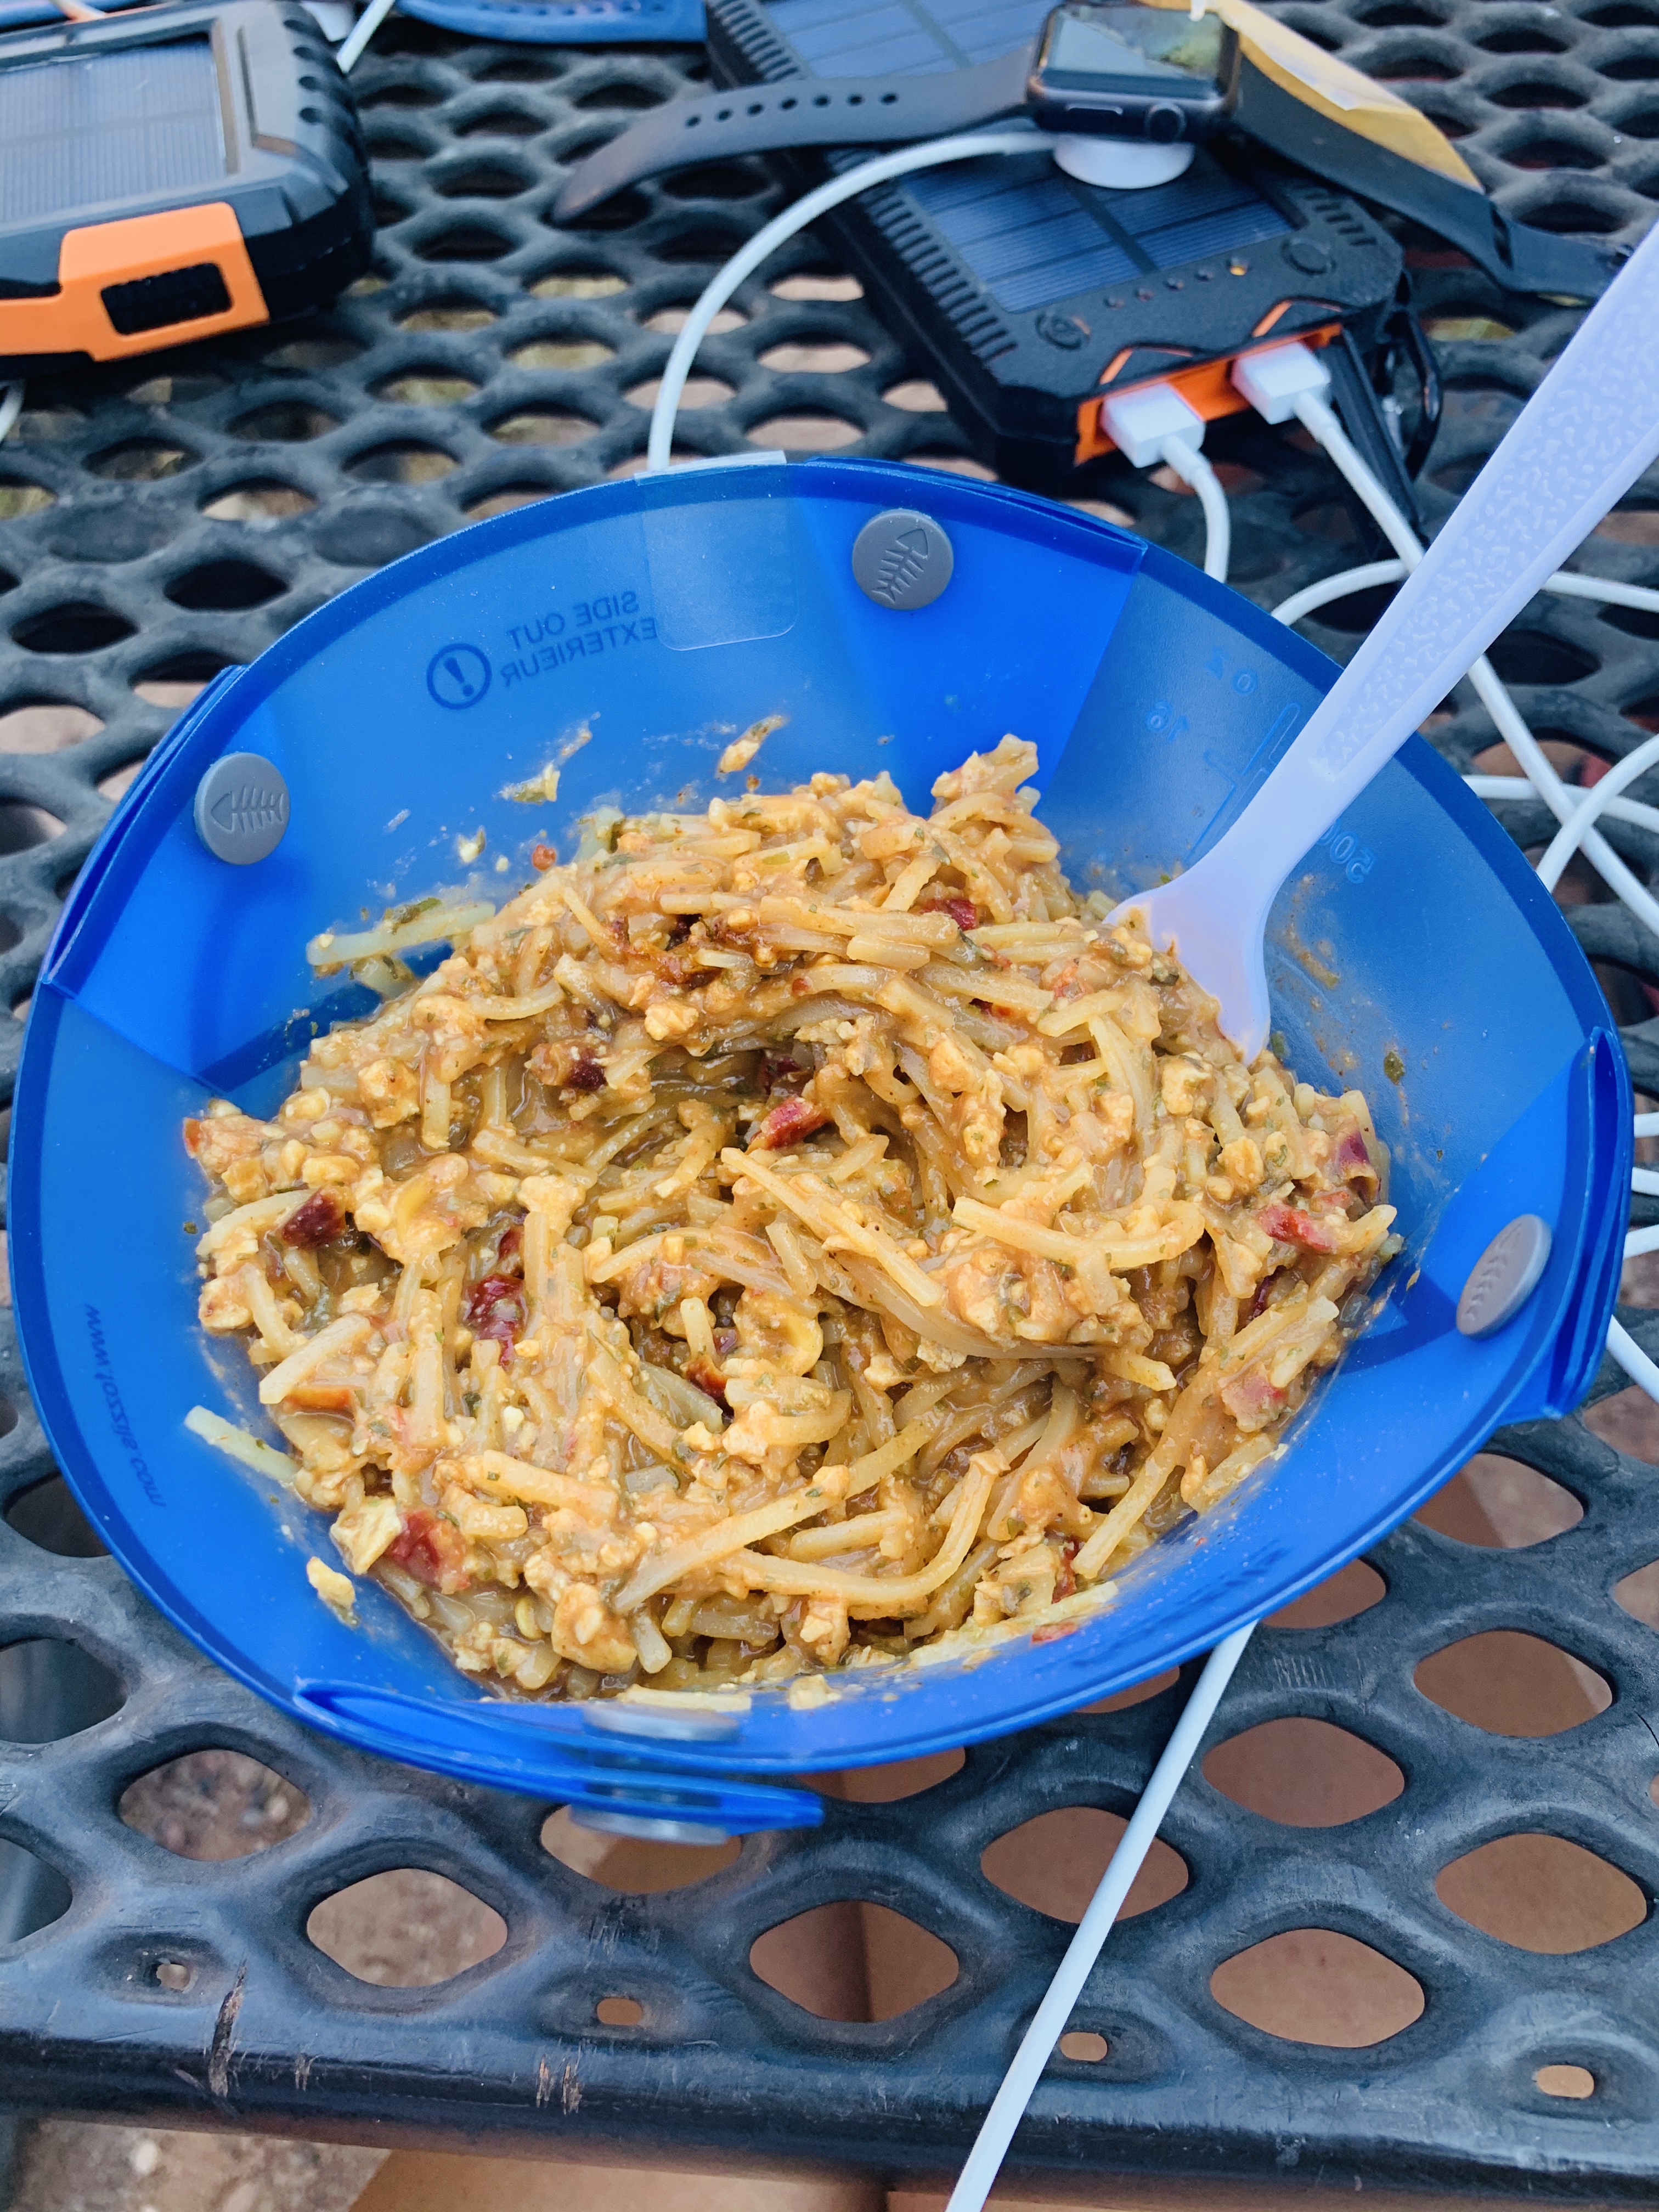
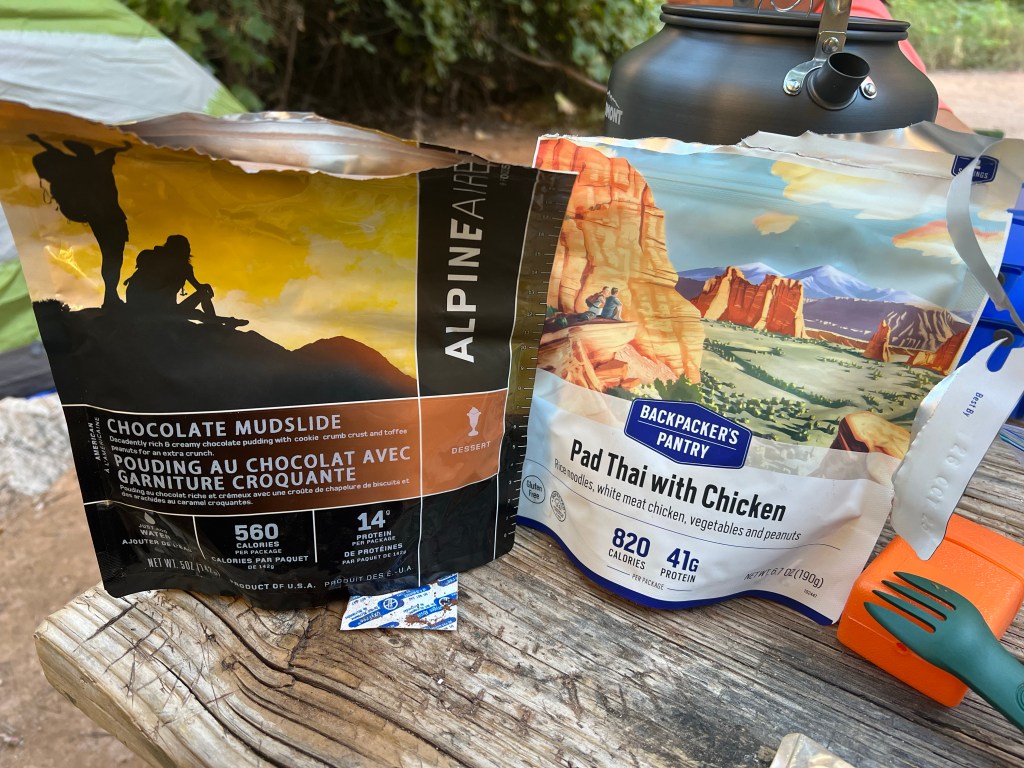
Finally around about 4 pm, we headed back to our campsite, made our Backpacker’s Pantry pad thai dehydrated meal for dinner and an amazing AlpineAire Foods chocolate mudslide dessert! Around 6 pm we used body wipes to wipe away the minerals and dirt to take a “camp shower”, changed into our pjs, and crawled into our tents for the night! The sound of the rushing water in the creek lulled us to sleep in no time!

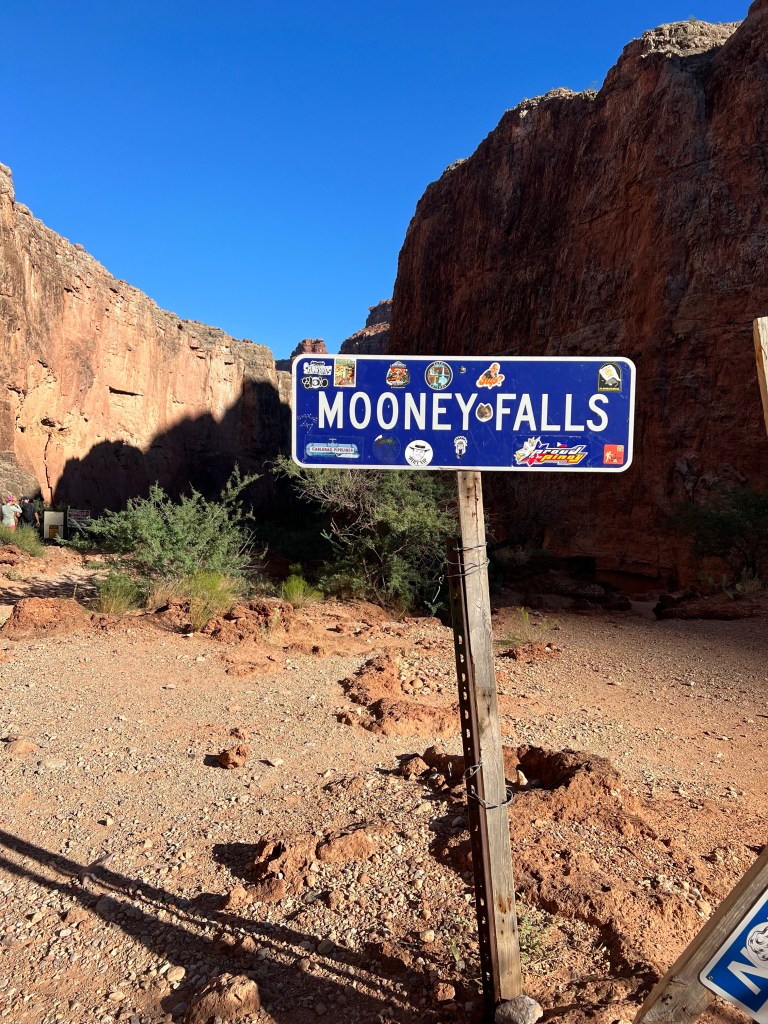
Day 2: Mooney Falls and Beaver Falls hike

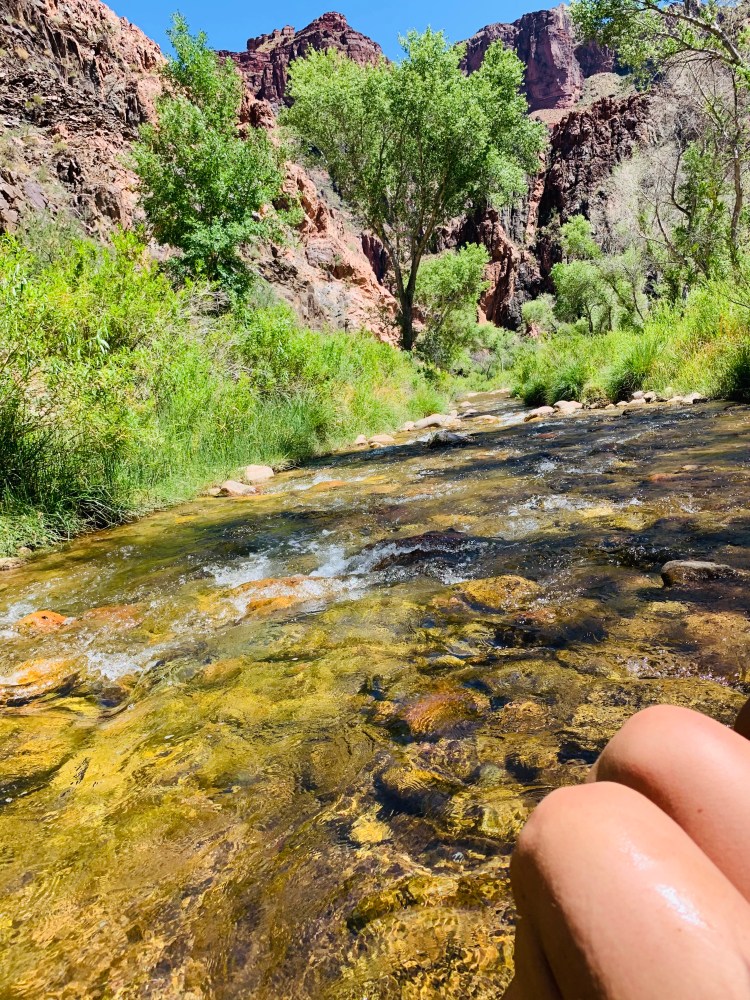
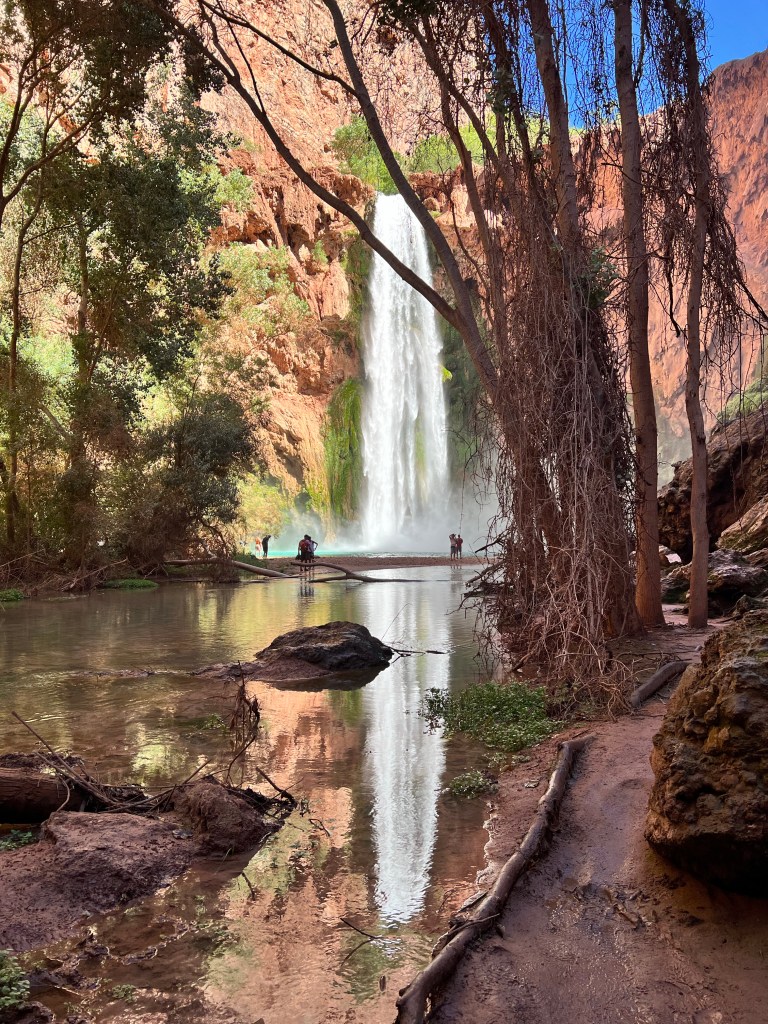
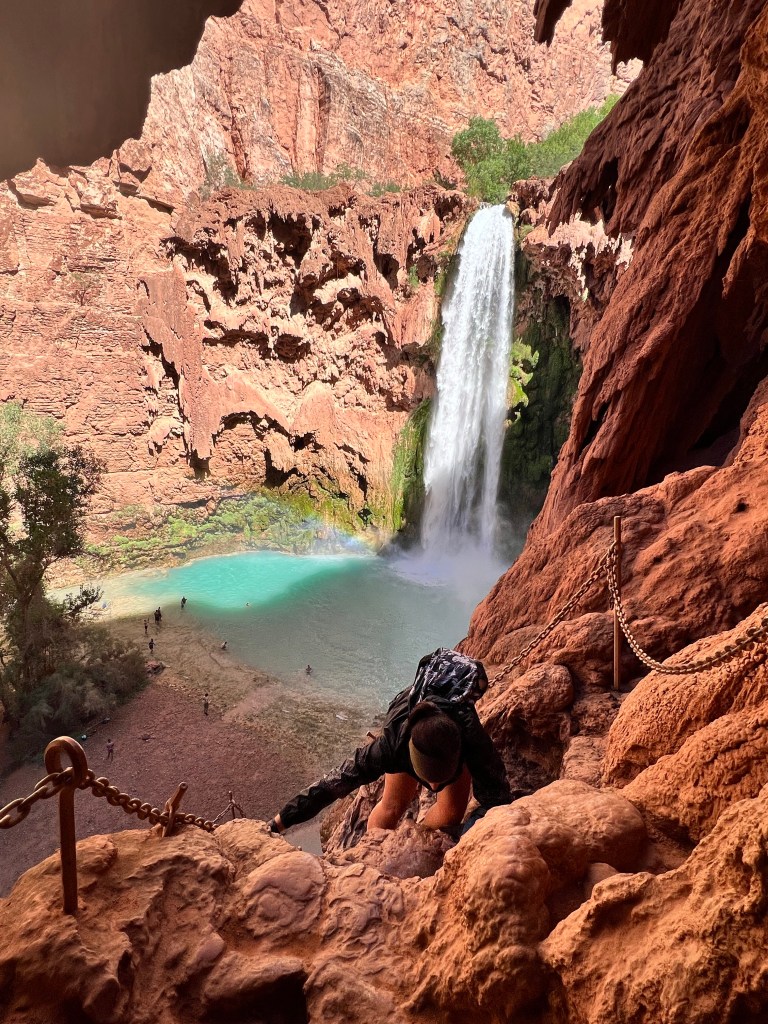
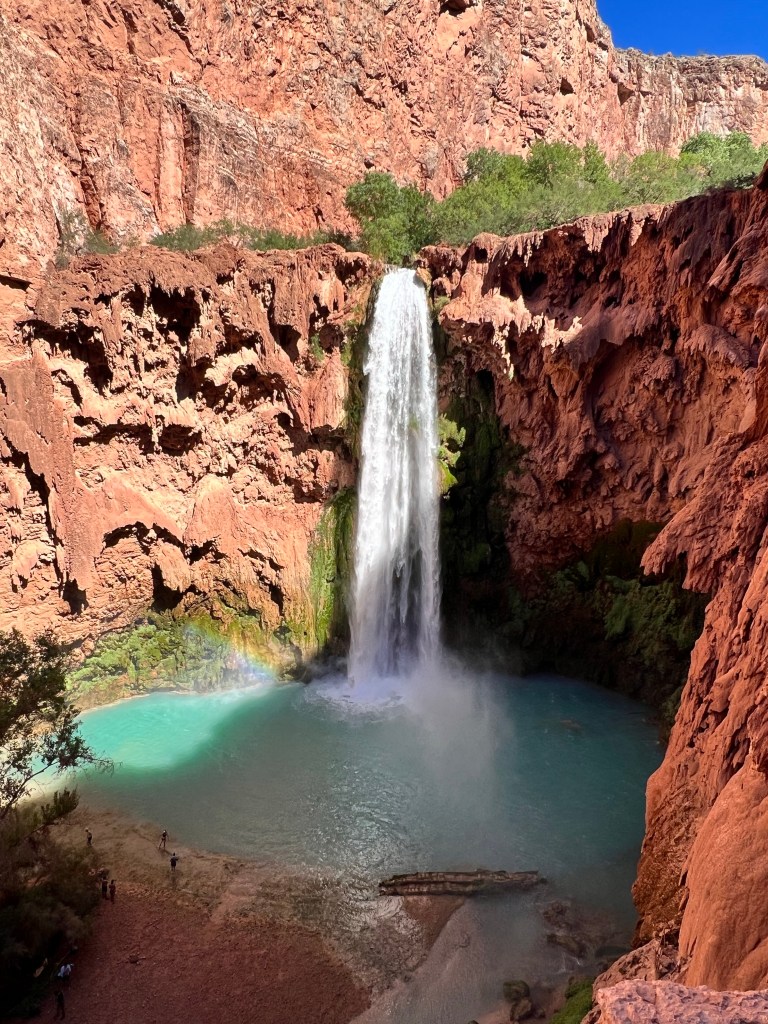
Waking up at 5 am to the sound of the Havasu Creek rushing by was an experience in itself. The day started with breakfast and coffee at the campsite then we debated if we should attempt the full hike to the Confluence of Havasu Creek and the Colorado River which would be a 20 mile day and it had just opened the day before due to flash flooding or just going to Beaver Falls and back for about a 7-8 mile round trip trek. We all agreed to make the call during the hike depending on what time we got to the turn off point for the confluence. We started our hike to the iconic Mooney Falls, just a short distance from our campground.

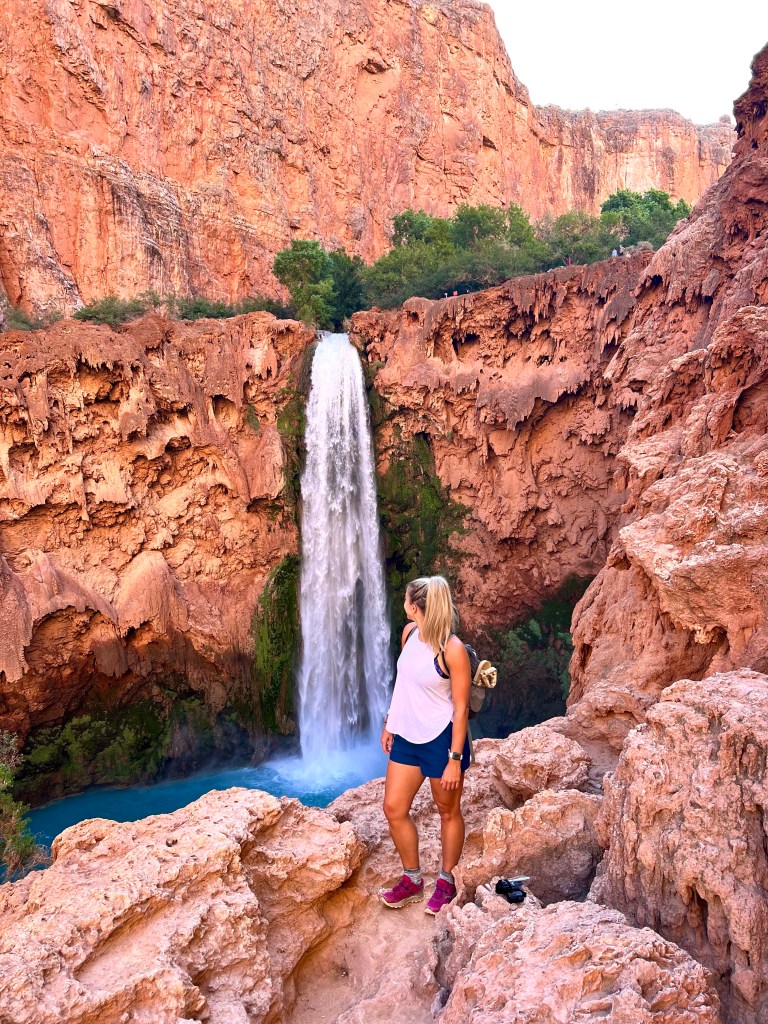
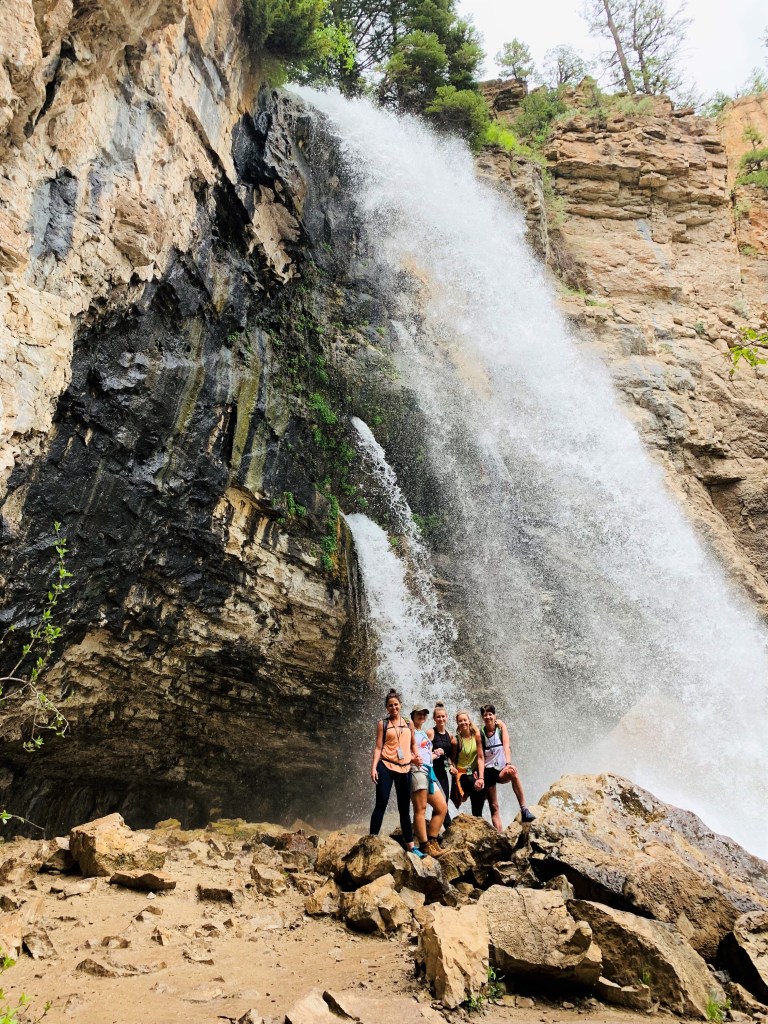
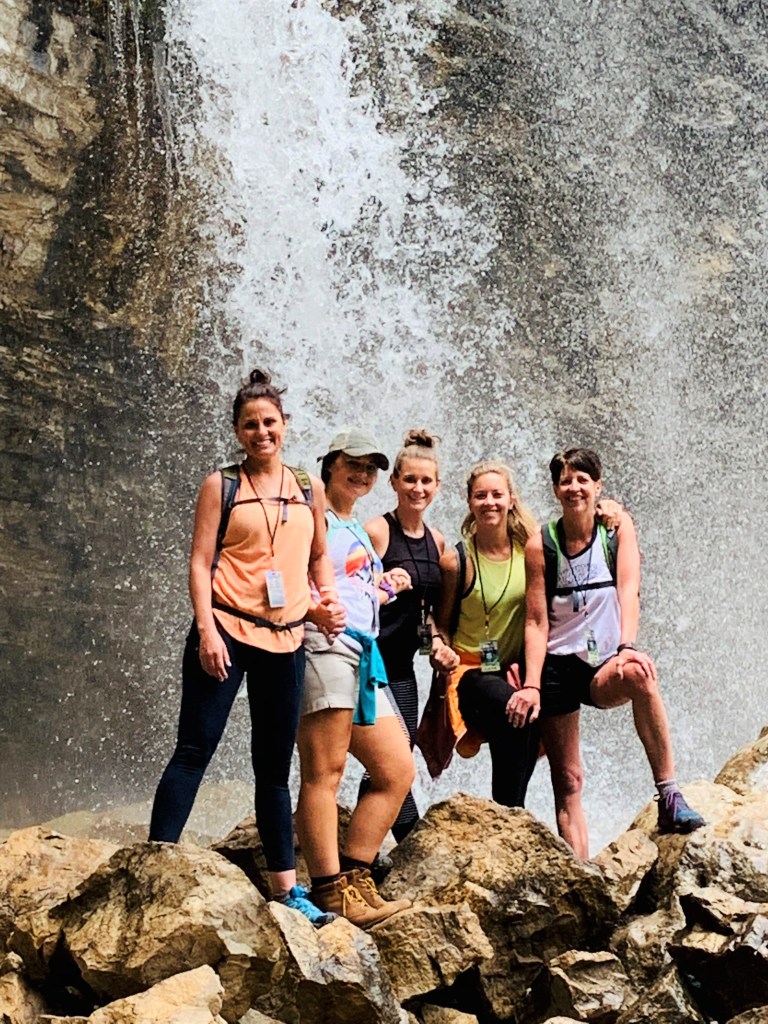
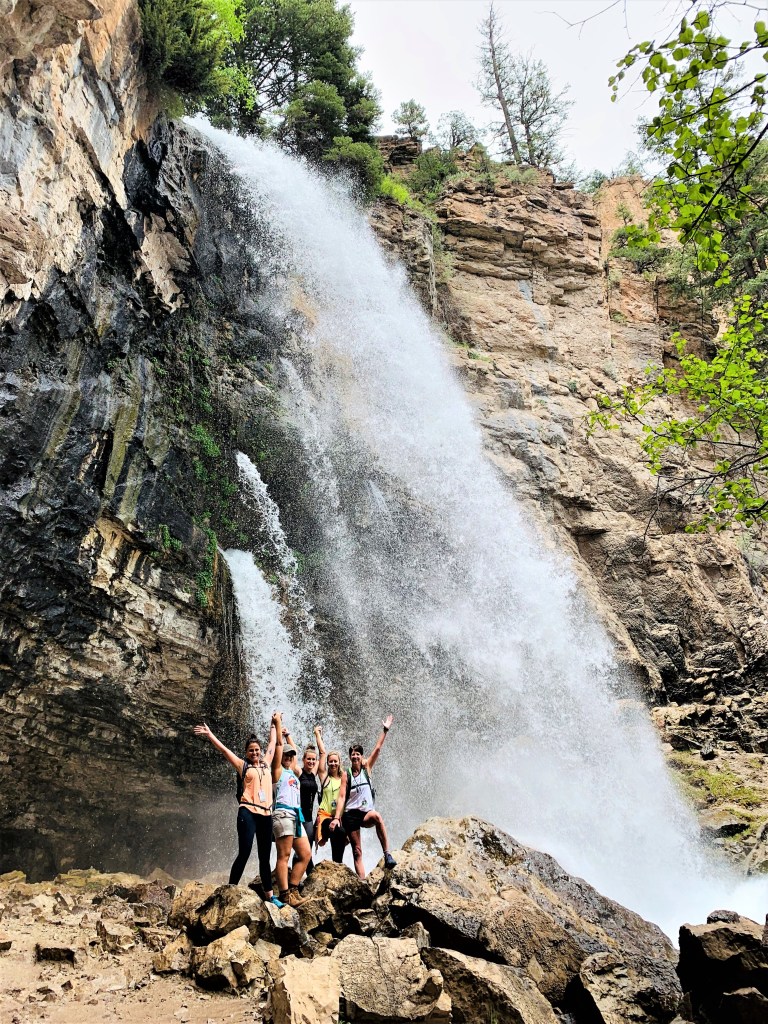
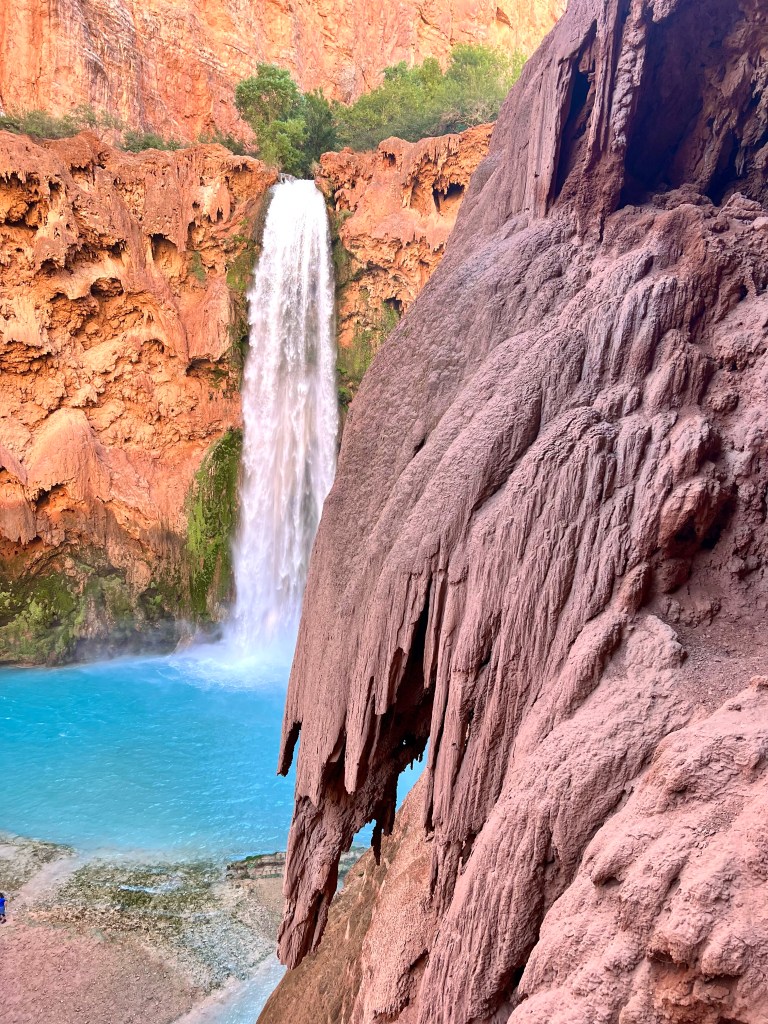
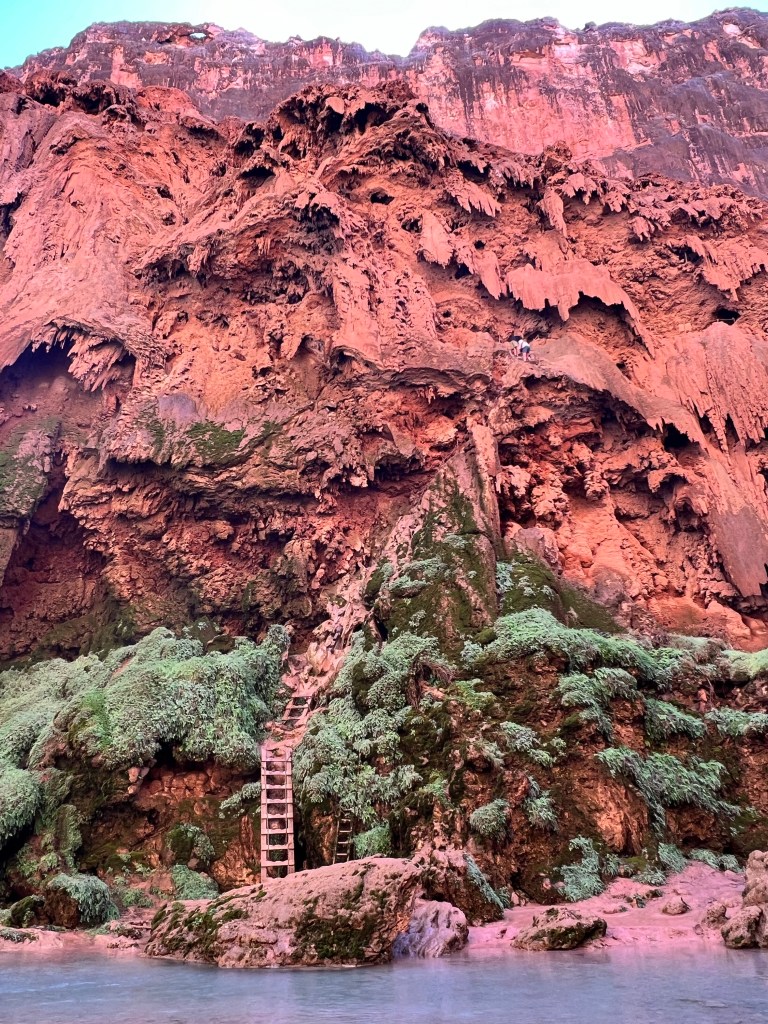
The adrenaline rush of descending to the base of the 200-foot falls is unmatched, and the view from below is truly spectacular. After navigating through a few caves in the rock face created by miners in the 20th century, we scaled the cliff face of chains and makeshift ladders down the 200 foot drop all while mist from neighboring Mooney Falls was pelting us in the face! I have never experienced anything like it and it is NOT a scenario you’d find in any National Park ha! It truly was an adventure in itself! The name of the falls actually got itself from Mr. Mooney who fell to his death a long time ago prior to the chains being in place.

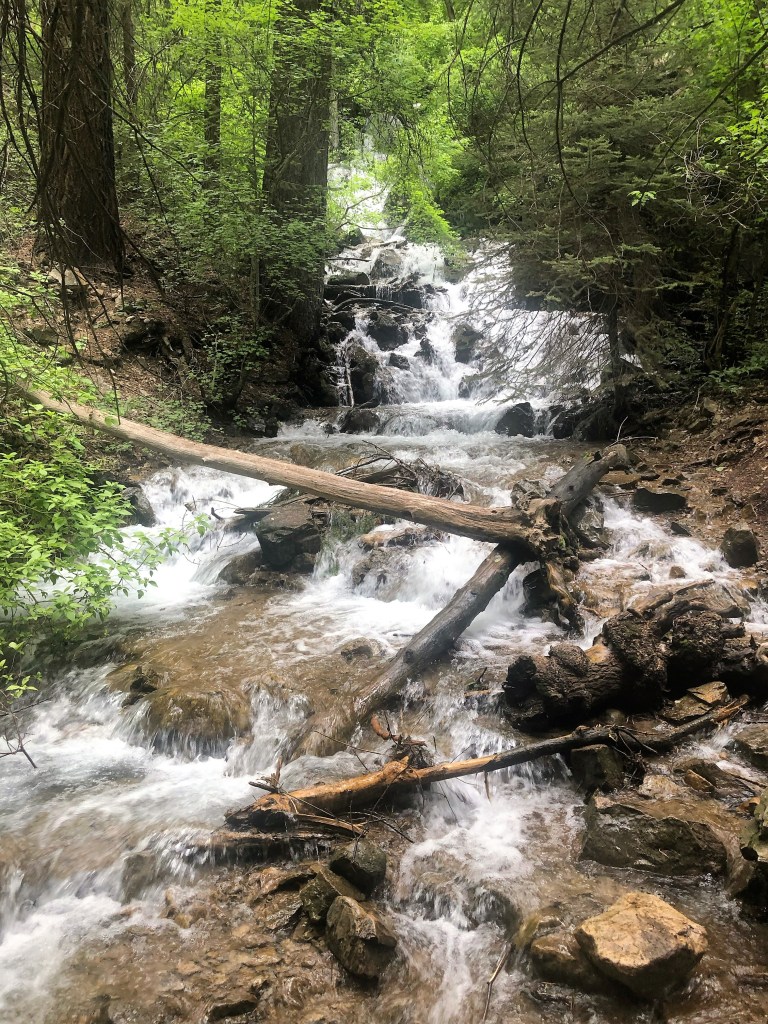
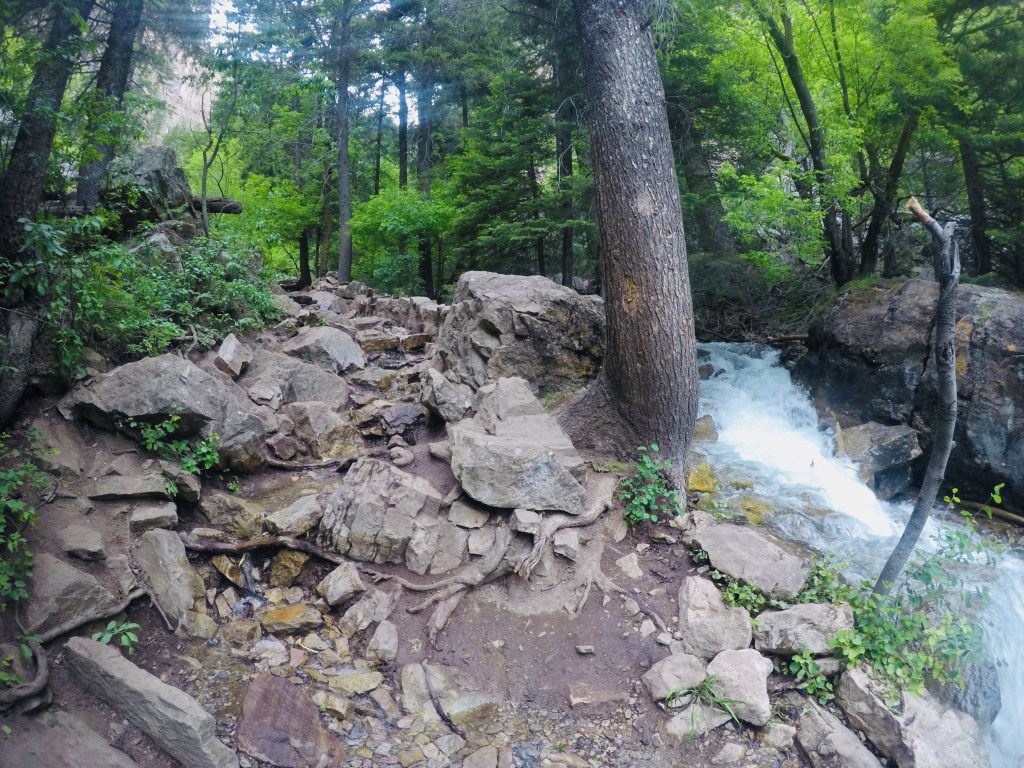
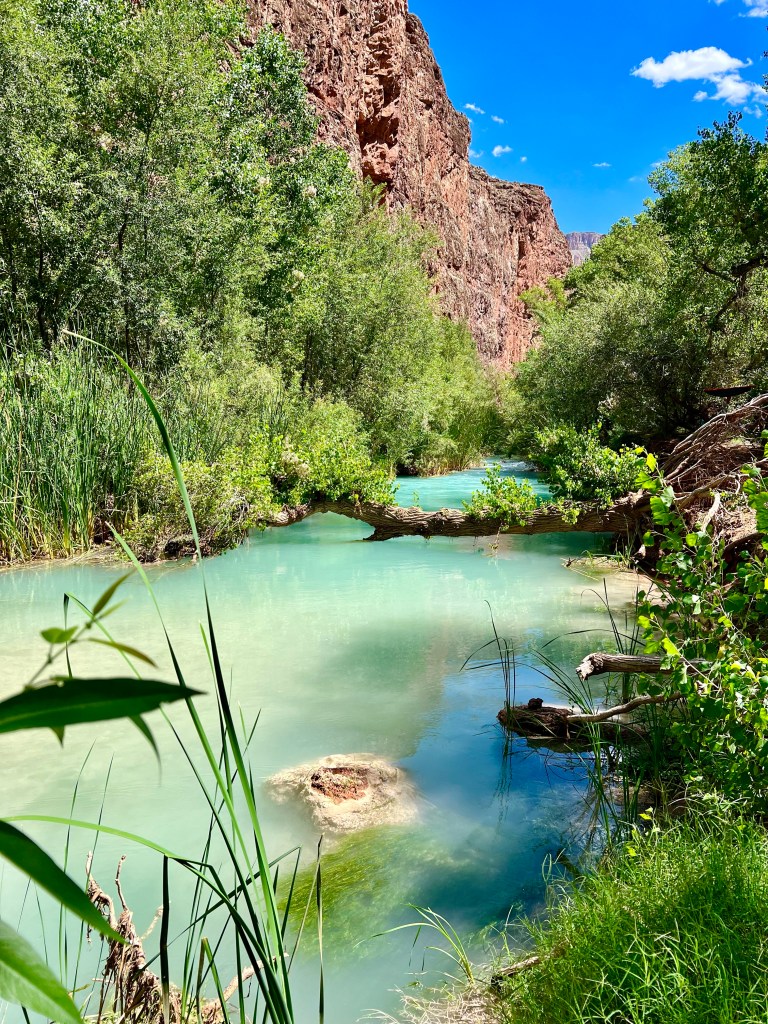
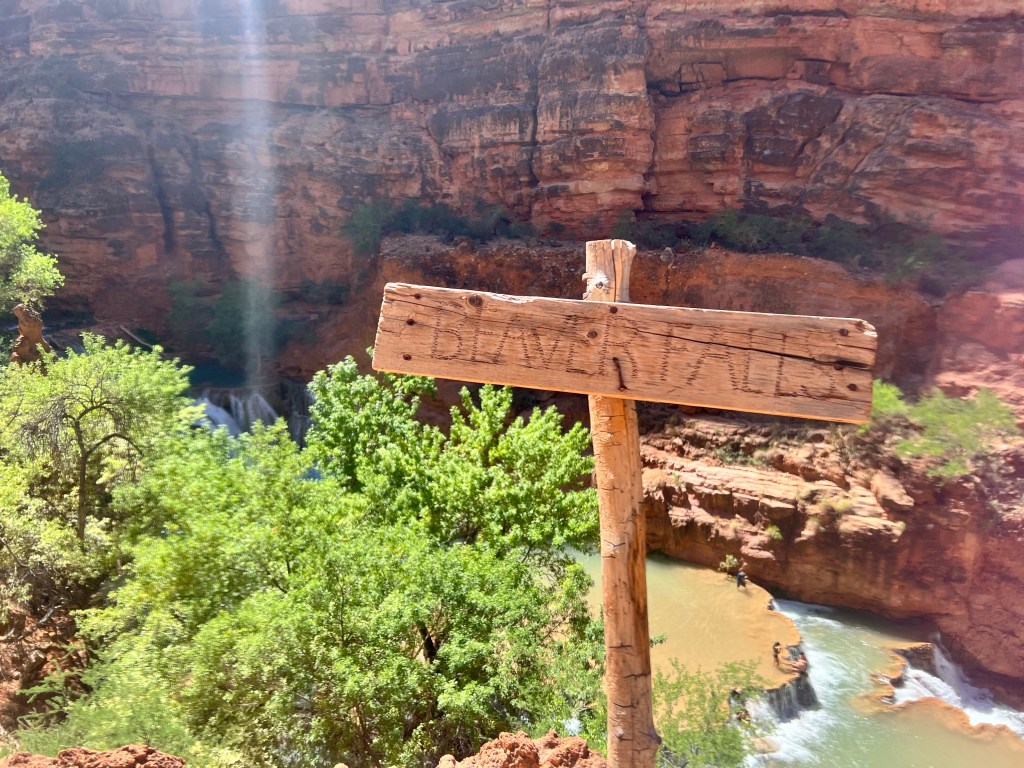
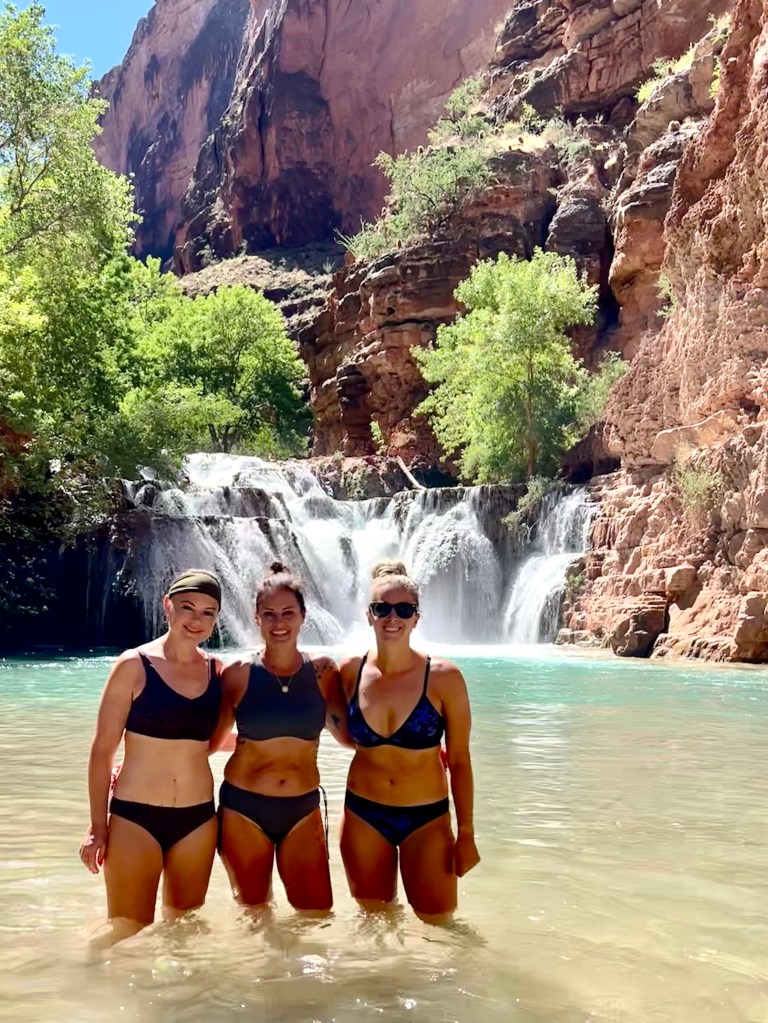
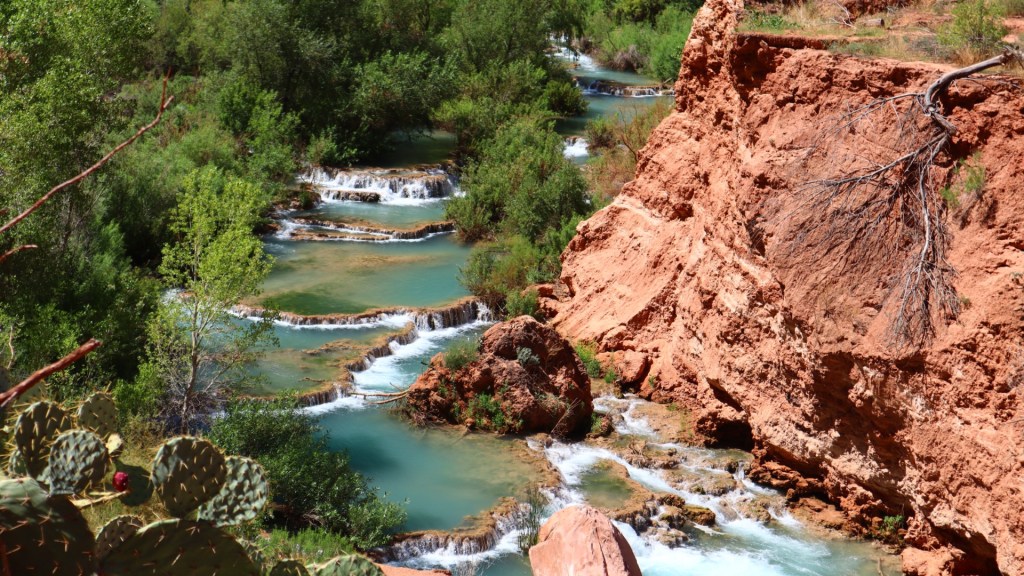
After briefly exploring Mooney Falls, we continued downstream to reach Beaver Falls, approximately 3-3.5 more miles. The trail takes you through mesmerizing terrain, offering glimpses of vine patches, turquoise pools, and smaller waterfalls along the way. Note of caution that there are several creek crossings, rock scrambles, and more makeshift ladders along the way! Beaver Falls, with its series of cascades and emerald-colored pools, is a serene paradise worth every step of the journey.

We swam in the pools at Beaver Falls for a few hours before eating lunch and drying off for the 4 mile trek back to our campsite. One of my friends joked she was going to stay at the bottom so she didn’t have to climb back up the 200 foot cliff face! I’m pleased to report we all did eventually make it up and back to camp! We enjoyed a dehydrated meal of fettuccine alfredo this night for dinner, cleaned up, and got ready for bed. I refused to climb into my tent before 7 pm this night so I did some yoga to stretch the legs and unwind before crawling in and succumbing to the sounds of the creek!

Day 3: 50 Foot Falls and Navajo Falls

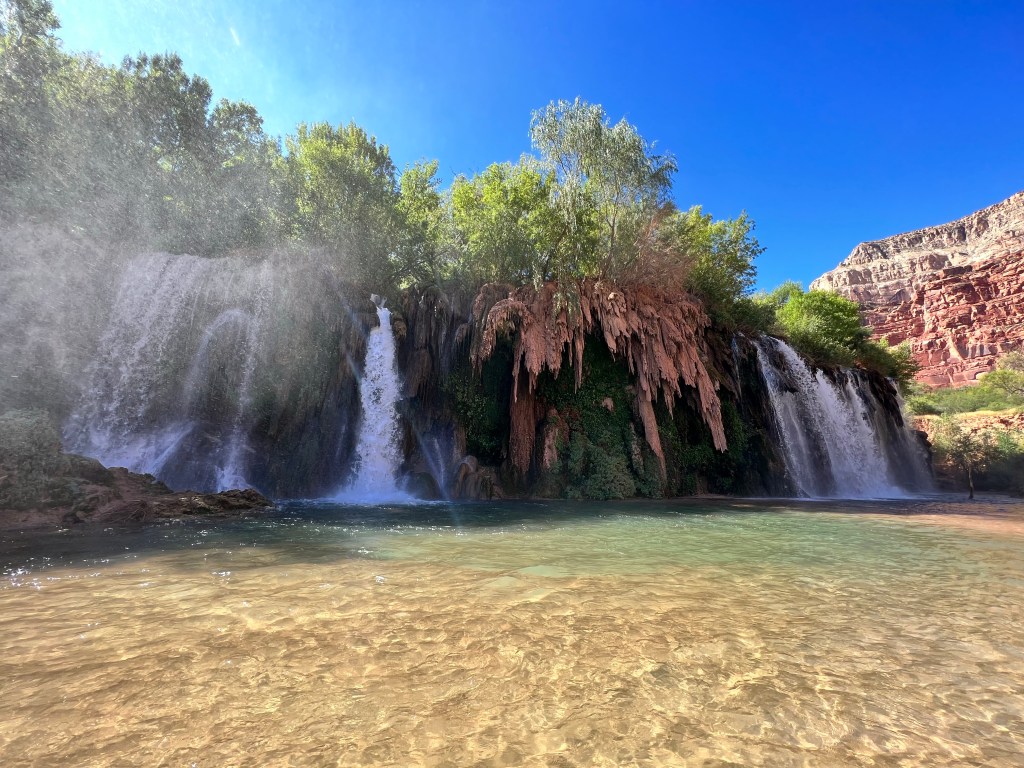
It was another morning of waking up between 4-5 am then relaxing a bit around camp before we got moving for the day! The early nights and time change made getting up early part of our normal routine! On our third day, we ventured into the canyon to discover the hidden gems of 50 Foot Falls and Navajo Falls. These stunning cascades offer a more secluded and tranquil experience as they aren’t heavily trafficked by all visitors. The hike to these falls takes you through the lush Havasupai landscape, with opportunities to take a refreshing dip in the creek’s pools.

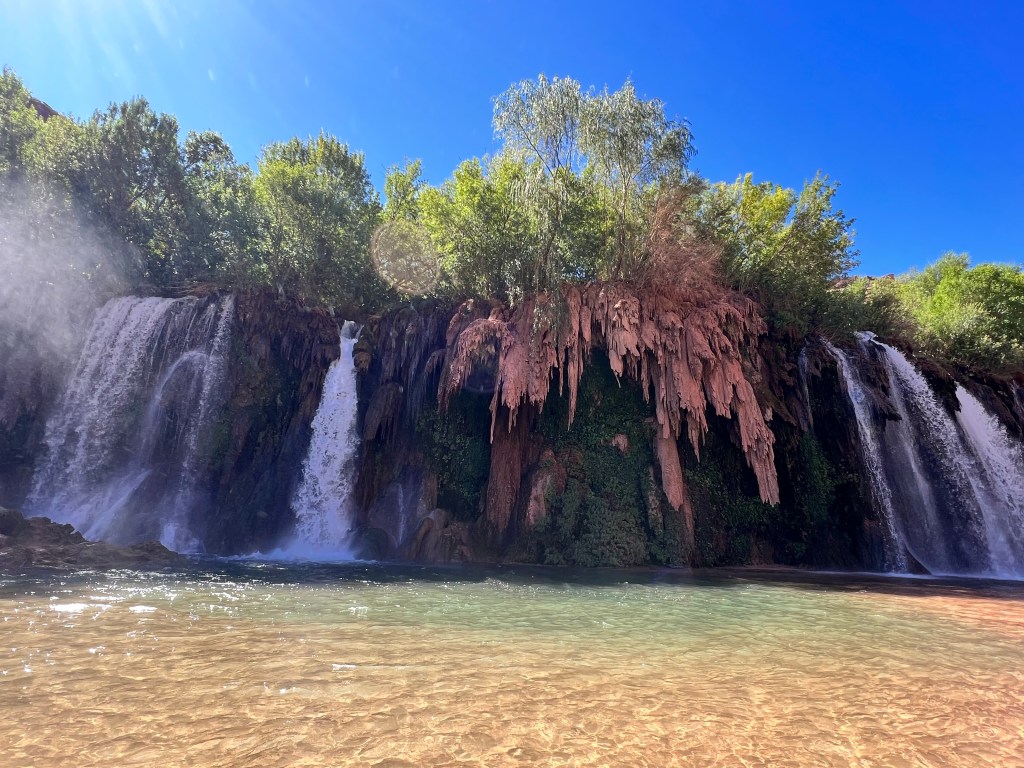
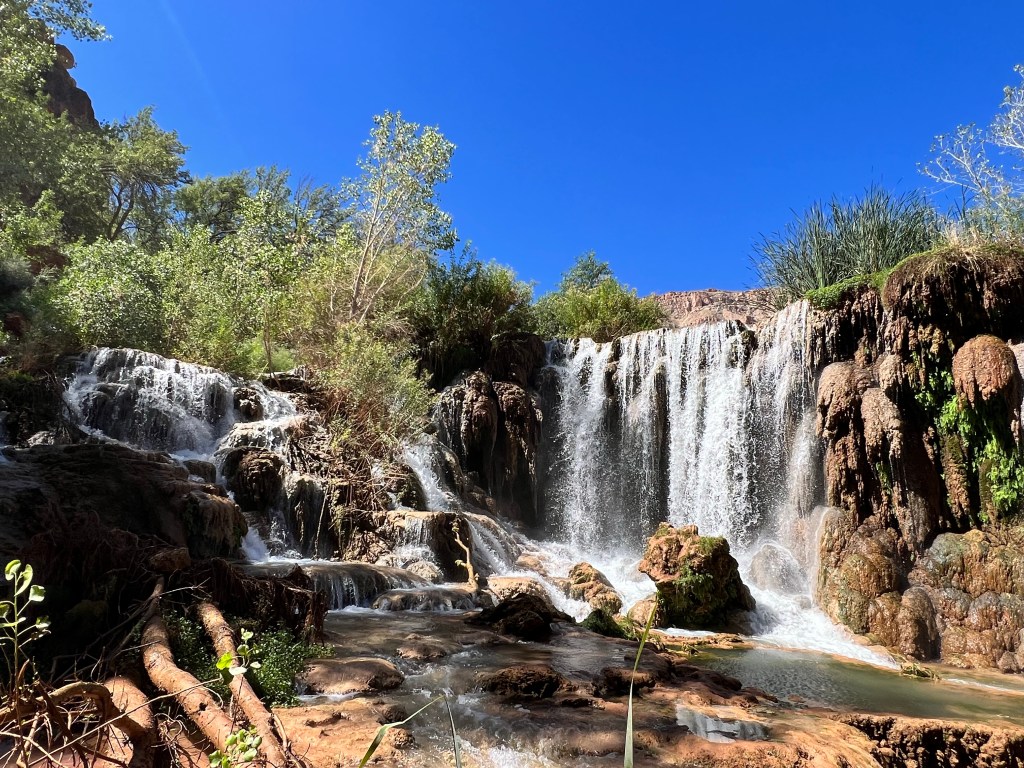
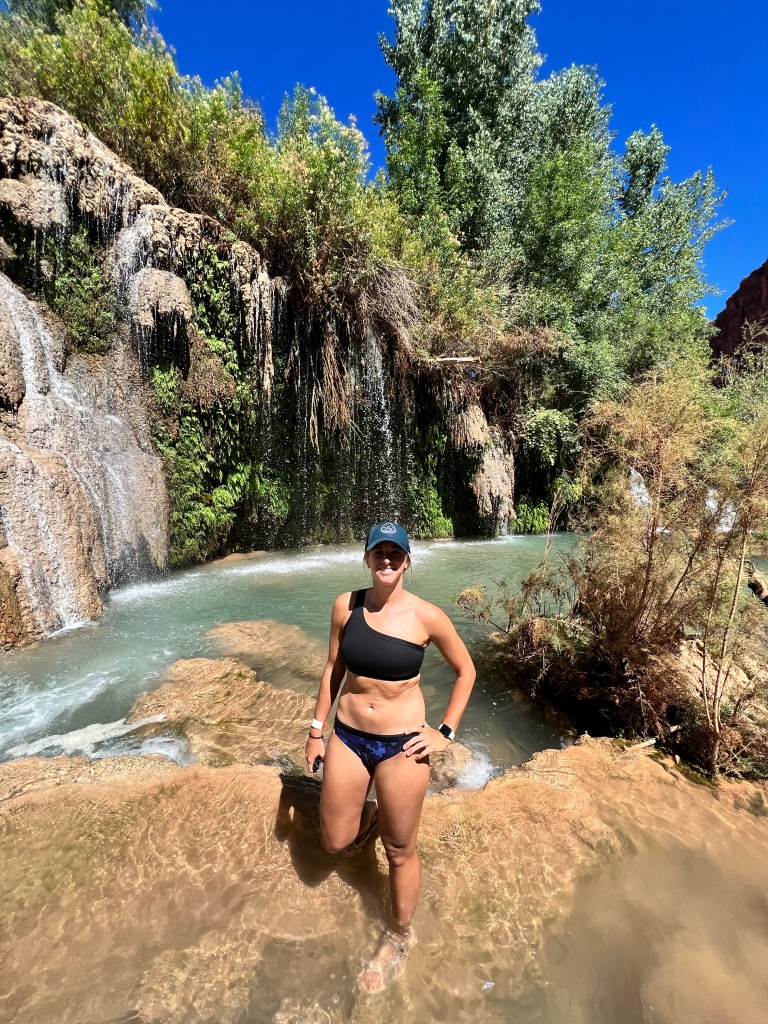
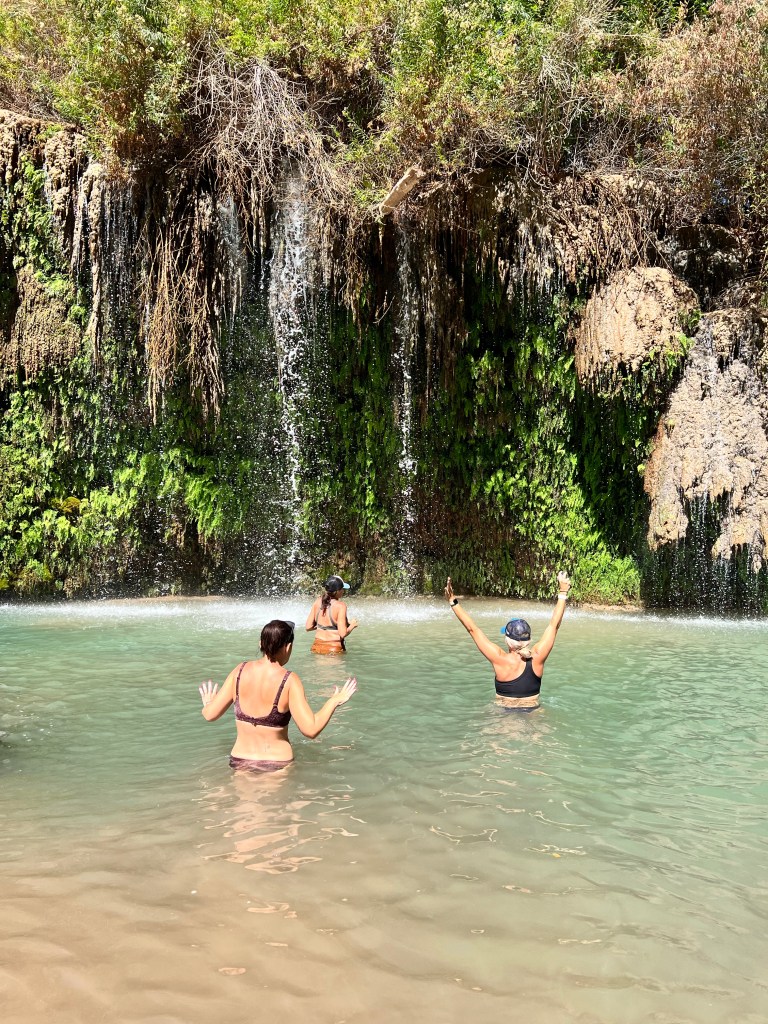
After enjoying the beauty of 50 Foot Falls and Navajo Falls, we spent the afternoon swimming in the pools of Havasu Falls again, and savoring the natural beauty that surrounded us. This day offered a peaceful contrast to the more adventurous experiences of the previous days.

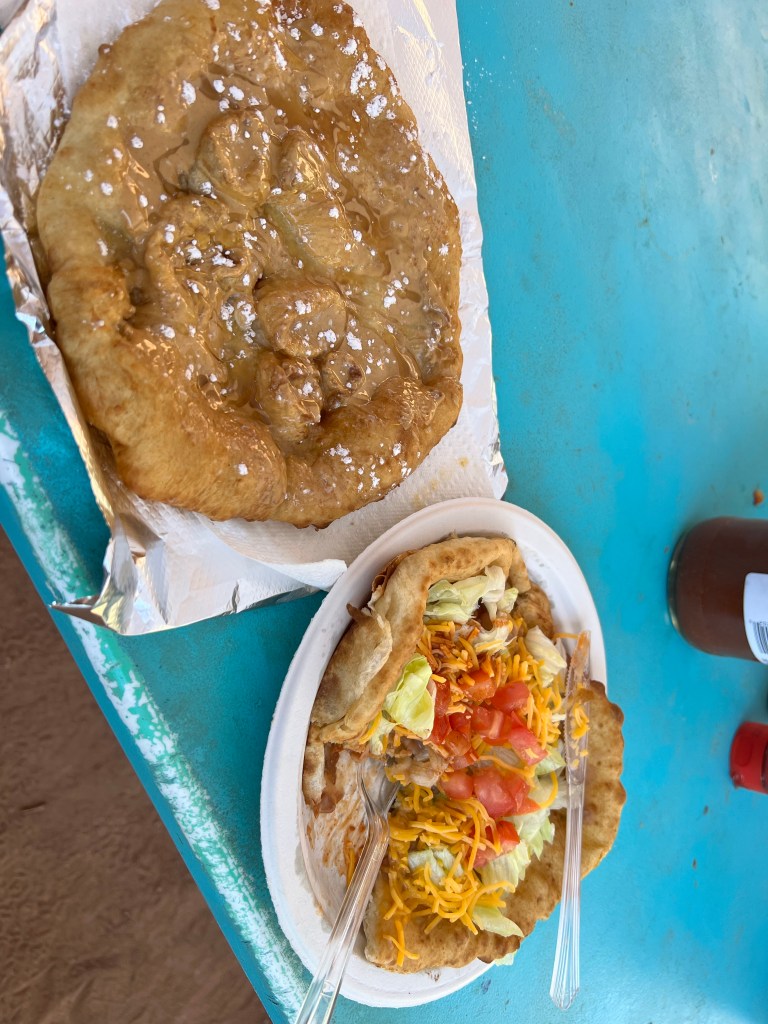
As the sun was starting to crawl behind the canyon walls, we noticed others coming down the hill with Indian fry bread from one of the stands set up by a village native. We each got one to devour with a differing combo of toppings from sweet to savory! We considered that our appetizer before our final dinner at camp. We mostly still made dinner to use up more food so we didn’t have to carry it out in our packs the next morning ha! Every ounce counts! After (second) dinner, we walked the half mile to the top of Mooney Falls to enjoy the view one last time. We then packed up everything we were able to and tucked in for our final night in the canyon around 8 pm.

Day 4: The journey out of the canyon

On our final morning in Havasu, we packed up our campsite at 4 am and started the trek back toward Supai Village at 5 am. The stray dogs from the village led the path for us for almost 2 miles keeping our spirits high and strolling forward at a strong pace. The return hike was challenging, especially in the heat of the sun at the start of the switchbacks, but the memories and stunning views made it worthwhile. We made it out of the canyon with the 10 mile hike and 3000 foot elevation gain (2000 of it being the final 1.5 miles) in LESS time than it took us to get IN to the campsite! We made amazing time in about 4.5 hours, without ever regretting our choices of not booking a mule to carry our 30 pound packs out! We felt so accomplished carrying our packs all that way and at a fantastic pace, allowing us to get the 4 hour drive back to Phoenix started earlier than we anticipated!


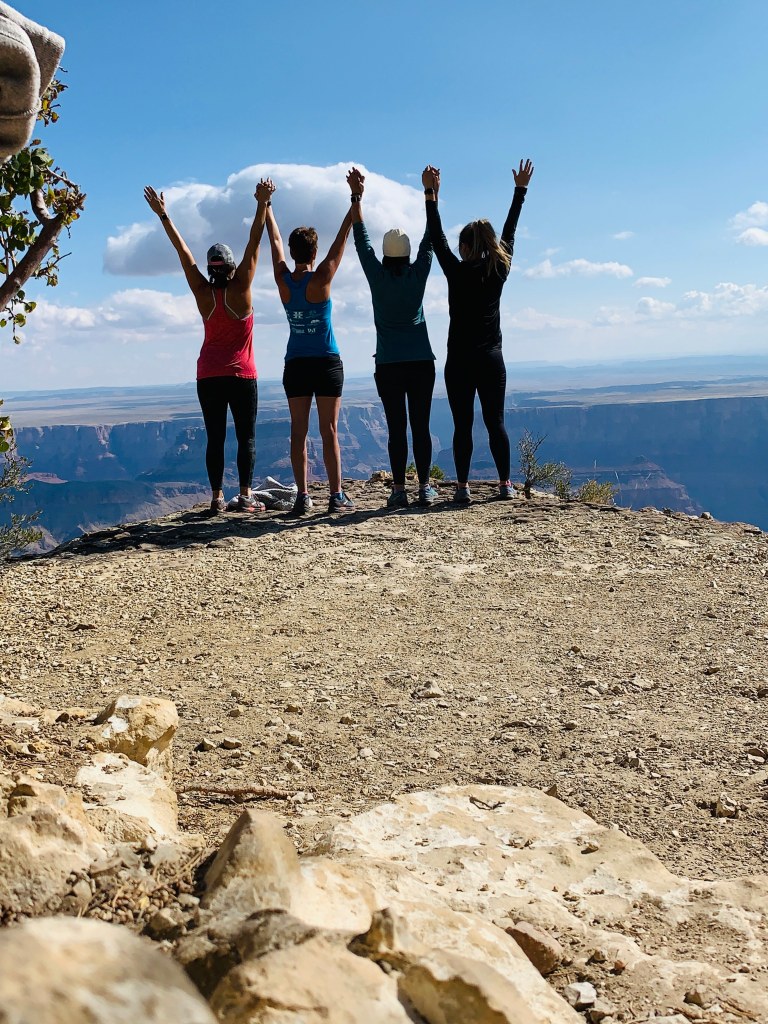
Visiting Havasu Falls was a once-in-a-lifetime experience, but man, there would not need to be ANY arm twisting to get me back there! If I were to redo my first time there, would I change anything I did? Nope, not a chance! If I were to go again, would I do anything different? Absolutely! There is so much more to see now that I know the lay of the land! I love the canyon so much and the teal blue waters are already making me dream of my return! The natural beauty of this place is beyond words, and the adventure of getting there adds to the overall sense of accomplishment. Having some amazing friends with me for the adventure was icing on the cake!

If you’re planning a trip to Havasu Falls, make sure to obtain permits well in advance, prepare for the hike, and immerse yourself in the beauty and culture of this unique destination. It’s an experience you’ll cherish forever, and I can’t recommend it enough with proper preparation and research. Havasu Falls is truly a hidden gem in the heart of the Grand Canyon, waiting to be explored by those who seek its beauty and wonder!

Until next time, friends. Go explore!

Featured

Rim to Rim (R2R) Packing List

Items for a 2-day/1-night stay (at Bright Angel Campground) in mid June.

When planning for R2R, one of the biggest things I researched was what was necessary to pack and what people brought that they wish they hadn’t as it added extra weight. Remember that everything you bring is along for the entire 24-27 mile trek across the canyon! You can see the full recap from our hike in the post linked here. We obtained a back country permit for camping at the bottom of the canyon at Bright Angel Campground in the middle of our North Rim to South Rim hike so we needed our sleeping supplies, change of clothes, and more food than if we were to do R2R in one day. We each tried to keep our packs around 20-25 pounds max (with our 3L water added was closer to 25#).

As you look through our packing list below, remember that we did this hike in mid-June when temps were 27 degrees at the North Rim where we started (but warmed up QUICKLY) to 135 degrees at Phantom Ranch at the bottom. Other times of the year may require slightly different items. Please let me know what questions you have about the packing list below!

ItemRecommended Brand/Link to ItemNotesAmount
Pack w/ internal frameGregory or Osprey are both fantastic brands! I used a 25L Gregory Citro pack and was able to fit everything. My friends had Osprey 50L packs. Both are fantastic brands w/ internal frame support systems. I’d recommend sticking to a smaller pack (~25L) so you aren’t tempted to overpack unnecessary items because you have room.1 each
Hydration bladder (3L)1-3L option on AmazonUsually part of pack1 each
Single-Person TentsEureka, Kelty, or Marmot are great brands. Check evo.com, steepandcheap.com or rei.com. Here is an affordable option from AmazonCould use one larger tent for all in your group if you wanted. We liked having our own and they fit in each of our bags. Keep weight in mind!1 each
Blanket (light sheet/towel)Link to Amazon packable, lightweight option.It was about 90 at the bottom at night so I didn’t use a cover until about 2 AM. A sleeping bag liner is a great option that is linked!1 each
Camping pillowLink to Amazon option. 1 each
Inflatable sleeping matKlymit: Amazon. Click here for link 1 each
Water bottle for electrolyte mixCollapsible w/ carabiner1 each
Bug bite creamWe didn’t use/need but good to have just in case (small tube)1 total
Solar chargers/cords (phone/watch/etc)Simple solar charger.1 each
Hiking socks (ankle height)Bombas– Get 25% off at this link: https://refer.bombas.com/x/rOMBND3 each
Flip flopsAnyA MUST if you are spending the night to get your hiking shoes off for a bit to allow feet to breathe!1 each
Hiking shoesGet fitted at REI or a local shoe store! I love Solomon or Saucony brand but there are so many good options!Invest in a good pair that won’t give you blisters!1 each
Pants-wear at start (just wore workout leggings)Your preferenceJust at start & for Ribbon Falls trek due to going through a ditch to avoid scrapes1 each
ShortsYour preference, I love Athleta or Oiselle2 each
Tank topsYour preference2 each
Bras/UnderwearYour preference2 each
Lightweight jacket/long sleeveYour preferenceOnly wore at start each day1 each
SunscreenYour preference1 total
HeadlampGreat, inexpensive Amazon option. Also some on steepandcheap.com1 each
Go Prohttp://www.gopro.com or from AmazonOptional item but I LOVE documenting my adventures to relive and help others live vicariously!1 total
Lightweight quick drying TowelBe sure to get the full body sizePackable, quick drying, and lightweight. Can use as a light blanket at night too. Dual purpose!1 each
First Aid Kit1 total
Utensils for dinnerREI or Amazon for reusable optionsDepending on dinner plans!1 each
Sunglasses1 each
Toothbrush/toothpaste/Contacts1 each
Biodegradable toilet paperCheap on Amazon hereWe never needed this as every bathroom was stocked but just in case you can’t make it to a bathroom on the trail, a nice-to-have item1 total
Wet wipes/compostable body wipesAvailable on Amazon here.Your shower in the canyon! 🙂1 pack each
Sunscreen/SPF chapstickProtect your lips! It is dry and the sun in STRONG!1 each
Blister creamCream and blister cushions if one develops1 each
Deodorant1 each
Trekking polesLink to Amazon option here (cork handles were nice to prevent blisters!) We used these the ENTIRE hike and it helped take weight off our legs! Poles definitely helped!1 set each
Canyon mapHad this fold-up one from Amazon.1 total
Camping Permit! (apply 4 months in advance)https://www.nps.gov/grca/planyourvisit/backcountry-permit.htmHave to apply for the lottery 4 months in advance to your hike then get selected. PLAN AHEAD if you want to camp in the canyon!1 total
Cooling towelsAmazon 4 pack here. Definitely recommend if you are hiking in summer months.1 each
Water treatment (SteriPen, filter, tabs)Popular water filter option on Amazon. SteriPen can be found on REI.comWe had a SteriPen and DID have to use it! SteriPen is the more expensive option over a filter or tabs but all work great.1 total
Ear plugsThese wax ones work WONDERS! Keep all sound out!For at night as campers are coming and going at all hours but the steady sound of Bright Angel Creek is fantastic to fall asleep to!1 set each
Hat to block sunAny1 each
Light Rain Jacket/ponchoAny small packable disposable rain ponchoIt didn’t rain but was a small/lightweight item that would be nice to have if a sudden downpour did come on!1 each
Ziploc bags-sandwichYour preferenceFor trash or anything (pack out what you pack in!)! Would rather have a few on hand just in case than not have any when needed5 each
Camping StoveCan get one on REI, Steep & Cheap or this affordable option on Amazon.This is optional but it was amazing being able to have a hot meal after hiking 17 miles our first day! & My friends love their coffee in the morning 🙂1 total
Camping Pot to boil waterCan get one on REI, Steep & Cheap or this affordable option on Amazon.Again, optional but was amazing for a hot meal!1 total
Small propane tank (really small)Walmart/camping store (cannot bring on flight so buy after you land if flying)Again, optional but was amazing for a hot meal!1 total
Deck of cards for night?AnyOptional, we had but never used because we went to bed around 8 pm1 total

Of course, we also needed fuel for this trek. Below is what we carried to eat/drink during our 2day/1night hike. We tried to stay ahead on electrolytes and salt tabs as it was 135 degrees at the bottom of the canyon and we were exerting a lot of effort with our 20-25 pound packs…oh and it was 27 miles and a 5,000 foot vertical climb (there’s that!). The first day, we definitely did not eat enough calories due to heat/lack of hunger but we learned our lesson for the second day climbing out of the canyon and remembering to fuel our bodies often.

FOOD list (2 days/1 night in canyon)Recommended brand/link to order
Salt tabsAmazon link to order.
TrailmixAny kind you like! I like to make my own with salted almonds, dried cranberries, sunflower seeds, and dark chocolate chips (these will melt but I don’t mind that!)
Bagels (2 each)Local Grocery (e.g. Safeway)
Nuunnuunlife.com or Amazon
Dried mangoAny
Justin’s peanut butter packetsOrder box of packets on Amazon for about $6.
Honey packetsOrder box on Amazon. Great with peanut butter on a bagel (or tortilla).
NutsAny you prefer!
Beef jerkyAny you prefer. Here is a link to single serving packets on Amazon. We ate a lot of beef jerky on the second day as it was easy, salted protein to get in.
Honey stinger bars/waffleswww.honeystinger.com
Spark or coffee (for morning 2nd day)Any coffee you prefer! If you don’t have a filter, maybe instant coffee packets.
Granola BarsAny you prefer!
Dried dinner packet- We had Backpacker’s Pantry Pad Thai and it was FANTASTIC! On Amazon, Backpackerspantry.com or REI with this link here (best price I found). Two servings in each pack.

In general, remember that what you hike in, you must hike out. There are no garbage cans in the canyon. Leave no trace and leave the canyon better than when you arrived. Also, remember that every single ounce counts. Each time you say “well, it doesn’t weigh much, I’ll just bring it along” that it adds up quickly. When you have 2 miles left up Bright Angel Trail, you will be thinking of each item you wish you would not have brought and have to hike up/out! Keep it simple!

I’d love to hear if you have questions about what to pack for your own R2R trek! I honestly didn’t have anything in my back that I wish I hadn’t brought and there was nothing I could think of that I wish I would have had. We truly had the essentials and not a lot of added, unnecessary weight. In total, we drank about 4 gallons of water each over the 2 days and all of the water sources in the Canyon were turned on and working but you can check the status before your own hike here.

I hope this helps you plan for your own bucket list trek across the canyon! Once you do, you are part of the ‘less than one percent of population’ that has explored beneath the rim and you will have experienced one of the Seven Natural Wonders of the World! If it were easy, more people would do it. Take on the challenge but TRAIN for it, know what your body is capable of, stay hydrated and fueled, and pack smart. People die in the canyon from heat exhaustion, overexertion, underestimating the toughness of the hike, and many other reasons. Respect the canyon, distance, and elevation but soak it all in!

Go explore, friends!

This site contains product affiliate links. Blog owner may receive a commission if you make a purchase after clicking on one of the links above.

Featured

Rim to Rim (R2R): Grand Canyon Recap

Experience our 27 mile North to South Rim hike across the Canyon (with Ribbon Falls detour added)!

Millions of people visit the Grand Canyon’s South Rim each year but VERY few go to the North Rim and even less venture into the depths of the canyon. In September 2019, myself and three girlfriends sat at the Lodge of the North Rim watching the sunrise and vowed to return to the canyon to conquer our first Rim to Rim a few months later in 2020. Never did we expect all the barriers that would get in our way!

In January, we set our dates for June to hike our first R2R and decided to do North to South after reading reviews and wanting to be at our car and done at the end instead of having to shuttle back 4 hours to our car. We decided to draft out an itinerary for a 1-day hiking option and a 2-day hiking option if we were lucky enough to be accepted for the lottery submission of a campground spot at Bright Angel Campground at the bottom of the canyon. A separate post will explain the exact logistics of obtaining that permit but luckily we were approved in February so we started planning our hotels/lodging, shuttle, etc for a 2-day hike across the canyon. We were ecstatic to have 2 days so we would not have to rush, could take in all the views, and we could see Ribbon Falls. As COVID-19 hit and continued to cancel portions of our plans (North Rim Lodge not opening in time, shuttle not running to get us the 5 hours to the North Rim, etc), we just needed the actual canyon to open and our camping permit to be honored to make this R2R happen. Our hike was June 10-11 and the NPS officially opened the North Rim and the canyon on June 5 and our permit was officially approved to be utilized! We were ecstatic! Little did we know the North Rim would close the day after we went through due to Magnum Fire closing the entire road to the rim. We were SO lucky to have our R2R fall within the 5 days the North Rim was open in 2020!

Thankfully one of the ladies in our group’s brother lives in Phoenix and was willing to drive us the 5 hours from the South Rim to the North Rim the day before our hike (can you say “Saint”!?!) where we ate dinner and got AMAZING cookies at Jacob Lake Inn on our way to Kaibab Lodge where we stayed the night before our adventure (North Rim Lodge canceled our reservations due to not being opened yet due to COVID-19). If you have not had Jacob Lake Inn cookies, you’re doing life wrong!

We went to sleep around 8 PM to gear up for our big day ahead! We left the lodge at 4:15 AM and got to the North Kaibab (NK) Trailhead to start our hike at 4:45 AM. It was 27 degrees and still dark out (sun came up around 5:15 so we didn’t need our headlamps long). We all had hiking poles and adrenaline was kicking in as we began our 5,000 foot descent for the day! With our planned detour to Ribbon Falls, we knew we had 17 miles before we got to our campsite at the bottom for the night. Due to camping and doing it over 2 days, we each had 20-25 pound packs on our back with our gear, food, and water.

We worked our way down the trail, admiring the 15 foot high blooming agave, how well kept the trail was, and how grateful we were for this experience to take place! On the North Kaibab (using NK here forward) in the first 6 miles, there are switchbacks, bridges, and views all the way across the canyon.

About 5 miles down the NK is the view across the canyon of Roaring Springs which is a powerful waterfall that actually is the sole water source for Grand Canyon National Park! You can see the water pipeline MANY times along the R2R hike! It produces potable water for hikers to drink at the many fill-up spots. (TIP: always check NPS site to ensure which water sources are in working order before your hike as many pipeline breaks occur!). The waterfall is incredible to see and flows all the way down the canyon wall.

The next area we came to was Manzanita Rest Area where there were bathrooms and water. We took a quick ~10 minute break to use the rest rooms and eat a snack before continuing on. About 7 miles (from top), we reached Cottonwood Campground where we encountered only 1 campsite of the 15 being utilized. Looking back, at this point we absolutely should have topped off our water supply as it is the last source of water (besides the creek where you have to filter) until after The Box and you get to Phantom Ranch (lesson learned!). About a mile and a half further, we got to a sign that said “Ribbon Falls bridge” and we followed it knowing the bridge was out but thinking this was the way everyone had told us to cross the creek by foot. Two in our group dropped off their bags and we all found an area where we could cross the shin-deep creek (about 8-feet wide). We got to the other side and eventually found a little makeshift trail toward Ribbon Falls. When we got within about 0.25 miles of the falls, there is a sign that points you back to the NK Trail but via a much easier creek route (we just hadn’t gone far enough–half mile further on main trail and we would have seen it/known that way to take). So at this point, the two girls that dropped their bags went back for them while myself and another got to the falls to enjoy for about a half hour while our other friends returned, sans backpacks due to not recalling exactly where we crossed the creek and thinking it is better safe than sorry for us to all stay together (smart move!). So we all took in Ribbon Falls before heading back for the bags and the trail as we knew we were a bit behind schedule on getting to The Box before the hottest time of day (and in June!).

We navigated our way back across the creek to the dropped bags and got back on the main NK Trail. This is where one in our group had a sudden bout of heat exhaustion. She sat down, we all acted quickly to cool her down with dripping water all over her, putting cooling towels on her, getting an ice pack from our First Aid Kit on her neck, and salt tabs in her system. After 5-10 minutes of rest and cooling down, she was back full force and ready to tackle the last 7 miles to the campground! We got to The Box (which is the narrowest part of the canyon and just traps heat) at about 10 AM. We decided to keep moving slowly but to relax in the shade to keep ourselves as cool as we could and our heart rates low. Thankfully (honestly probably saved our lives), there was a nice breeze through The Box at the time we went through that made it less miserable than it could be! Unfortunately with about a mile to go in The Box and about 2 miles to the campground, all four of us ran out of water (oh crap moment for sure)! Looking back, we should have all topped off at Cottonwood but thankfully we all had water purification methods with us and the creek was close to the trail with a little route down to it. We all got our water bottles filled and sterilized (had a UV steri-pen to kill bacteria) and were ready to continue on. We made it through The Box and knew we didn’t have far to go. We came upon the best sign of the entire trek that was the 3/4 mile to Bright Angel Campground sign! We ventured through Phantom Ranch which was completely empty (besides one deer) due to it still being closed due to COVID-19. It was eerie walking through (and we had only seen 11 people total in the previous 16 miles at this point!). We made it to the campground where we dropped our gear and went and just laid on the rocks in Bright Angel Creek for several hours. The temp was 100 degrees higher at the bottom of the canyon than what it was at the top that morning!

After cooling off and coming back to life a bit, we wanted to walk the half mile to the Kaibab Trail Suspension Bridge as we heard it was beautiful and a not-to-miss view. On the way to the bridge, there is a burial for a foreman of the Bright Angel Trail who died on duty while building the Kaibab Trail (photo below). We paid our gratitude for his work on the trail! The Suspension Bridge spans the 440 feet across the Colorado River and is how (via mules) supplies get down into the canyon for Phantom Ranch! Read the plaque below to learn more about it, it is fascinating how it was built. Also, it is the only bridge the mules use to cross the river because the bottom is boarded and you cannot see through it to the moving water below (which scares the mules)!

After seeing the bridge, we took the 10 minute walk back to our campsite and set up our tents for the night. When all four of our tents were complete, we started making dinner (at about 6 PM). We had Backpacker’s Pantry Pad Thai which included everything but the boiling water! It was fantastic and 2 packets fed the four of us. If you are looking for a freeze dried meal, this one was fantastic! It was the perfect mix of carbs/fat/protein and the sodium we were craving! Following dinner, we got changed and crawled into our tents for the night! It was still about 90 degrees when we laid down so no blanket was necessary until about 2 AM when I woke up and put my light microfiber blanket over me a little and went back to sleep until 3 AM when I heard my friend chasing a ring tailed cat out of her backpack (yes, seriously haha!) At 4:45 AM, we woke up to tear down our tents, have coffee, and hit the trail by 5:45 AM.

The sun was up by the time we started hiking up Bright Angel (BA going forward) Trail. The first mile was just getting through the ranger and mule lodging and crossing Silver Bridge until you get to deep, loose sand for about a mile (wakes the calves up right away in the morning!). There was a River Resthouse about 1.5 miles into the trail and then you start going back and forth up switchbacks a little until you reach a very lush, cool area. We knew we were nearing Indian Garden Campground at this point and had made really good time for the first 5 miles of the day! Indian Garden was unexplainable– so green with grass as tall as our heads and 15 degree cooler temps, it was as it if just didn’t belong in the canyon but we were so grateful for it to cool us down for a bit! We took a break at the hut at Indian Garden and filled our water packs (learned from the day before!) before heading up the final 4.5 miles of switchbacks.

I ate more beef jerky this day than I’d like to remember and am slightly scorn from thinking about it for a while!! We made our way up Devil’s Corkscrew which is a series of severe switchbacks (photo below). At the 3 mile resthouse, we didn’t end up stopping but instead started to take breaks almost every quarter mile whenever shade popped up so we could cool down slightly and lower our heart rate. Remember we were climbing 5,000 feet (with majority of it being in the final 4 miles of our 10 mile day), with 20 pound packs on our back in 90 degree weather. I mean, this was NOT an easy feat by ANY means!! We started telling ourselves that it didn’t matter how slow we went, as long as we continued forward because each step was closer to the top! Also, my mantra was “if this were easy, more people would do it and it wouldn’t be a challenge”. The last 3 miles took us just as long, if not longer, than the first 7 miles that day. The last 3 miles are absolutely no joke!

Then at mile 1.5 (where the last rest stop/water area is), we got our cooling towels re-wet for our necks for the final ascent! This is where you start running into the families and people hiking in jean shorts and flip flops so you know you aren’t overly far from the top (although still a good amount of time away). Everyone coming down was asking how far it was to “the river” and was thinking they were going to hike down to it. We warned everyone we could that it was not meant to be taken lightly and down is optional but up is required! We saw many of these people at the top shortly after we made it stating that the 1.5 mile resthouse and back up was well enough for them and they were glad they took our advice and didn’t venture further down as they weren’t prepared. We saw SO many people going down without water with them on a very hot day. This is my PSA–BE SMART! Anyway, back to the climb! We eventually made it to the first tunnel that is halfway between the 1.5 mile resthouse and the top which continued to give us hope. Then 0.7 miles (which felt like an eternity) later, we got to THE TUNNEL (if you know, you freaking know). The tunnel at 0.1 to go to the top. The tunnel where I stayed for a few minutes capturing and documenting that moment. I was so happy to see that tunnel! Then, I passed the “puking sign” and then emerged at the top a freaking hero in my own mind on the South Rim.

After 27 miles, 6000 feet down, a 5000 foot climb back up, about 4 gallons of water each, too much beef jerky, Nuun, and nuts, we did it. We seriously did it! We completed our first ever R2R across the Grand Canyon. We have things we’d definitely do differently and lessons learned but THAT is part of the experience! Immediately after, while drinking prickly pear margaritas at El Tovar Lodge, we said never again, we had seen what we needed to see. Fast forward one week later and we couldn’t wait to get back to the canyon and are already talking about even doing Rim-to-River-to-Rim via South Kaibab to Bright Angel some weekend. In all, the canyon has our hearts and it is officially the hardest thing we’ve ever done! I can’t express how grateful I am for getting to share this experience of a lifetime with three of my best friends! I know this was THE longest post ever but I hope it helps you envision this adventure and even inspire you to explore a bit of the Grand Canyon yourself someday! Check out my recap video with live video footage within it here!

Go explore, my friends!

PS: R2R logistics, packing list, itinerary in separate posts!

Featured

Utah Nat’l Parks & Page, AZ Itinerary

4 friends, 5 locations, 6 days, unlimited memories

Below is a high-level itinerary for my girls’ trip to Utah/Arizona Sept 12-18, 2019. I share best practices, trails, and timelines. This is all based on a heavy amount of research and reviews prior to booking/going. There is also a separate lengthier post for each location for more details! Locations: Zion National Park, Bryce Canyon National Park, Lake Powell/Antelope Canyon/Horseshoe Bend, North Rim Grand Canyon

First: Packing tips will be a separate post! Book cabins and lodging at least 5 months in advance and look at best times of year to travel (mid- Sept was PERFECT when kids were back in school! Buy an annual National Park Pass to get all the people in your car into all the national parks and save a LOT of money.

Day 1 (travel day): arrive to Las Vegas, get rental car & drive 1.5 hours to St. George, UT for the evening. Swing by grocery store in town to grab water & lunch/snacks in bags for Friday hiking. We stayed at TownePlace Suites as I’m a Marriott point junkie (and they had a great free breakfast) before we left to hike.

Day 2 (Zion): breakfast @ hotel, leave hotel by 6:00 am ready to hike, go straight to Zion National Park (45 min drive, park in Zion Nat’l Park at Visitor Center, catch free Zion shuttle to stop #6). Hike Angel’s Landing-5 hour hike (eat packed lunch during, added time to stop for pictures), 5.4 miles round trip (https://www.nps.gov/zion/learn/news/upload/Spring-2019-Tearsheet-Print-Ready5-3.pdf) After Angel’s Landing, visit Lower Emerald Pools (short/easy walk)- Upper pools were closed. Get back to car, eat dinner in Springdale. Then drove 45 min back to Hurricane, to check in to our AirBnB for the night, ($100 booked AirBnB -Desert Sky home in Hurricane-it was perfect for 4 people and the host was lovely!


Day 3 (Zion): leave around 6:00 AM (15 min drive) to run half marathon, back to AirBnB by 10, shower/eat/check out by 11. Head to Zion National Park-ride Zion shuttle through park to last stop (#9, Temple of Sinawava), then hike- Narrows easy hike . We went about 2 miles in for beautiful sites, highest water level at one point was waist deep. Left park a few hours later for a late Lunch in Springdale at Whiptail Grill (burrito was amazing!). Then drove the beautiful and scenic route to Bryce Canyon (1 hr, 45min from Zion National Park) to stay in a cabin at-Ruby’s Inn RV Park and Campground, – Bryce Canyon, UT—CABIN w/ 2 double beds (bunk beds-needed blankets/towels), Cabin #5 was perfect location: ($73).


Day 4 (Bryce Canyon): Pack up car before hiking, Leave Ruby’s Inn campground at 7:45 to get on first 8 am shuttle across the street, Bryce Canyon all day. Viewpoints: START at Bryce Point (this is the highest point of elevation in park so by starting here, you decrease elevation overall), walk along rim to visit Inspiration Point, at Sunset point, Hike down Wall Street to the hoodoos then hop on the Queens Garden Trail, (stop halfway on trail to eat packed lunch). Leave by about 1-2 pm, drive 2.5 hours to Page, AZ to Lake Powell Wahweap RV & Camping Site to pitch tent & sleep ($30/night tent,). Hang out at beach (on Lake Powell) at the campground for a few hours to relax! Dinner in Page, AZ, at State 48 Tavern- delicious jalapeño margaritas!


Day 5 (Horseshoe Bend/Antelope Canyon): Page, AZ adventures! Left campground at 7 AM for Horseshoe Bend (20 min drive from campground /then a 1/2mile hike to the overlook). Then, we then went straight to Ken’s Lower Antelope Canyon (TOUR scheduled for 4 people at 10 AM AZ time, Pacific daylight). I researched a TON prior and saw this was the best slot canyon tour to take! Make sure you do the LOWER canyon! After this, we looked for kayaks on Lake Powell to explore Antelope Canyon via water. We booked WazSUP Kayaks with Bill who delivered 4 of them to us at the ramp for a $60 fee (so $15/person delivery fee) plus the kayak half day rental. We left around 3:00 pm, drove 2.5 hours to North Rim Campground to pitch our tent. STOP at Jacob’s Lake Inn to buy some cookies (so delicious!) Watched the sunset over the Grand Canyon then had a prickly pear margarita at The Saloon then an 8:00pm dinner reservation at Grand Canyon Lodge, tent site #26 purchased: ($18/night)


Day 6 (North Rim Grand Canyon): Went to lodge to watch sunrise and drink coffee, go back to take down tent, pack up car. Left campground around 7 AM to hike for 5-6 hours. Campers have access to Transept Trail (unpaved trail that travels along the rim to visitor center & lodge) & Bridle Trail (cuts through the forest & connects with the North Kaibab Trail). The North Kaibab Trail descends into the Inner Canyon & is a short walk from the campground. We did not do these trails though, we drove a half hour and went to Cape Final, and Cape Royal which had amazing vistas over the Grand Canyon and were easy hikes (~7 miles in total). Left ~2pm for 5 hr drive back to Vegas to return car & relax, Stay in Vegas on strip, Dinner and a show before flying out on Wednesday morning.


This is a very detailed itinerary BUT I hope all my research prior to booking my own trip helps you make your experience as absolutely amazing as ours was. It truly was the best adventure ever. For more details and photos on each specific location, see separate posts!

-Go explore friends

Rocky Mountain Nat’l Park: 13 Mile Loop Hike to Sky Pond

2,500 foot elevation gain, 7 beautiful lakes, numerous waterfalls including a scramble up one!

In late August, four friends and I flew to Denver to experience some hiking in Rocky Mountain National Park (RMNP)! We had a short trip of 3 days which one day of it was spent in Colorado Springs to do The Manitou Incline so really had two full days in RMNP. We knew we wanted one difficult hike day and one day to at least see a lot of the park which meant more driving than hiking. This post will explain our long/difficult hike day where we went 13 miles in a loop route to Sky Pond (and 6 other ponds/lakes included!).

Let’s start at the beginning though! We flew in to Denver Int’l Airport, rented our car, grabbed groceries and were on our way to Estes Park! We spent the night at Estes Park Campground at Marys Lake, Colorado in the tent we brought in our checked bag. You have a view of the mountains from almost every tent site, showers/bathrooms, picnic table, and bear boxes for food. We set up our tent then made dinner which included Mountain House Chicken Fajita Bowls and for dessert we put Bailey’s, chocolate chips, and marshmallows in ice cream cones then wrapped them in tin foil and heated over a fire (delicious!).

After dinner, we got all our gear ready for our early morning hike because we knew we had to leave the campground at 5 AM to get into RMNP and secure a parking spot in the Bear Lake parking lot due to the increase of visitors on a weekend and in summer! We got to the lot around 5:30 AM and there was ample parking for us (Glacier Gorge parking was our back-up!) so we secured a spot, brewed some coffee and breakfast until the sun came up just a bit, and we left on our hike around 7 AM. Right at the beginning from Bear Lake, you head toward Glacier Gorge Trailhead, which is where we ran into some elk right along the trail feasting on their breakfast. We continued on our way toward Alberta Falls which would be our first waterfall of the day! (PS: I love bridges in nature so you may see a lot of those in this post!)

From Alberta Falls, we continued on toward The Loch which would be our first major lake of the day and a sign we were still on the right path to Sky Pond! We had beautiful views the entire way to The Loch and decided to take our first snack break when we got there to enjoy the beauty! (Watch out for chipmunks trying to steal your food!).

Next we continued on (starting more of an incline) toward Lake of Glass (still en route to Sky Pond) with plenty of incline and even a waterfall scramble along the way! The trail is so well maintained and as we continued getting closer to Sky Pond, we saw less and less people (because the waterfall scramble up Timberline Falls is NOT for the faint of heart! It had my heart racing in a few slippery spots!

After the intense scramble up Timberline Falls (have good trail shoes and take your time!), we reached Lake of Glass and the name perfectly explains the view! The glassy surface provides an amazing reflection of the snowcapped mountains on the other side! We stopped here for a few minutes to take in the view.

Fun fact: most people stop here because they THINK Lake of Glass is Sky Pond since they made it to the top of the waterfall so they take it in then turn around. Don’t do that! Keep going across the boulders to continue the trek to Sky Pond! You are ALMOST there- only 4.5 miles later (but about 2,000 feet of elevation climbed!)! We made it to Sky Pond, soaked in all of its glory while eating our lunch we packed before we started (PB&Js and beef jerky for the win…at 9:30 AM haha!), chatted with other hikers, snapped some photos, and sat in silence in awe at how lucky we are to be able to hike to such great views! (Tip: Look to your right from the pond and you will see The Sharkstooth-which is a series of jagged mountains that look like exactly what the name implies- see second photo below!)

Now, from Sky Pond, make sure you turn around and look at the beautiful view behind you to see Lake of Glass and the vast range of trail it took you to arrive at the beautiful view you’ve earned!

From here, we traveled back toward Lake of Glass, carefully worked our way DOWN the waterfall we had previously scrambled up, and continued a few miles back toward the way we had come (past Loch Vale). On the way back however, we turned left at Mills Junction so we could do a loop and hit a few more lakes and add some mileage! We headed toward Lake Haiyaha (which means ‘lake of many rocks’ and again, names appropriately!). After about a mile and a half of trail, we made it to a sign that pointed us to go left toward Lake Haiyaha and the last 50 yards required us hopping from one giant boulder to the next to reach the lake! It was amazing how vastly different this lake was from the previous we had seen earlier!

Next, we geared up to head back to the main trail and headed another mile to Dream Lake. Just past Dream Lake, on our way to Emerald Lake, it started DOWNPOURING which was a sudden afternoon mountain rainstorm which we had prepared for with our rain gear/ponchos! However, you do NOT want to be stuck in this so thankfully we were on the final mile of our hike for the day anyway and scurried back along the trail toward Nymph Lake to Bear Lake parking lot (just as the hail started) and warmed up in the car! Sadly I don’t have photos of the final two lakes because my hands were so cold and I was too focused on rushing back to the car! Looks like I will just have to return for this hike again to grab those photos 🙂 The third photo below has the Sky Pond route in red and the distance and elevation is if we would have done it straight out and back. We did it as a loop instead (blue line I added to show you the loop route) and had 2,400 feet elevation, 12.9 miles total, and saw 7 awe-striking lakes that are not all so easy to get to! But hey, if it were easy, everyone would do it, right?!

Now, ohhhh if only our adventure for our day ended there! We got to the car wet and warmed up a bit then headed straight to a brewery for a late lunch (yes our second one, don’t judge…or call it early dinner if you want) before heading back to our campsite to see the dumpster fire of our situation. Our tent was completely soaked so we opted we were too tired to deal with it and ended up booking a hotel room at a local hotel in Estes and calling it a day. BUT FIRST, because we fit in everything we can when we go somewhere, we had to stop at The Stanley Hotel (redrum? Here’s Johnny? Anyone?) for a cocktail or two before heading to our hotel.

From start to finish, it truly was an extremely eventful, laughable, memorable day! I hope this post encourages others to accept the challenge of hiking to Sky Pond (and even adding a few miles on to the end like we did!).

Separate post on our 2nd day in RMNP exploring! Go explore, friends!

Hanging Lake: Hike to Breathtaking Waterfalls

When in Colorado, hike to Spouting Rock & Hanging Lake waterfalls then relax in natural hot springs all in one day!

While on a vacation with girlfriends in Vail, we decided to expand our exploring one day by heading to Glenwood Springs to hike to beautiful waterfalls and recover in hot springs! Glenwood Springs is only about an hour east of Vail and worth the roadtrip! One of my friends researched and found amazing reviews of Hanging Lake and discovered starting in 2019, a permit was now required to hike it and they instituted a shuttle bus to get to the start of the hike from May-October. Luckily, we were able to secure a permit ($12/person) for the hike the next day (I’ve heard this isn’t common to be that lucky to secure one for the next day so easily!). Tickets can be purchased here. Permits are now required to protect the ecosystem and control the amount of visitors.

It was June, so the temperatures were warm for the hike so we geared up appropriately, drove to where we would get on the shuttle and were taken to the start of the Hanging Lake trail! Below are photos from the very bottom on a paved path leading up to the trail.

The hike is only 1.2 miles to Hanging Lake and about 3 miles round trip if you take a little detour to Spouting Rock at the top (a MUST). In total, it is about a 1,000 foot elevation gain so you definitely get out of breath at times but I wouldn’t call it a ‘hard’ hike by any means. The views on the way up keep you entertained and there are many opportunities to stop for a break to enjoy the many mini waterfalls on the hike up! The terrain changed often on the hike up from dirt, rocks, wood bridges, etc! It was all so beautiful though.

To get to the top, it took us about 45 minutes total and that is with several breaks to stop and soak in the views…and of course, for pictures because it’s what I do (not sorry!). There are many little bridges that we crossed on the way up and as we ascended, we could see the top nearing making us excited for the falls we were about to see!

We FINALLY made it to the top, at a lookout point, and had to stop and enjoy the view for a few minutes, soaking in what we had just hiked to earn the view! This point of the trail was a one-way area so we had to wait for some hikers coming back down to get by until we could continue up.

Just when we were about to turn (right) to Hanging Lake, a passerby hiker told us to stay left and first head up to ‘Spouting Rock’ for an amazing site. We had no idea what this meant and couldn’t believe we almost missed doing so if not for that awesome hiker telling us this!! We met with several hikers later who were at Hanging Lake who had no clue about Spouting Rock and would have missed it if not for us passing the good word forward! Spouting Rock was just a quarter mile up from Hanging Lake and was a GIANT waterfall just spewing from the rocks above! Because we were there in June, the snow melt from the mountains was causing the water to gush powerfully! We spent almost 20 minutes at this waterfall before turning and heading the quarter mile back to Hanging Lake.

The photos below (and photos in general of Hanging Lake) just do not do it justice! The water is so incredibly clear and there are a series of waterfalls coming into the lake…as if it were…”hanging” (the name says it all). Nobody is allowed in the water as the oils and pollutants would harm the ecosystem. The water is a beautiful turquoise because of its minerals and there is a log that extends across most of the lake that has been there for years! There is a sign that says to ‘keep off it’ and PLEASE DO! Respect the lake, the ecosystem, and remember to leave no trace. At the waterfalls, we enjoyed snacks we brought on the hike and soaked in the views before beginning our descent down. (I couldn’t narrow my favorite photos down so you get the joy of seeing several!).

The hike back down took about a half hour to forty minutes as we had to move to the side as we crossed paths with hikers just on their way up for the day. As mentioned, round trip was 3 miles and with our breaks at the top, took us 2 hours and 20 minutes total,. At the bottom, we then waited for the shuttle back to our car where it started raining. We decided there was no better place to go than to sit in natural hot springs to relax after our hike and enjoy the rain before heading back to Vail. We went to Iron Mountain Hot Springs which had 16 small mineral hot springs that all had varying temperatures (99 degrees up to 108). The backdrop of the mountains wasn’t terrible either! It was a perfect way to recover after a long day!

We ate dinner at a cute little family-owned restaurant in Glenwood Springs before we leaving town. We drove back to our condo in Vail while reminiscing the beautiful views of Hanging Lake and all the adventures of the day!! I highly recommend this breathtaking hike when in Colorado!

Go explore, friends!

North Rim Grand Canyon: 3 Easy Day Hikes Above the Rim

This recap is part of a multi-day adventure I took with three girlfriends across Southern Utah and Northern Arizona! See full itinerary for the trip here. The North Rim was our final stop of our adventure before heading back to civilization (boooo). The day prior to this, we were in Page, AZ visiting Horseshoe Bend and Antelope Canyon. We left there around 3:00 pm because we didn’t want to miss the sunset this night on the rim! It took about 2.5 hours to North Rim Campground but we first needed to stop at Jacob’s Lake Inn on the way to buy homemade cookies we had heard about from a few people the day before. I’m pretty sure we each got a minimum of 5 (yes, 5 each…don’t judge) and devoured them over the next 24 hours! Seriously, stop for cookies, no photo evidence of the cookies as we ate them too fast. As you continue toward the canyon (only one road in), watch for wildlife! We arrived at the campground (site #26 for $18 reserved well in advance), checked in, set up the tent, then we went straight to the North Rim Lodge. We witnessed an amazingly beautiful sunset over the Grand Canyon. No amount of words or pictures do this experience justice!

After sunset, we then enjoyed prickly pear margaritas at The Saloon prior to our 8:00 pm dinner reservation at Grand Canyon Lodge. The margaritas were FANTASTIC (seriously, I dream about them and am going back to do R2R this year to enjoy another) and the Lodge’s dinner was delicious. No photo evidence here either because we drank and ate all so fast (notice a trend?). I cannot put into words how impressed I was with their menu (available online to check out).

After dinner, we went back to our campsite where we started a fire and roasted marshmallows dipped in Bailey’s (caramelizes the mallow) while talking about our adventures of the past few days and our plan for the day ahead. Our tent site was near a restroom and the sites are HUGE so we had no issues at our site overnight and all slept soundly in our tent. We woke up the next morning and went straight back over to the lodge to grab a coffee and to watch the sunrise on their giant deck. Nothing silences your thoughts and eases your brain more than witnessing a sunrise 6,000+ feet over the canyon.

Following the sunrise, we headed back to camp to tear down our tent and head out for the day. Campers have access to Transept Trail (unpaved trail that travels along the rim to visitor center & lodge) & Bridle Trail (cuts through the forest & connects with the North Kaibab Trail). The North Kaibab Trail descends into the Inner Canyon and is a short walk from the campground. We did not do these trails though as we only had a few hours so we opted for trails above the rim that were on our way back toward Jacob’s Lake. We drove about a half hour and went to Cape Final, Angel’s Window, and Cape Royal which had amazing vistas and were easy hikes. You can Google the names of these trails to get directions or use the ‘All Trails’ app which is a great option too (especially for the actual trail). The longest hike of the three was Cape Final, which was only about 4 miles round trip. Angels Window is accessible from the Cape Royal lot/route. Cape Royal, which is the southernmost viewpoint of the North Rim, was only about a half mile walk on a paved trail so would not consider that a ‘hike’ but the vista was breathtaking and we were so close to it that we had to see it! From this point you can see Wotans Throne which is an iconic canyon view.

After a few hours above the rim, we headed back to our car to make the drive back to Las Vegas to end our amazing week of hiking Zion, Bryce, Horseshoe Bend, Antelope Canyon, and the North Rim. I have no doubt that I will be back to explore more of these places as I feel we only scratched the surface of each. In June 2020, I actually got approved for a permit to camp below the rim of the Grand Canyon at Bright Angel Campground as I complete my first Rim 2 Rim experience with the same three friends who did this trip with me! More to come on that but I’m THRILLED to have my return to the canyon already planned!

~Go explore, friends!~

Miles to Go: Inspiration

Life is too short, go freaking live
—me

Hi everyone! Welcome! I’m just getting this blog-thing going, so stay tuned for more! I wanted to first share the inspiration for my words and blogs you’ll be seeing here. Above in the photo, you can see a part from one of my favorite poems by Robert Frost: ‘Stopping by Woods on a Snowy Evening’. The ending lines state how he has ‘promises to keep’ and ‘miles to go’ before he sleeps. I love his statement because I am a runner and travel enthusiast. I know I have SO many things to do and sites to see before my time on earth is up! I actually have ‘Miles to Go’ tattooed on my side because I love the message so much!

In my blog posts, I’ll share my travel experiences, best tips (I’m a research junkie so will do the leg work for you!), and favorite race experiences around the country/world (running isn’t the primary focus but will be sprinkled throughout). I’d love to hear any and all feedback on your thoughts and what you’d like to see more of in my posts.


-Go explore, friends.

Refilling the Soul in Page, AZ

Horseshoe Bend, Antelope Canyon, & Lake Powell

Have you ever been scrolling through blog sites or Instagram and see the most beautiful views that make you think “I need to see that in person” or “No way that is that breath-taking in real life”? This was my experience with Antelope Canyon and Horseshoe Bend about five years ago. (Don’t believe me? Scroll down to see some of my photos!) After seeing about 5 photos of these iconic locations, I googled where they were located and saw “Page, AZ”. I quickly researched the best way to get there and realized there was no airport within several hours so I gave up thinking I would ever see these places…for a few years!

Then, last year I convinced three of my best friends to do this crazy Utah National Park road trip in September (see full itinerary here) and I had to choose between Arches NP or swinging down to Page instead before heading to the North Rim of the Grand Canyon. I decided Arches can be another trip and set up our day in Page! Almost 6 months prior, I booked our campsite (at Wahweep Campground on Lake Powell) and our Lower Antelope Canyon tour with Ken’s Tours (https://www.lowerantelope.com/) at the 10 AM time slot (perfect for lighting coming through!)

We arrived in Page, AZ from Bryce Canyon NP and got to our campsite. We set up our tent and headed down to the beach to relax then headed to do dinner in town before turning in for the night. We woke up the next morning to the most beautiful sunrise from our tent!

We drove the 15-20 minutes to Horseshoe Bend parking area and walked the ~half mile to one of the most iconic and breathtaking views ever! I researched what time to get there and every blog had conflicting opinions so I decided any time is a good time! We stayed for a while taking in as much of the view we could. This was such an amazing moment for me because I had wanted to see this view for several years. Check out my favorite photo I took below (note: I’m not a photographer, just love taking photos!) and some cheesy fun ones.

Ok, by now it was almost 9 AM so we headed to the car to drive the ~10 minutes to Ken’s Lower Antelope Canyon Tours for our 10 AM tour. I did a lot of research prior and decided to do lower canyon instead of upper based on comparative reviews of people who had done both. Our guide’s name was Kevin and he was FANTASTIC! No words can possibly do this amazing slot canyon justice so I will let my photos speak for themselves:

These are not even 1/10 of the photos I took that day and the photos just CAN’T do it justice, I swear! Every day of my Utah/AZ trip, I thought the next day just couldn’t get any better and it continued to awe me, including this canyon!!! If you see this beauty in photos and are inspired, PLEASE make it a point to go see it in person.

After our canyon tour, our day wasn’t quite done in Page! We googled kayaking in the area while grabbing some beers to take with us! We booked WazSUP Kayaks with Bill who delivered 4 of them to us at the Antelope Point Marina ramp for a $60 fee (so $15/person delivery fee) plus the kayak half day rental and a cooler for us to use for our beer…now that is service! Below are a few photos of our amazing adventure through the canyon via kayak! PS: it was windy that day so fighting it was tough until we got back to the canyon and were protected from it! This took us about 2-3 hours before calling Bill to come back and pick up the kayaks for us.

After exploring Horseshoe Bend, Antelope Canyon, and kayaking, we moved on from Page and drove the couple hour drive to North Rim of the Grand Canyon. We stopped at Jacob’s in (45 minutes from the North Rim) for AMAZING homemade cookies (I think we each got about 5 and ate them all). We got to the North Rim campground just in time to set up our tent and head to the Lodge for a prickly pear margarita while watching the sunset in the canyon!

All in all, Page, AZ was more than we could ever ask for and more breath-taking than any photo on social media can ever showcase. Have you seen these iconic photos and wanted to go see it in person? What are you waiting for?

Bryce Canyon Nat’l Park: Why You NEED to Go!

If you’ve never been to Bryce Canyon National Park, you NEED to add it to your itinerary when you are in the southern Utah area! Really, just add all of Southern Utah to your bucket list. The beauty of Bryce Canyon will blow you away! It is almost as if someone just picked up the park and placed it in the middle of where you wouldn’t expect it to be! The hoodoo formations are incredible to see in person and SO beautiful, let alone their vibrant burnt orange color (see image below)! Every single day of my Utah/Arizona adventure I said “wow, I think today is the best hike of the trip” because everything was so freaking amazing…this post hopefully sums up why I loved Bryce.

For full trip itinerary, see post linked here. The day prior to Bryce, three girlfriends and I had come from Zion National Park where we had hiked The Narrows. We then drove the very scenic route to Ruby’s Inn RV Park and Campground, – Bryce Canyon, UT, where we stayed in a cabin with bunk beds for the night (slept 4 comfortably).  We were in Cabin 5 which was an excellent location in the campground and it was only ~$75 which was low compared to the high hotel rates. I did book this cabin about six months in advance to ensure we secured a place to sleep! Upon waking, we took the free shuttle right across the street from the campground into Bryce Canyon for the day so we didn’t have to worry about parking in the actual park. Keep an eye out for mule deer and other wildlife while riding the shuttle! I highly recommend taking the shuttle all the way to Bryce Point because that is the highest point in elevation and as you hike along the rim, the elevation decreases. Make sure you check the weather before you go to Bryce Canyon–it is at 9,000+ feet elevation so temps can be lower than other parts of Utah!

Right from hopping off the shuttle at Bryce Point, we were speechless from the views. I had no idea what a hoodoo was prior to researching for this trip (in terms of the rock formation). We stopped to admire the views from the top every chance we got! We could have hiked Peek-A-Boo trail down into the hoodoos but that is a longer hike and we knew we would get a good taste of the hoodoos on the trail we’d hop on later so we opted to stay up top for a bit. We walked along the rim to visit Inspiration Point and admire the views down into the miles and miles of hoodoos! We continued walking to Sunset point where we hiked down the steep switchbacks to Wall Street where there is a little slot canyon that opens up to the hoodoos (for scale, see people walking through the slot canyon in the image below). Hiking down within the hoodoos was INSANE, it made me feel so tiny as they were towering overhead!! From the bottom of Wall Street, we then hopped on the Queens Garden Trail which is a loop. Of course, we had to stop halfway to eat our packed lunch of PB&Js on a fallen tree!

We hiked by the rock that literally looks like a side view of Queen Victoria (do you see the queen in the image below!!?) and went through archways caused by rock formations. Since it was early in the day, the trails weren’t overly crowded at all, which was perfect! We had it all to ourselves most times. In total, we put in about 6 miles at this park but could have put in less if we opted to take the shuttle to each viewpoint (but miss the beauty along the way) or more if we would have hiked the other trails. In all though, I feel the route we took gave us a full taste of the park so I left with no regrets.

If I went back to Bryce Canyon and had more time, I would hike Peek-a-Boo trail just because I am absolutely fascinated by the hoodoo formations and LOVE the color of them (especially at different times of day!). If you are planning a trip to Bryce, you can use this NPS guide of the trails.

We left Bryce Canyon around 1:30 pm to drive the 2.5 hours to Page, AZ to Lake Powell Wahweap RV & Camping Site to relax by the lake then pitch our tent ($30 for a tent site). That night, we ate dinner in Page, AZ, at State 48 Tavern- delicious jalapeño margaritas, FYI! We headed back to the campground to shower and head to sleep for an adventurous day ahead of Horseshoe Bend, Lower Antelope Canyon, and kayaking Lake Powell before driving to North Rim Grand Canyon!

Have you been to Bryce Canyon? Do you plan to go? Are you as fascinated by the hoodoos and the colors of them as I am? Tell me about it! Go explore friends!

Zion Nat’l Park: The Narrows Recap

Unbelievable views, graceful face-plants, & my ONE regret

Zion National Park was the location of choice for days one and two of a trip with my girlfriends to southern Utah and Northern Arizona and it did NOT disappoint! For our full detailed itinerary, see that blog post. **Full disclaimer: Keep in mind as you read this that we hiked Angels Landing the day before The Narrows and ran a half marathon the morning OF this hike in Hurricane, UT! We were hoping the cool temps of the Virgin River would help our muscles!

We arrived to Zion a little late this day because of the half marathon that morning so we pulled into Springdale around 11:30 and used our annual National Park pass to get into the park. We took a gamble on there being an open spot so we didn’t have to park outside of the entrance in Springdale. We had to drive around for about five minutes for a spot to open up which wasn’t bad at all. However, the shuttle line was super long this day because it was so late in the day so (TIP) we opted to walk on the Pa’rus Trail to the second shuttle stop! It was only a 1 mile hike on an easy, flat, paved trail. We loved it because we were able to get to the second shuttle stop and get right on the shuttle! We didn’t have to stand at the first stop and wait in line for an hour. So, if lines are long at the visitor center, I highly recommend this tip!

From stop two, we took the shuttle all the way to the last stop (#9), which is the Temple of Sinawava.  Prior to the hike, we had packed peanut butter and jelly sandwiches, beef jerky, and a few granola bars as well as 2L of water each. It was mid-September so it was hot (about 80° with full sun but the Narrows is shaded maybe have a long sleeve with you just in case! For attire, we had on shorts and a tank top and we each had hiking shoes on. I had Vibram Five Fingers shoes on, which were the hiking and trail version so a bit sturdier than their normal pairs. These were great for getting wet because they dry quickly.  I didn’t want to wear my normal hiking shoes for this hike because we were going to be hiking the next day and I didn’t want to risk the chance of them still being wet.  Many people hiking The Narrows did rent hiking shoes and poles from a place in town right outside of the Zion Park entrance. I know that is an option but we opted not to do this and were just fine.

Once we got off the shuttle at stop #9, it is a 1-mile hike along the river on a paved trail (called Riverside Walk) to the area where you actually enter the Virgin River. When you do get in the river at The Narrows, it does chill you right away! The water is pretty cold, even in September when we went and I know it is much colder at other times of the year  so be prepared and plan wisely! The temp isn’t the only thing that changes about the river, the depth of the river can change from any given day (or even point in the day!) so make sure you keep an eye on what the depth is so you know how high the water will be on you the highest point! For our hike, the highest it was on us was waist deep, but I know I know at some points of the year and some days it can get chest deep or higher! Beware the risk of flash flooding and hypothermia!

The hike through The Narrows is interesting because it is all IN the Virgin River! The total hike is about 8 miles round trip of fighting water currents, slipping on rocks, and trying to not wipe out! BUT it is also filled with inspiration, beauty, energy, and an adventure you can only experience if you do the hike yourself! You can spend a full day doing this hike because you’ll want to take your time. We only hiked about three-four hours total because we started late in the day and we had to drive to Bryce Canyon that night. I will explain a little bit further about how far we got into the hike.

Back to the actual experience…as I said, RIGHT when you step into the water it definitely takes your breath away! The first half mile only reached mid-calf on us. The water current makes it difficult, as does the incredibly slippery rocks you walk on. Honestly, it’s almost like you were just walking on a ton of marbles and bowling balls! At any given time there could be a rock in the water that juts out higher than the rest so just be prepared to test your balance and go slow!

As you’re walking through the river, make sure that you’re taking time to slow down and stop to take it all in!  For the majority of the time you’re actually looking straight down at your toes making sure that you’re not going to wipe out in the water so I just recommend that every so many steps, stop and look up and all around you!

The first point to mention (about a half mile in the river), which is a good turn-around point if you have kids along or if you are just aren’t looking to do the full hike is Mystery Falls. Water rolls down the rock, creating a beautiful view. Depending on time of day and where the sun is, it can create a rainbow as the light reflects it, so stop and enjoy this part. You might see people rappelling down the rock here too which is fun to see! From here, you are going back-and-forth across the river to different dry beds as you do this hike. I would say it is about 50 steps on one side, cross the river of strong currents and slippery rocks, then about 50 steps on the other side.

Right after Mystery Falls is where the river got to waist deep on us. At a point it was about knee deep is where one of my friends very gracefully fell and face planted in the river on to another rock!! This led to a really good laugh for us and those around us. It was like she fell in slow motion slow motion and I think what got most wet on her was her face which I don’t know how she managed that!! (Jody, THANK you for that laugh, I wish I had photo evidence!!)

From here, three of us decided to continue on while one waited back. We went about another half mile, around through the Narrows and we stopped on a giant tree that had fallen. It was on this dead tree truck that we sat and ate our PB&J‘s! It was an awesome picnic we had right there in The Narrows! I believe this point was right at The Narrows Alcove, we decided to turn back here because we had already been in this hike for almost 2 hours because we had taken our time and we had a lengthy drive to Bryce Canyon yet that night so wanted to get on the road before it got dark. Looking back at it now though, turning around here is definitely my biggest regret!! As I look at reviews and maps of The Narrows I realize that we should have continued to at least get to Wall Street, where the canyon narrows even further. Knowing this now thought, I WILL make it back to Zion some day and I will do the Narrows all the way through to Wall Street (or beyond!). The hike back down the river was much easier than it was the way up because we weren’t fighting the current as much. We made it back to the shuttle to lock in the memories of the hike as we made it back to our car.

I would be remiss if I did not mention our drive from Zion to Bryce Canyon National Park in this post! This is a very scenic drive it takes about an hour and a half to two hours depending on what the traffic is like. You drive through Zion and come out the other side (a few thousand feet higher in elevation!). The views are outstanding. You then go through a mile long tunnel that was blown out in order to really cut down the drive from Zion to Bryce!

As you come up on Bryce, you go through these beautiful arches and you see a wide variety of landscapes on this drive. We headed straight to Ruby’s RV and Campground for the night where we had a cabin rented. We ended the night with a fire outside our cabin, roasting marshmallows dipped in Bailey’s (it caramelizes the Bailey’s when you roast over the fire—highly recommend!). Our trip to Zion, hiking Angels Landing and The Narrows was a huge success and now we were ready to take on Bryce Canyon the next day!